Laudna (pronounced /ˈlɔːdnə/) is a human Hollow One sorcerer/warlock and a member of Bells Hells. Laudna is played by Marisha Ray.
Description[]
Appearance[]

Official art of Laudna, by Hannah Friederichs.[art 3]
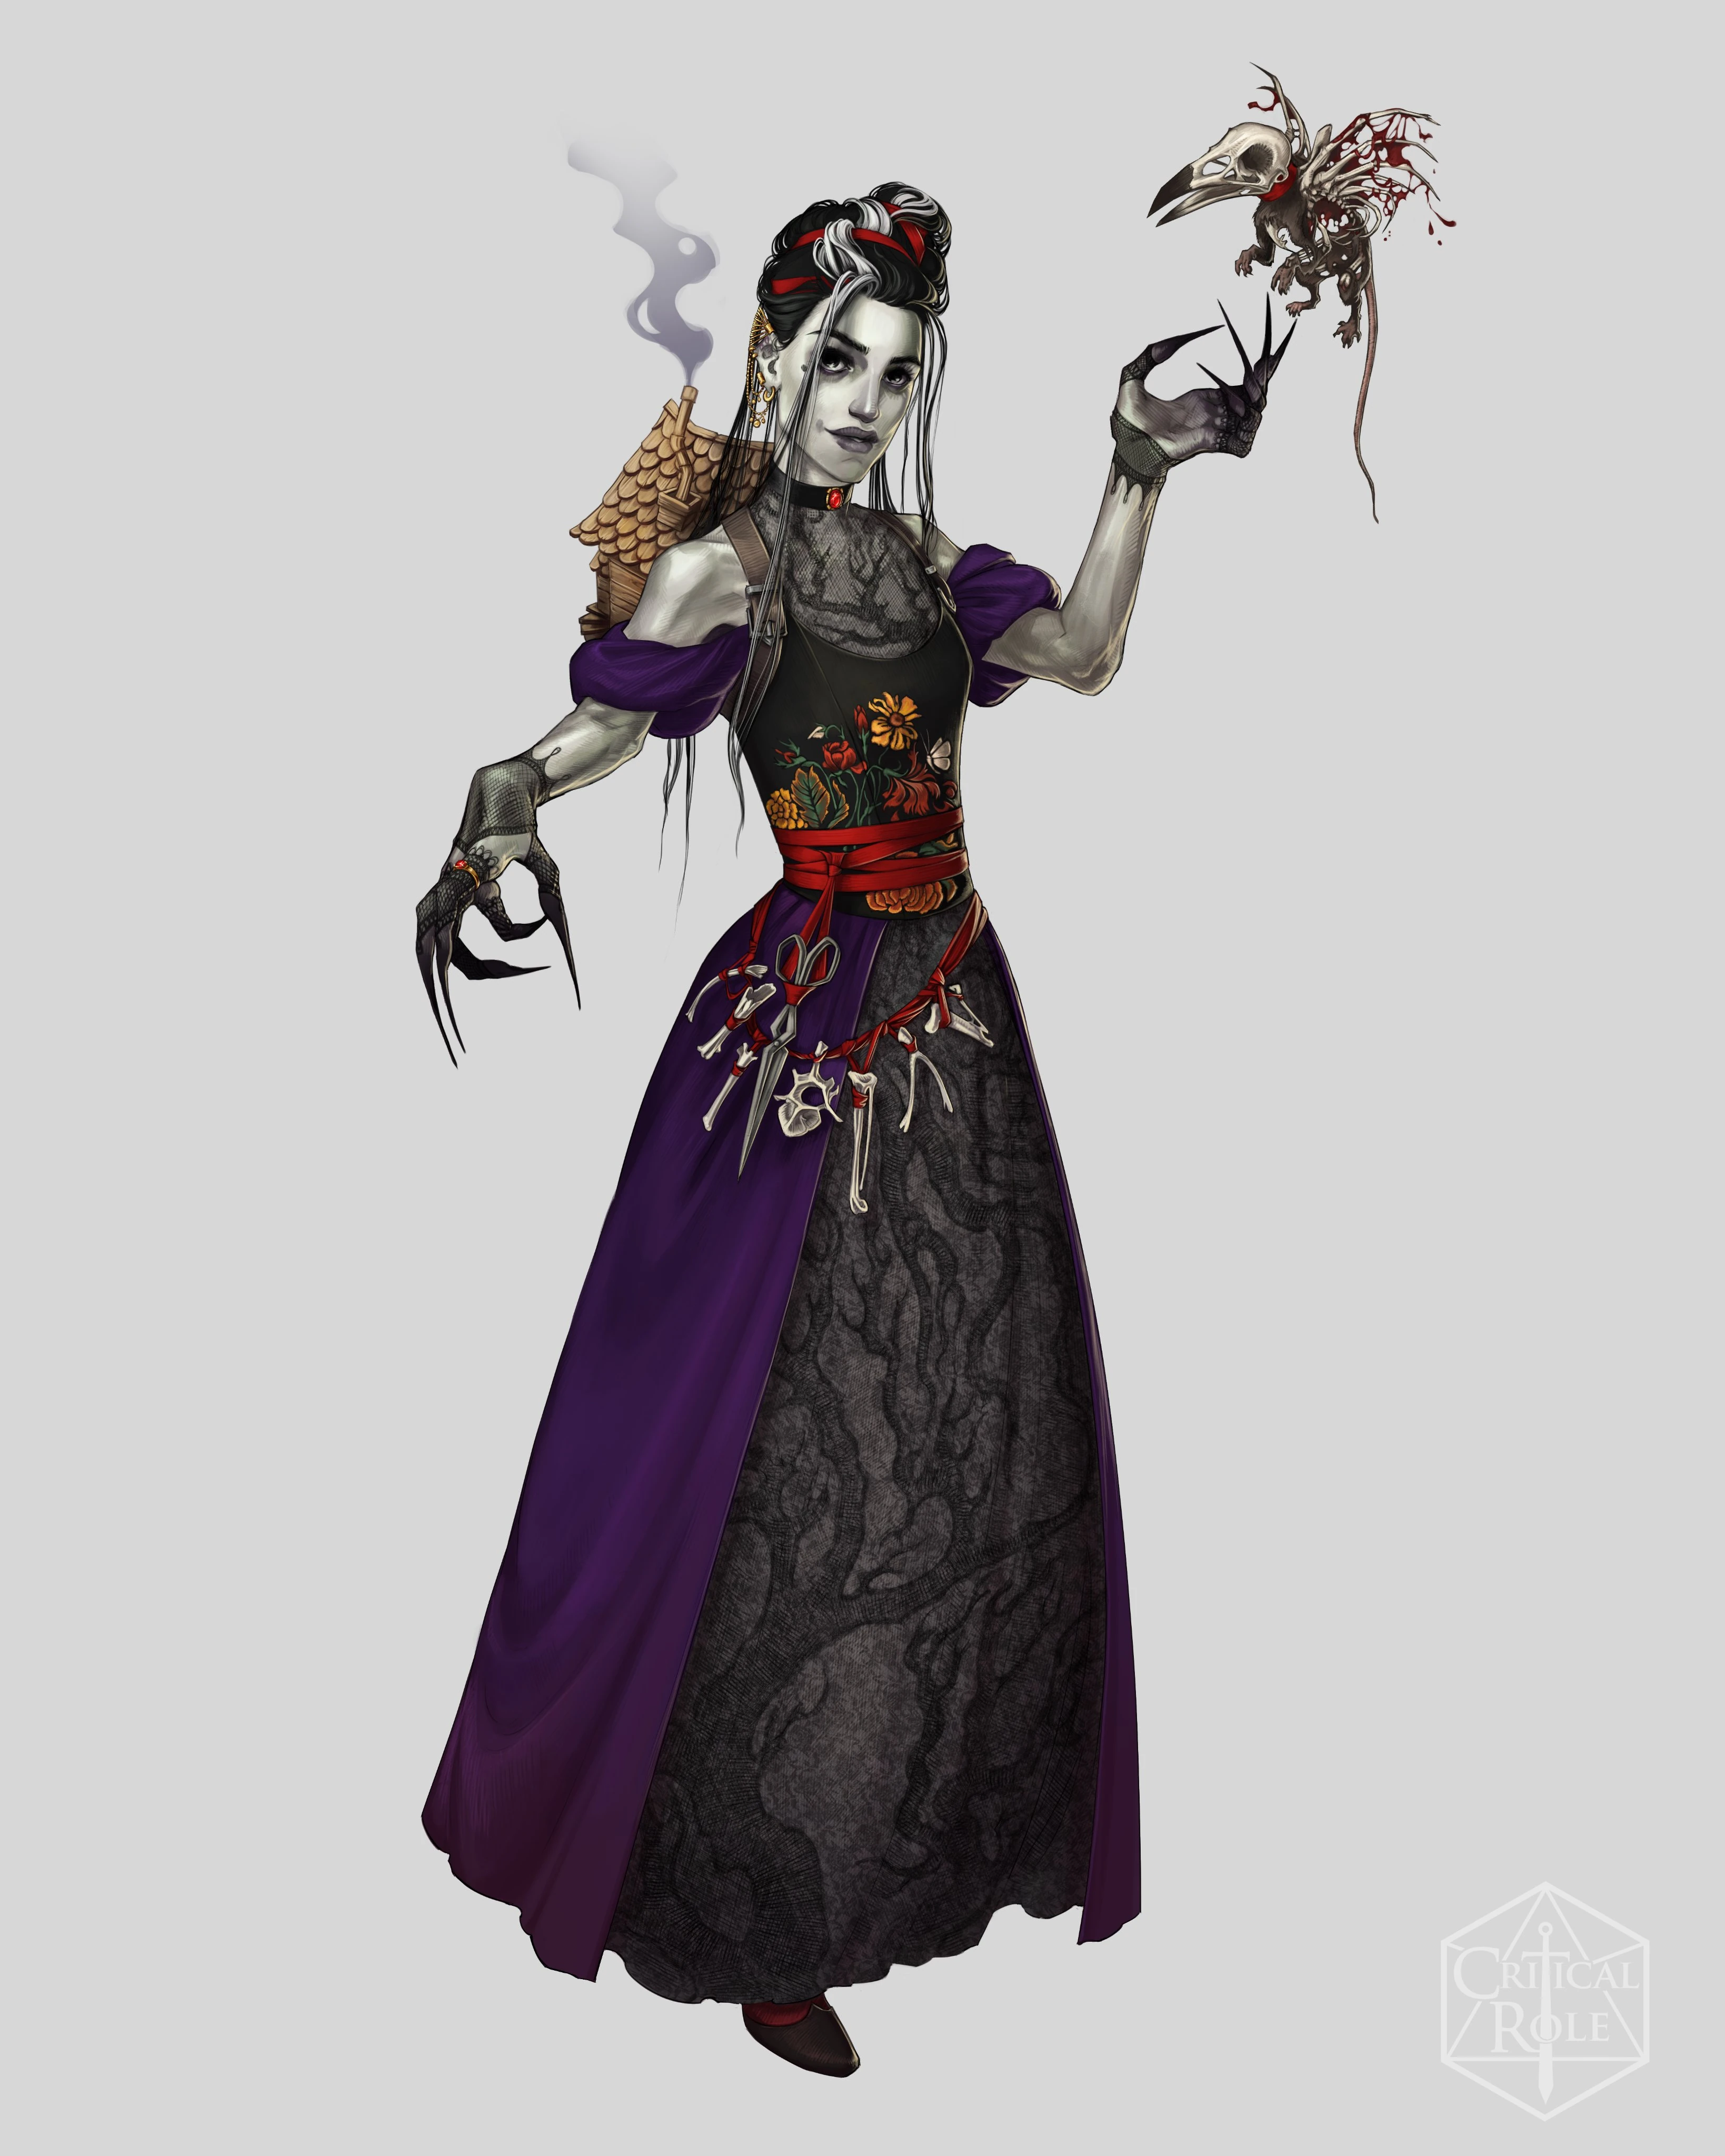

Official art of Laudna, 2023 update, by Hannah Friederichs.[art 4]
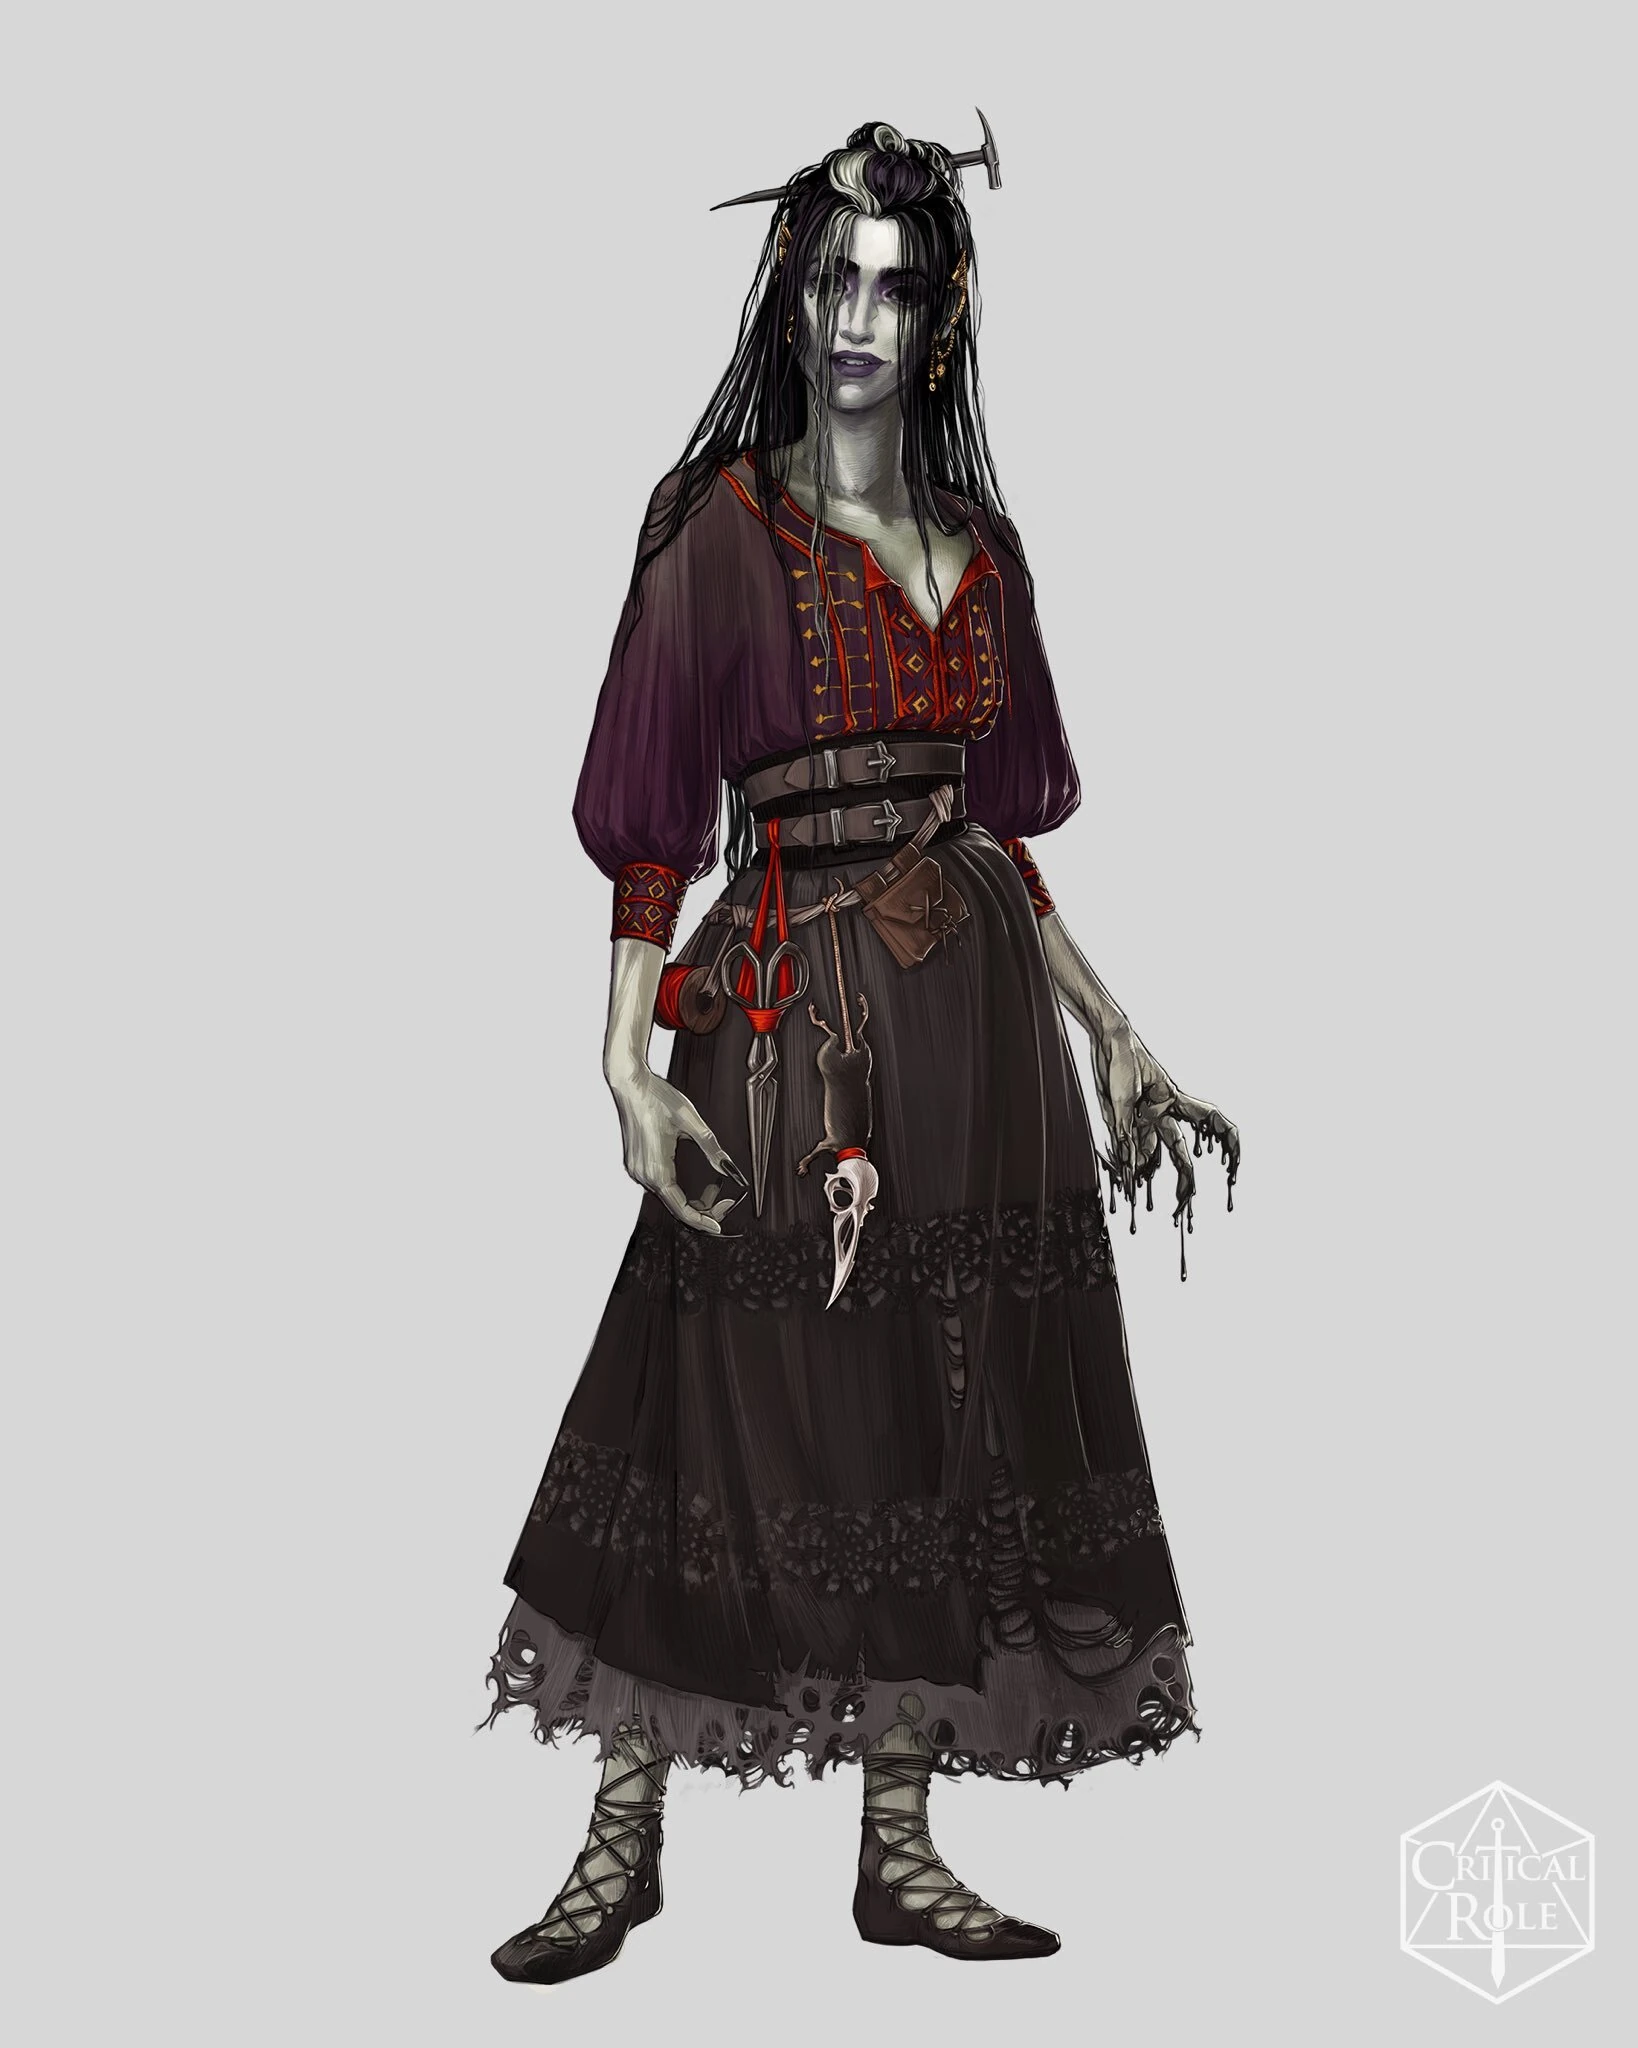
When she first appears, Laudna is fairly young, pale, and gaunt. Her big eyes have dilated pupils, and her lips are dark. Marisha further describes Laudna's features as "almost doll-like."[25] She has long, thin, dark hair with a shock of white through her bangs, pulled up in a half-up bun with a rock chisel (depicted as a rock pick in official art). She used tattered clothes, including a dark red blouse and a black skirt, although after some time traveling with Bells Hells she decided to update her outfit with a more elegant dress, more lady-like, and also a new hairstyle. She wears pointy gold cuffs on her ears to hide their edges, which were once shorn to points like an elf's.[26] Her belt holds various tools, miscellaneous animal remains (which used to include Pâté de Rolo before he became her familiar), and other odds and ends.[27][28]
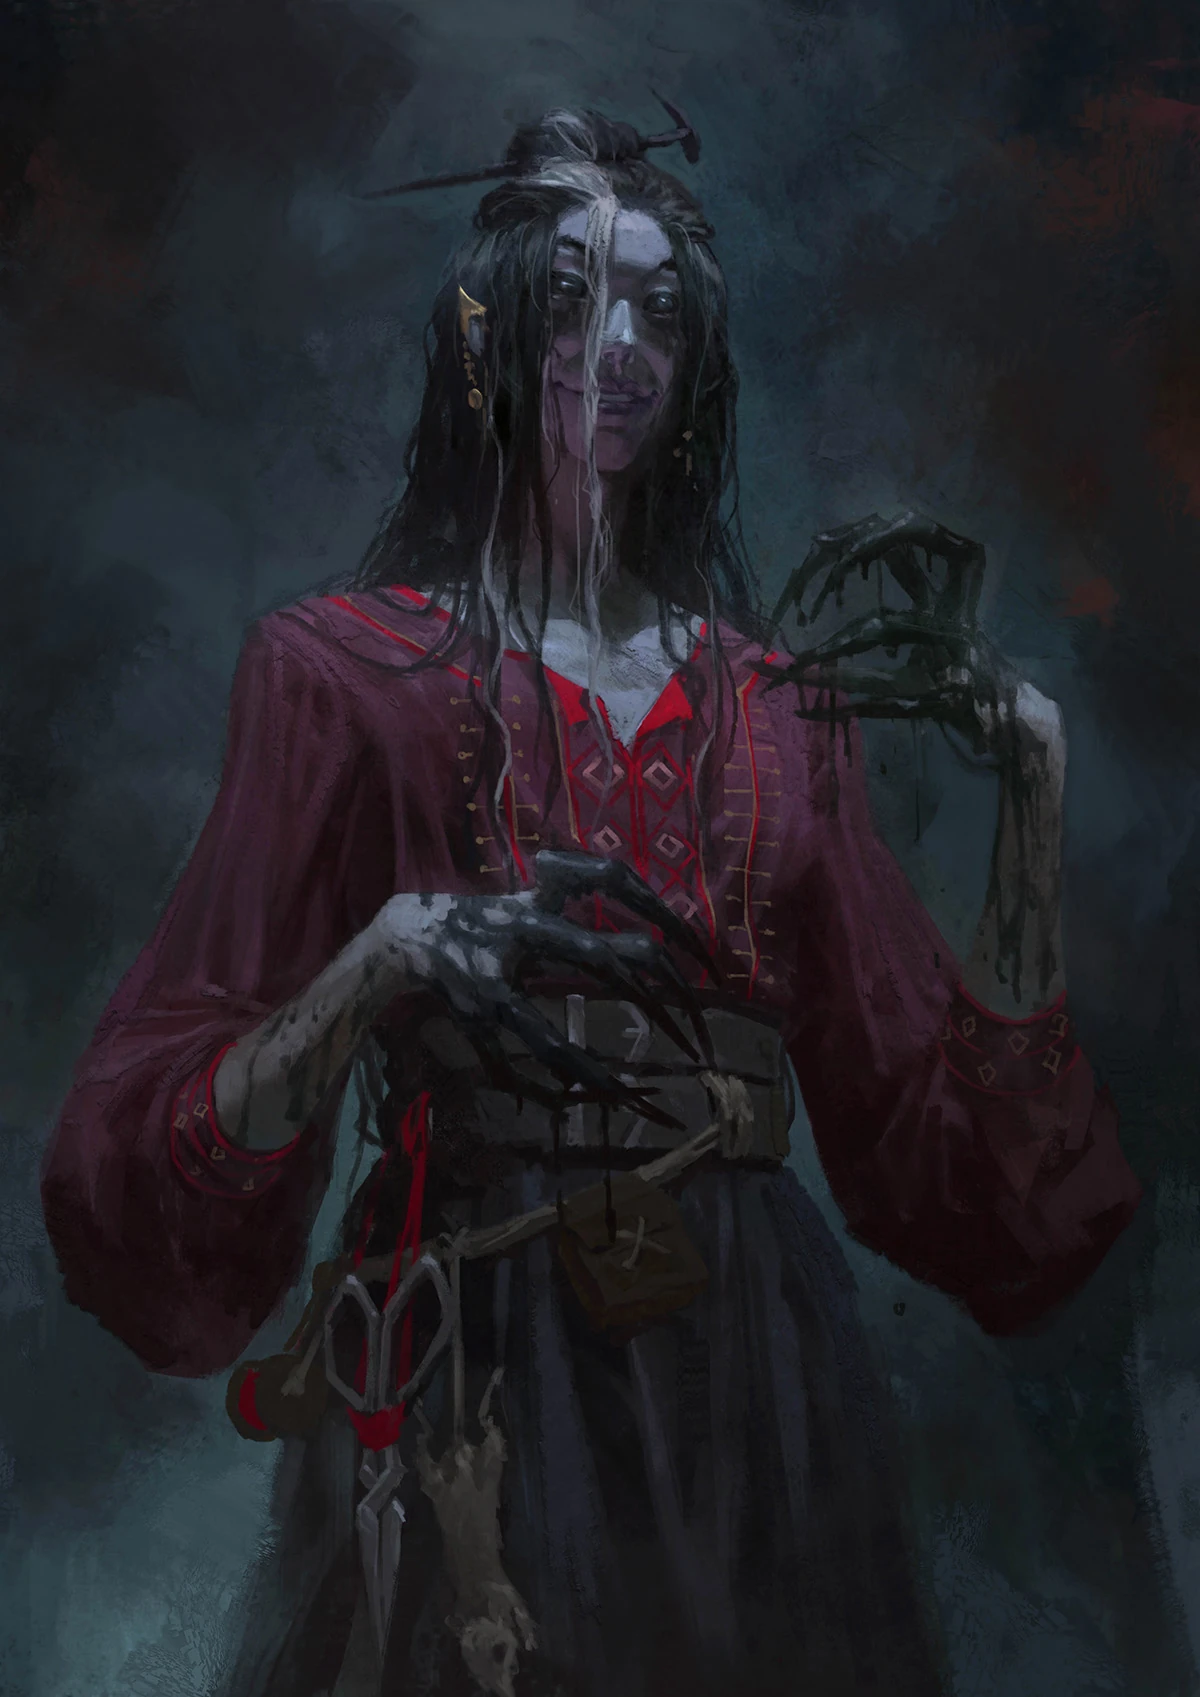
Originally, when Laudna used her Form of Dread, her extremities elongated and a black veil came across her face, hiding a stream of black tears pouring from her eyes. After her death and subsequent resurrection, the form altered to embody aspects of the Sun Tree.[29] But when Laudna cast Hunger of the Shadow on Bor'Dor Dog'Son after learning he had betrayed the party, she heard a slow heartbeat start up in the back of her mind, and the faint shimmer of a mourning veil folded over the top of her Form of Dread as Bor'Dor's life essence was sucked into her mouth.[30] Although for some time she managed to keep her Form of Dread tree-themed, whenever she channeled Delilah's essence the veil appeared again. While exploring Whitestone Castle, the image became more definitively that of Delilah, with wider shoulders and wearing her choker, in an overlapping secondary shadow of Laudna.[31]
Her eyes glow green at times, notably when she uses Eyes of the Runekeeper[32] or Cling to Life.[33]
Personality[]
In stark contrast to her ghoulish appearance, Laudna is rather bubbly, personable, and easy-going, although her emotions can fluctuate wildly. Marisha Ray described her as "just a little joyful undead kind of manic pixie dream girl."[34] She seems largely unaware of how frightening she appears (especially when she uses her Form of Dread power) and becomes offended when someone judges her based on appearances alone;[35] although after some time she started enjoying people's reactions whenever she noticed they were scared of her. She is both gullible and innately hopeful.[36]
Fan art of Laudna, by Nathaniel Himawan (ninesicks).[art 5]
When asked by Orym how she is the "happiest person" in Bells Hells, she commented that "the worst thing that's ever happened to [her] has already happened," alluding to her death. She prefers not to dwell on the past, beseeching others to do so in kind, that there is "no point in being sad over what can't be changed".[37]
Despite her basic happiness, she has deep insecurities, paranoia, and worries, particularly about those she cares deeply for.[38] She fears rejection and betrayal, probably stemming from earliest childhood when her peers regarded her as a "freak".[39] After her death on the Sun Tree, she was rejected by all of society, and responded by creating dolls to be her friends, which she continued to play with even after joining Bells Hells. The first real person to accept her as she now is was Imogen, and she was devastated when Imogen seemed to reject her as well after Delilah forced Laudna to break the gnarlrock.[40] Due to her isolation and arrested development, she isn't equipped to deal with big emotional moments, even if social interaction have improved her skills to a degree.[41] She reacts most strongly to betrayal. During the combat with Fresh Cut Grass when he went berserk and attacked the party, Laudna was traumatized, having interpreted a message from Delilah as, "Your friends are going to betray you." She cast Hunger of the Shadow for the first time on FCG and heard Delilah's voice saying, "You see, at the end of all things, only yourself can be relied on, when all love is taken."[42] When Bor'Dor Dog'Son betrayed the party, Laudna used Hunger of the Shadow again to kill him even though she knew it had the potential to bring Delilah Briarwood's influence back.[43]
Biography[]
Background[]
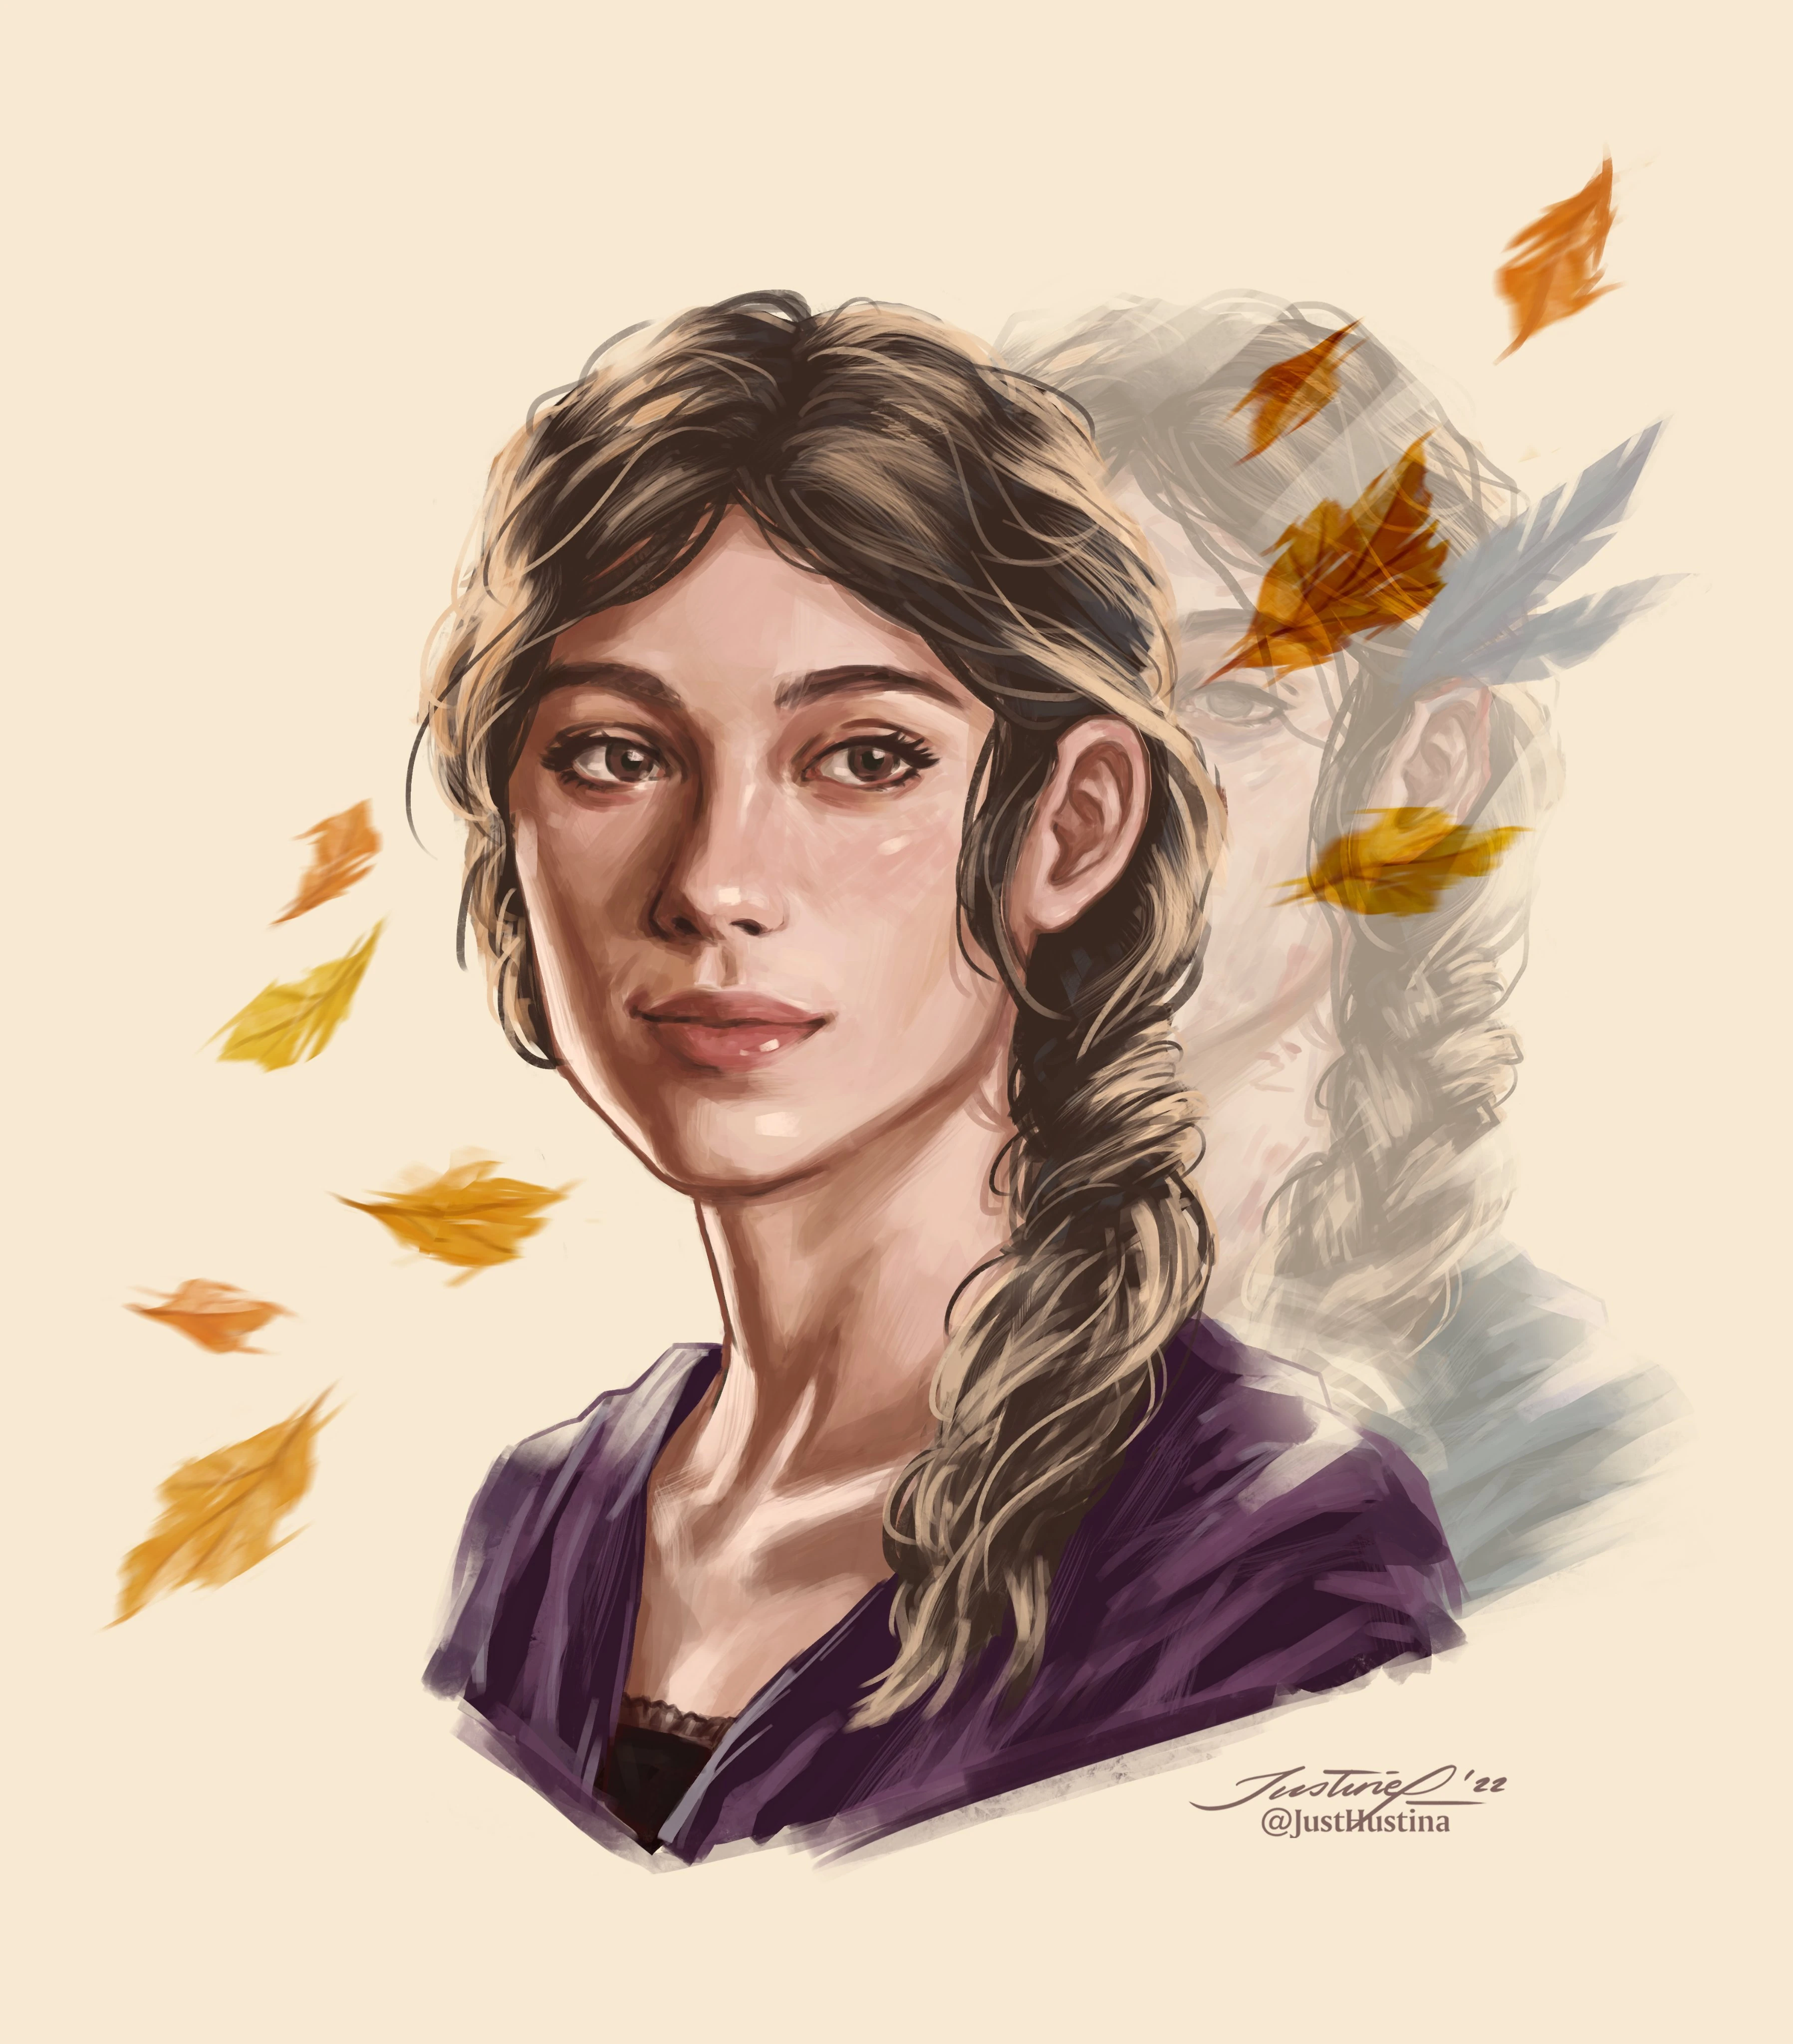

Fan art of Laudna in her youth, by @JustHustina.[art 6]
Laudna (then named Matilda Bradbury)[44] grew up on a farm on the outskirts of Whitestone in Tal'Dorei, and always had innate magical capabilities.[45][46][47] She was something of a late bloomer when she was a child.[48] Even as a young girl, she was thought of as the freak of the town. She would occasionally seek refuge in and explore the tunnels beneath Whitestone Castle.[49] She once had a crush on a young boy named Andy, but he threw dirt in her face.[50]
The Briarwoods took over the city when Laudna was a young woman. Shortly before the Whitestone Rebellion in 810 PD, she and her parents were invited to dine with the Briarwoods and told they were going to serve a greater purpose. In addition to the promise of festivities, she hoped that the magical Briarwoods would take interest in developing her natural sorceress magic and becoming a powerful mage, a pursuit her parents supported.[51][52] After the dinner, she was killed. Her ears were docked into points like those of a half-elf and she was strung up on the Sun Tree in effigy of Vex'ahlia.[53]
Laudna woke up hanging from the tree when a burst of necromantic magic hit her and mingled with her natural magic.[54][55] She left the city and never returned, and believes she is a cross between dead and alive.[56] Although the Briarwoods are dead, Laudna began to hear the voice of Delilah Briarwood in her head around a year after Delilah died.[57] Laudna hears Delilah "every now and then."[58][59]
Having been killed before Vox Machina's arrival in the city and left during the rebellion, Laudna was unaware that Percival and Cassandra de Rolo had returned to power in Whitestone, saying that she became "a bit of a recluse" after her time in Whitestone. She didn't talk to people much, and they didn't want to talk to her.[60] She spent the next thirty years going from town to town, living in fixed-up abandoned shacks in the woods until chased out by townsfolk denouncing her as an undead witch.[61] It was during this time that she "kind of forgot who she was, being alone for so long", and while singing to herself, gradually changed her name to "Laudna".[62][63] During this period, she did have one friend, a young girl who wasn't afraid of her.[64]
About two years before the beginning of Campaign Three,[65] Laudna met Imogen Temult in Gelvaan, with whom she became best friends.[66] They left the town together when the inhabitants tried to violently remove Laudna from it, and Imogen saved her in an impressive, but also violent way.[67] Laudna and Imogen roomed together in Jrusar with their landlady, Zhudanna,[68] before meeting and joining up with Bells Hells.
Campaign Three: Bells Hells[]
Arc 1: Jrusar[]
Laudna and Imogen were in Jrusar attempting to gain access for Imogen to the Starpoint Conservatory when they encountered and joined the group later named Bells Hells. After Laudna shared her history, she was visited by the voice of Delilah Briarwood warning her that "some things are meant to be kept secret".[69]
When Laudna became aware of Imogen's recurring nightmares of a red storm, she was worried and supportive. Imogen eventually told her about her growing connection with the purple shard she found in the lair of the Shade Mother. Later, Laudna again asked Imogen about the shard, and Imogen told her she still had the gnarlrock and it made her feel safe. Laudna felt uneasy about this, as it reminded her of her own acquisition of power from an unsettling source, and she admitted to Imogen that Delilah spoke to her while they were in the Heartmoor. The stone's presence continued to disturb her and she eventually asked to hold it, promising not to do anything with it. As she touched it, she felt a growing pulse and the stone growing warmer as her vision faded. Delilah's voice in her mind said, "Child, this is far too dangerous in your hands. I'll handle this." The heat strengthened till the stone was searing, the warmth traveling up her arms. Laudna demanded to know what the stone was, but Delilah shushed her, saying, "I've taken care of it for you." As the warmth hit Laudna's chest, the cold pulsing became a warm heartbeat. Her fingers opened. The gem was cold and broken.[70]
Imogen was at first speechless, then whispered, "You lied!" Laudna tried to explain, and promised to fix it, but Imogen just wanted to go to bed. Laudna screamed into the night, "What did you do?!" and felt the dull heartbeat and the warmth receding. Delilah's voice said, "Don't worry, I've taken care of it. And thank you."[71]
Arc 2: Ruidus Rising[]
Following this, the relationship between Laudna and Imogen was clearly strained. Laudna seemed the more upset of the two, sharing with other members of the party what had happened and asking for advice on how to handle it. She told FCG that she just wanted Imogen to have a life and a youth, and to protect her from something that might hurt her. She was very upset by the situation. FCG volunteered to help facilitate a conversation between the two when they were both ready.[72] Ashton Greymoore also asked Laudna about the tension between her and Imogen, and Laudna tearfully told him she did something terrible: she killed Imogen's rock. Ashton suggested maybe they should find her a nice rock to give to Imogen as a replacement and an apology.[73] When the party split while in Bassuras and Laudna was in a separate group than Imogen, she threatened to kill Chetney and Ashton if they allowed anything to happen to her.[74] Orym later asked her about this intense reaction to being separated from Imogen and Laudna confessed that this was their first really big fight. She was very upset and getting conflicting advice.[75] Soon after the party met Dusk, Dusk asked Imogen if she and Laudna were "a thing". Imogen replied, "No."[76]
Imogen finally wrote Laudna a note saying, "Can we talk?". As Laudna left to join Imogen, Dusk interrupted to ask her out to dinner, but Laudna nervously put her off. Imogen was waiting for her and they both apologized, saying they didn't want to fight anymore. Imogen gave Laudna a ruby ring and Laudna shared with her that Dusk asked her out and she was confused. Imogen told her about her latest dream and the Ruidus flare, and Imogen suggested she hold onto Laudna while sleeping to see if Laudna could join her in the next dream.[77]
During the Deathwish Run, Laudna rode shotgun while Chetney drove a crawler he named the "Buck Fucket", with Fresh Cut Grass serving as the front wheel. When the kagaronk attacked, Laudna took over driving. She was knocked unconscious during the battle, but Dusk leaped into their crawler and used Lay on Hands to barely bring her back to consciousness. Laudna then drove to victory in the Run. In the aftermath, Imogen telepathically told her that Otohan Thull was the woman in Imogen's dreams, and Laudna told Dusk that she wasn't ready for an emotional relationship.[78]
When the party left Bassuras and was attacked by the Fist of the Ruiner gang, Laudna cast Darkness on the gang's crawler resulting in its destruction when it drove off a cliff.[79] When they reached Oleander Calloway and Ira Wendagoth at the Veilscatter Scope, Laudna volunteered to look through it before the Weave Lens was installed. She saw one of Marquet's leylines and its intersection with three others drifting into a nexus above a dark jungle. When Ira shifted the scope to aim at Ruidus, Laudna tried to look at the moon but her vision and attention blurred into almost drowsiness and she was unable to focus on it.[80] After Ashton shattered the Weave Lens, Laudna Mended it but was unsure if it retained its enchantment.
Laudna named the doll Chetney gifted to Fearne "Caviar" and they introduced it to Pâté de Rolo. The two hit it off immediately and arranged for a threesome with Sashimi. Laudna set up the dollhouse, shoved all three dolls within, and hung a scrap of fabric over the door. The next morning, when she found the gnarlrock shard Fearne had surreptitiously placed there, her thought was that the dolls' love had manifested it. As she reached for it, she mentally heard Delilah Briarwood's approving voice saying, "You wander dangerous paths. Be warned, child. Not everyone's looking out for your wellbeing like I am. I'll keep you safe." Laudna went outside and demanded more information, and Delilah told her she was watching from her "distant, forgotten perch" as Laudna wandered around dangerous magics. Laudna knew the impact they could have on her and Delilah was just trying to keep her safe. "For if you die, I go, too." Laudna asked about Ruidus and Delilah admitted she'd researched the power of the celestial solstices. She encouraged Laudna to get as involved as she'd like.[81]
During the combat with Fresh Cut Grass when he went berserk and attacked the party, Laudna was traumatized, having interpreted Delilah's message as, "Your friends are going to betray you." She cast Hunger of the Shadow on FCG, severely wounding the robot but for a moment feeling warmth and life in her heart. She heard Delilah's voice again, "You see, at the end of all things, only yourself can be relied on, when all love is taken." FCG viciously taunted her, saying, "You were never alive."[82]
Afterwards, an obviously shaken Laudna Mended the dents she had caused in FCG's head. Imogen told Laudna she knew that Delilah was talking to her earlier. Laudna admitted to Imogen that Delilah wanted the gnarlrock and that Delilah had told her that the party would all betray her. Imogen reassured her that Delilah was evil and that Laudna was indeed alive and had a life. She promised they would get through this and get Delilah out of Laudna's head.[83]
On the party's return to Bassuras and Paragon's Call's Seat of Disdain, Laudna decided to retrieve Armand Treshi's tracking ring from a nearby pawnshop. Ashton joined her traveling through a raging sandstorm, along the way telling her he thinks she's hiding a bunch of bad shit. She responded that he knew about as much as she did. Her past trauma is still with her. Laudna suggested that they could give Imogen and FCG the life she and Ashton never had. Ashton told her he worried about her, and suggested she communicate with everyone more. Her bullshit is adorable, but not all the time.[84]
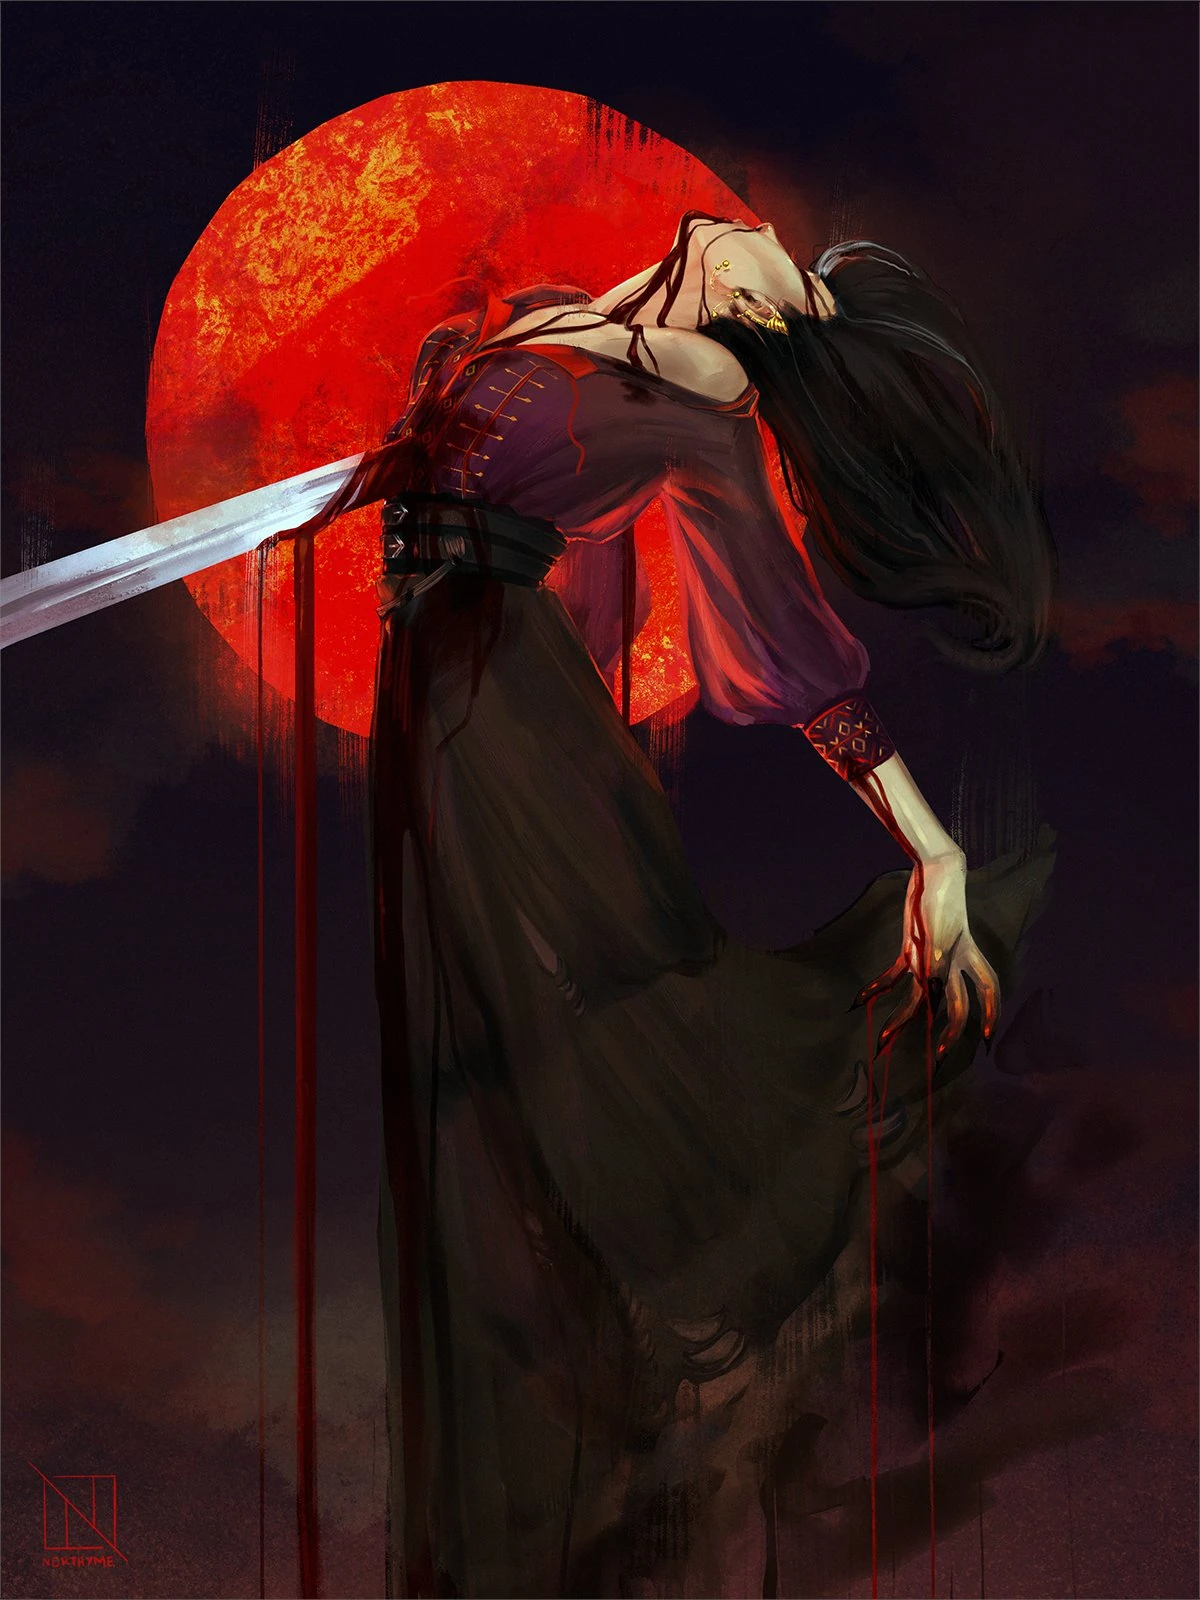

Fan art of Laudna being stabbed by Otohan, by Northyme.[art 7]
During the attack on the Seat of Disdain, Laudna encountered Otohan Thull on a balcony overlooking the battle, and rather clumsily planted the tracking ring on her. During the ensuing battle, Laudna used Wither and Bloom to heal others from unconsciousness, but was herself attacked and knocked out before being healed back. She attempted to interest Otohan in the location of the Moontide Crown. Otohan attacked her again, stabbing her repeatedly. Holding Laudna's unconscious body aloft on her sword, Otohan asked Imogen, "Is she your favorite?" Desperately, Imogen finally succumbed to her power, creating a psychic blast which caught Laudna in its wake and brought back memories:

Fan art of the Gentle Repose, by Lap Pun Cheung.[art 8]
Almost immediately thereafter, Laudna passed from unconsciousness into death. FCG was able to Revivify Fearne, and the party frantically tried to decide between spending the last remaining spell slot on the lifeless Orym, or Laudna. Eventually Fearne flipped a coin, and brought Orym back to life. The heartbroken party carried Laudna's body with them back to Jrusar (under the effects of Gentle Repose). During the journey, Imogen Sent to The Voice of the Tempest and told her they'd found the assassins and a lead, but one of them with "strong ties to Whitestone" was down. Keyleth responded that she was currently on business in Vasselheim but could meet shortly.[86]
When they reached the city, Lord Eshteross had been unable to locate any help for them to bring Laudna back. Privately, Imogen tried Sending to Delilah Briarwood, asking again how to bring Laudna back, and Delilah responded faintly: "Whatever it takes. It won't be long now. I'm fading. And I'll take her with me."[87] Imogen then Sent again to Keyleth, who immediately used Transport Via Plants to arrive via tree. Keyleth looked at Laudna's body and grew quiet, after a moment saying, "We need to speak with someone. Someone who can help you." She re-opened the rift in the tree and they all rushed through to Whitestone.[88]
Keyleth introduced them to Lord Percival de Rolo before leaving, and he in turn introduced them to his wife Vex'ahlia and to Pike Trickfoot, a cleric able to bring Laudna back to life. When they realized Laudna was Vex'ahlia's effigy on the Sun Tree long ago, Vex became committed to helping her, but when Pike performed the ritual she learned that there were two souls bound to Laudna's body, one of them Delilah Briarwood's. At that point, Percy refused to aid further, but Pike and Vex took everyone to Pike's home where Pike used Astral Projection to send Bells Hells into the shadowy realm where the two spirits currently were.[89]
There, they encountered vignettes from Laudna's memories: a ramshackle cabin with angry villagers approaching to burn the witch out (where Pâté de Rolo was originally created);[90] the young Laudna's (then apparently named "Matilda") interaction with her childhood crush Andy;[91] a very young Matilda playing with rough, homemade dolls in a barn;[92] and Laudna/Matilda with her parents getting dressed to attend the dinner with the Briarwoods.[93] Eventually the party encountered the shadow-Delilah at the corrupted simulacrum of the Sun Tree, within which she was holding Laudna's spirit captive. They battled and freed Laudna's soul by destroying the tree, sending Delilah into a burst of white and themselves back to the Material Plane.[94]
Back in Whitestone, Pike confirmed that the connection between Delilah Briarwood and Laudna, while not gone, was heavily diminished, and began the Raise Dead ritual. Orym told Laudna she deserved to be more than a footnote in Delilah's story and used Druidcraft to create red poppies in her hair. Fresh Cut Grass tried to cast a spell to compel her to return, but failed. Imogen told Laudna that her presence saved Imogen's life, and that she would be there to fill whatever hole Delilah's absence created for her. The choice to come back was Laudna's; no one gets to control her anymore. After an intense pause, Laudna's eyes opened. She was apparently completely physically unchanged, but very shaky, confused, and fearful. Vex'ahlia was aiming her bow Fenthras at her heart until Pike confirmed that it truly was just Laudna, without Lady Briarwood. Laudna, however, was terrified to learn that they were in Whitestone. When they left the cottage, several dozen more riflemen and Pale Guard, including Lord Percival, confronted them but stood down at Vex'ahlia's reassurance.[95]
Laudna was drawn toward the Sun Tree. When she touched it, she assumed her Form of Dread, now changed to embody the Sun Tree. Laudna shared that while in the shadow plane, one of the memories she relived was of creating Pâté. Thinking that Pâté may as well have been reworked into a more positive form, she tosses the doll into the air, and it transforms into a living creature with skeletal wings that greets them in a raucous Cockney accent. Laudna wasn't comfortable sleeping in the castle, and asked that they all camp out under the Sun Tree, where she gifted Imogen her Bloodwell Vial.[96]
The next day Bells Hells returned to Jrusar with the help of Manaia Turei, and went visit Lord Ariks Eshteross, who hadn't been answering Imogen's messages. After Chetney and Laudna (through Pâté's eyes) explored the orcish noble's manor, they discovered that their ally had been killed in their absence. While Bells Hells were waiting to meet with Orlana Seshadri Laudna wondered if she still had her warlock powers, and successfully cast Eldritch Blast (with consent, and a deliberately weaker version anyway) against Ashton; she also helped Chetney when he opened Seshadri's letter, casting Mending on the seal after closing it again. When they spoke to Mistress Seshadri in Eshteross' manor later that day they also met with Grave Mystic Weva Vudol, a worshiper of the Duskmaven who immediately took an interest in Laudna, noticing her half-undead nature and warmly (and creepily) welcoming her back to the land of the living. While they were there Laudna sent Pâté to Lord Eshteross' kitchen to retrieve his spices, as a token.[97]

Fan art of Laudna and Manad, by Danika Kersten.[art 9]
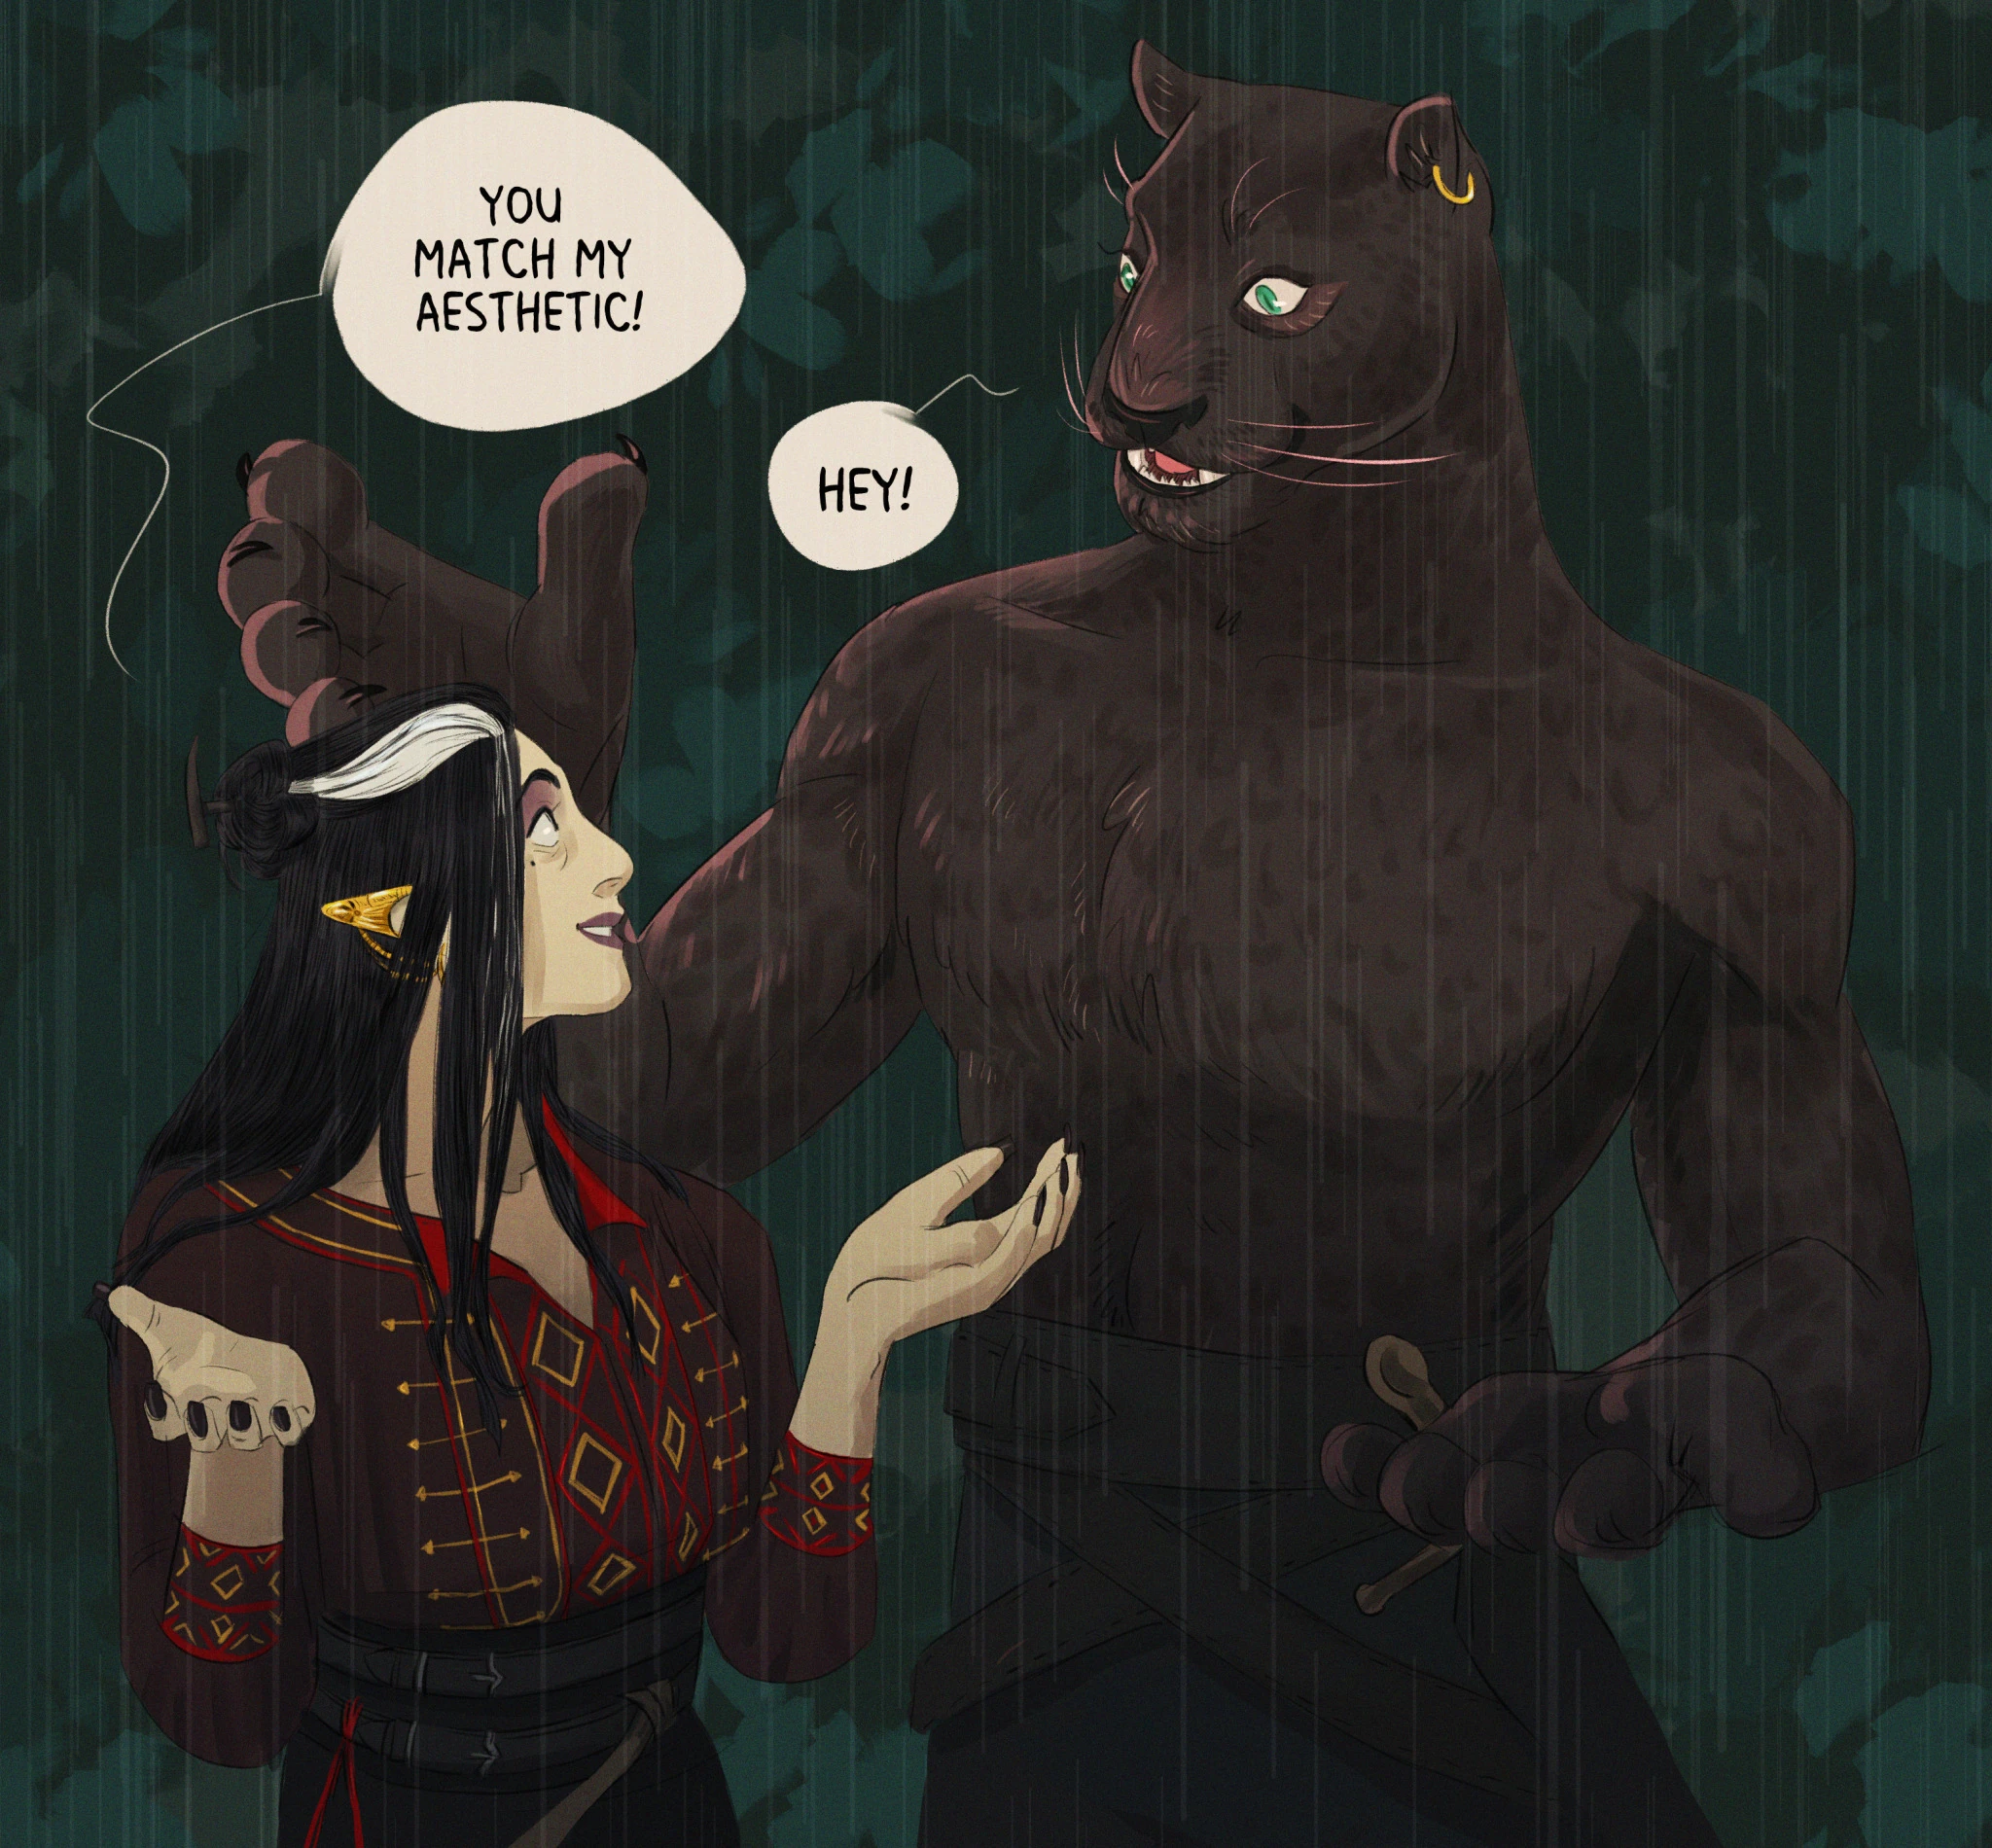
In the next few days, between the preparations and the beginning of the group's journey to Yios in the Silver Sun, Laudna slowly recovered from her weakened state after being resurrected. During the journey she tried Eshteross' cookie recipe, baking them successfully.[98] When their skyship was attacked by several cockatrices and a chimera, Laudna used her new tree-like Form of Dread. Later on, when the group descended to the Gloomed Jungles to meet with the Gorgynei (that could help Chetney with his werewolf transformations) Laudna bonded very quickly with Manad, a werepanther, who allowed her to ride him using her Form of Dread while they were traveling to the settlement of the Lycanthropes.[99] Two days later, when Chetney went through Sahyaadon's trial, Laudna and Bells Hells had to battle a bigger and more terrifying incarnation of the gnome's wolf form, while he tried to regain control. Laudna helped with her Silvery Barbs and by using her Darkness to block the beam of moonlight that was reaching the chamber where Chetney and his friends were.[100]

Fan art of Fearne teaching Laudna Fireball, by Melissa Hahn.[art 10]
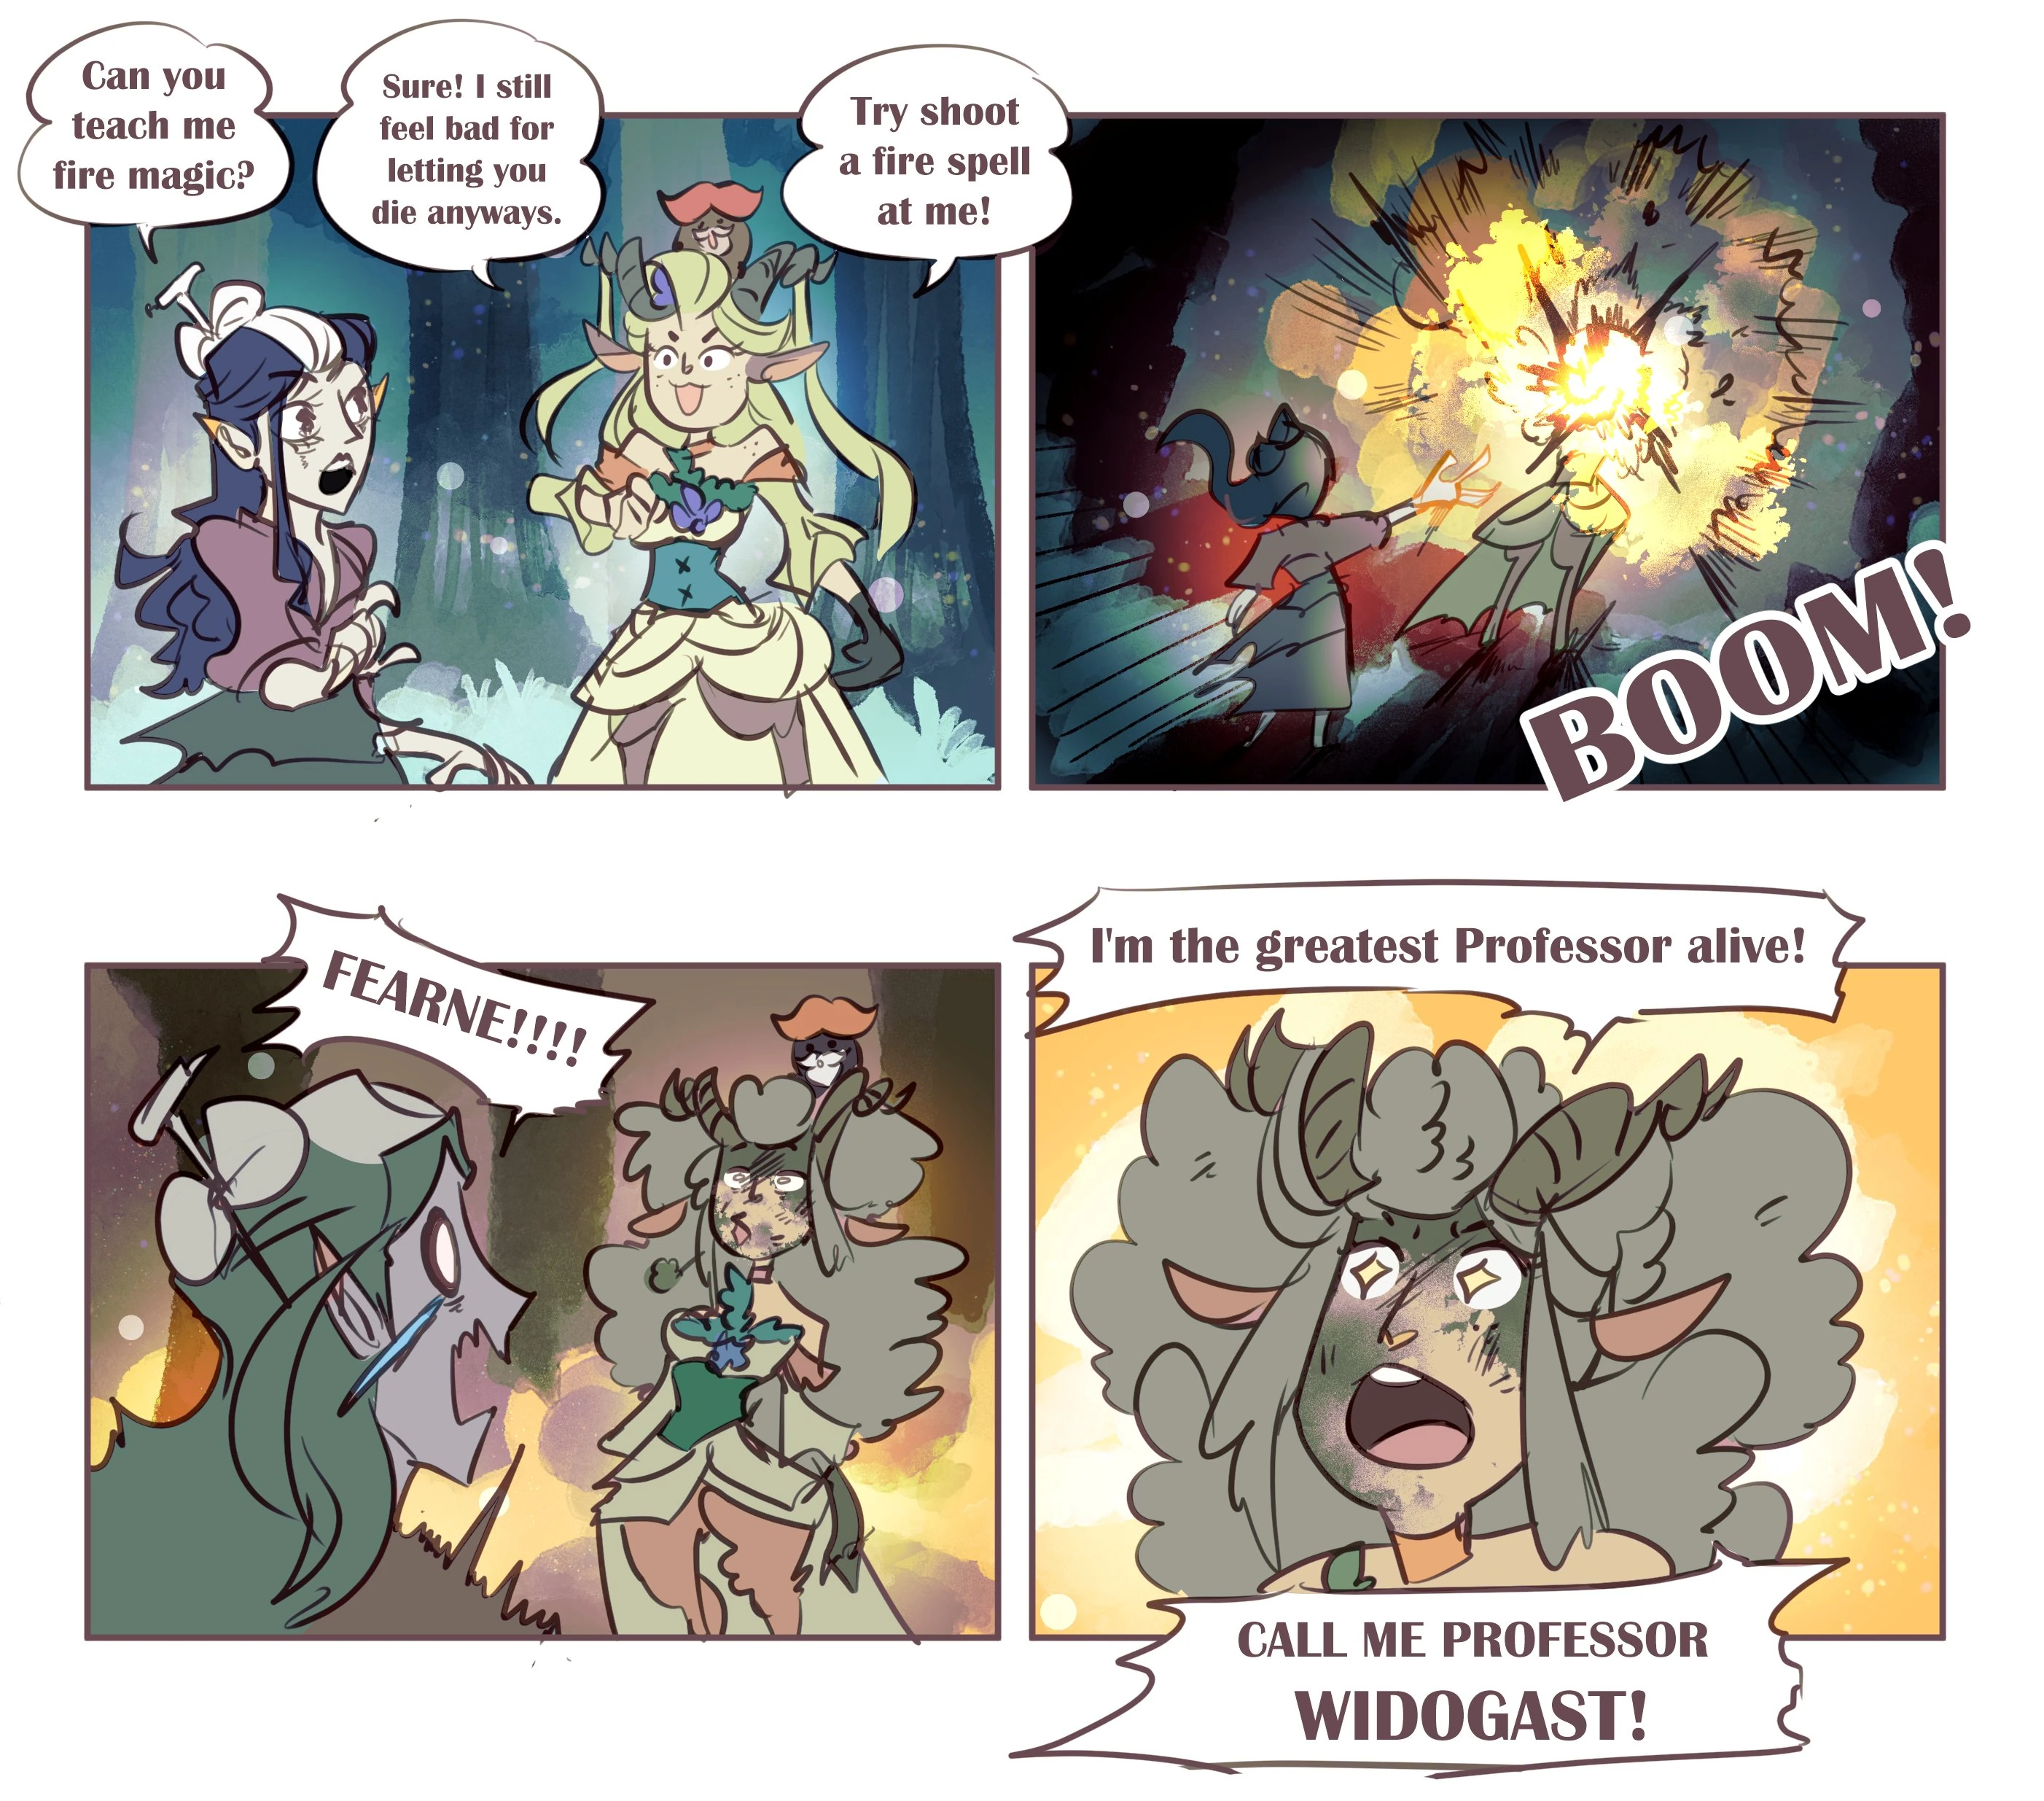
The next morning (once the trial was finished), while the Silver Sun was coming to pick them up Laudna approached Fearne, asking her for advice on fire magic. They practiced for a bit, and while Laudna didn't expect any spectacular progress, she successfully cast Fireball (damaging the druid in the process, although not badly); they also spoke about the circumstances of Laudna's death and revival, and joked about how they could blame the Changebringer for the sorcerer's prolonged dead period.
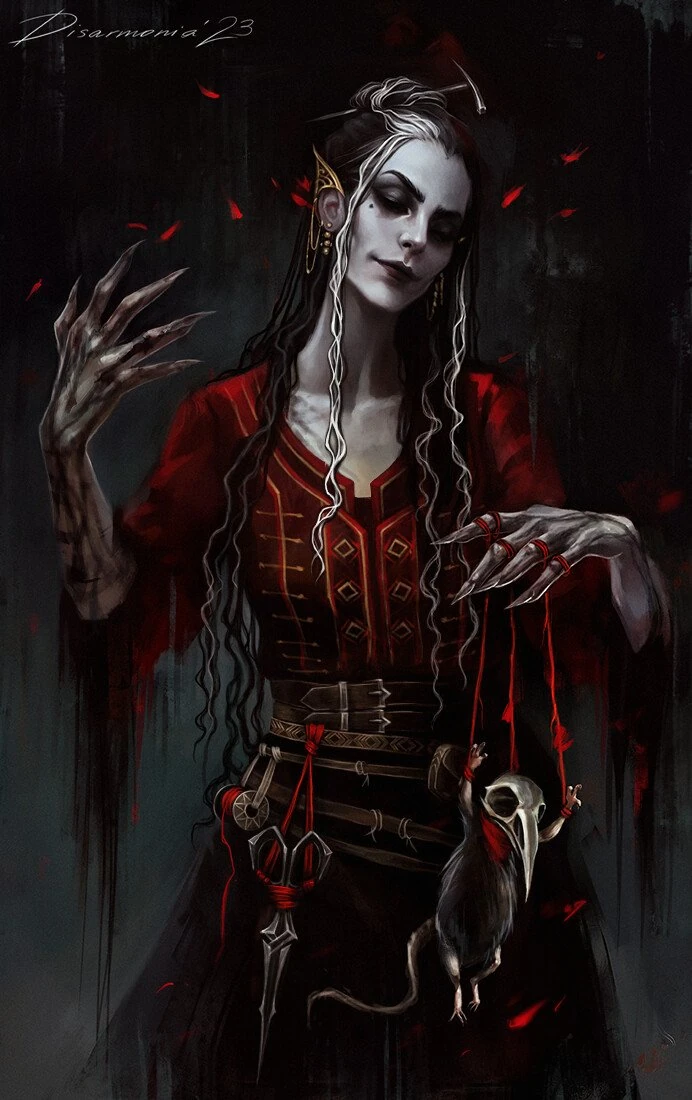

Fan art of Laudna, by Veronica Anrathi (Disarmonia).[art 11]
After arriving in Yios, Bells Hells went to a casino for a last night of fun before starting their mission in the city. While watching the gambling games Laudna proposed Chetney that they could use Pâté's invisibility magic and psychic bond with the warlock to cheat in those games in order to win, and the familiar was willing to participate; however, they ended up postponing the plan, since the adventuring party had too much attention as newcomers at that moment. Later, when they were in their room, Ashton talked to Pâté to ask him to protect Laudna (also threatening Delilah in case she was somehow listening through him), which left the familiar very confused; he told Laudna about the threat, and she said it was a normal behaviour for Ashton. The next day, after Bells Hells fought Shithead, an undead bird that was chasing Fresh Cut Grass, Laudna cast Hex on the creature and pointed out the similarities between Pâté and it, asking her familiar to follow it as it was fleeing, saying that they could become friends. However, Pâté ended up returning, having lost Shithead's track. When asked about Delilah, Laudna confirmed that she hadn't heard her in her head after being resurrected, and stated that she didn't mind that mental silence, since she was surrounded by her friends.
Later that same day, after visiting Ebenold Kai's home and finding him hiding in a basement with Baryn Vestisho, Laudna and her friends (minus Ashton) were transported with them to the Elemental Plane of Fire, where they spoke with the two members of the Grim Verity and Planerider Ryn, exchanging information about Ruidus and the events connected to it. During the conversation Laudna commented on the death of the Lumas Twins (apologizing for sounding a bit insensitive about it) and also mentioning her own death at the hands of Otohan. Before they returned to Yios the shadow sorcerer told Imogen that Ryn's behavior was similar to her own.
After Ryn sent them back to Ebenold's house, the adventurers discovered that three intruders were using an air elemental to explore the house and find the basement; before being discovered Laudna tried to keep the door closed with her Immovable Rod, and sent Pâté (transformed into a spider) to explore, although he got absorbed by the elemental's wind. The party tried to confuse the newcomers into thinking they were having a party with adult content, and Laudna contributed by loosening her clothing and giving FCG her tracking orb so they could use it as a "camera"; however, the farce eventually ended, and a brief battle ensued: Laudna controlled the battlefield combining her Spider Climb with Silvery Barbs and Bane (although not without getting hurt in the process by the enemy's magic) to weaken the intruders and protect her friends, and using Pâté to Shocking Grasp the air elemental through him; during the battle she also benefited from FCG's protection, since helping resurrect her had made the cleric bond with her. After combat the group escaped taking one of their enemies for questioning, loading him on Fearne's back (transformed into a horse).
When they found a place with enough privacy the adventurers interrogated Tuldus (for that was the mage's name) after Laudna cast Bane on him, using Imogen's telepathy and FCG's Fast Friends, discovering key information about him, his organization and his leader, which led the adventurers to contact Ryn and start planning their next step. Later, after meeting with Ashton at the Aydinlan Seminary (having left Pâté watching over Tuldus), the group divided, and Imogen, Fearne, FCG and Laudna went to visit Vitro Isham, an expert in automatons, although the first two left early to go see Professor Kadija Sumal.
Isham turned out to be a very friendly firbolg teacher and an acquaintance of Imahara Joe who accepted inspecting Fresh Cut Grass, revealing what kind of aeormaton he was and confirming some of the theories about their past. Laudna, noticing how the professor was trying to be reassuring, helped by praising FCG's good nature and talent for healing, and supported them when they asked for an "update" in their mechanical body. Later, when Vitro, who believed that the adventurers were students, encouraged them to notify him when they graduated, the warlock and the cleric went with it. After saying goodbye, Laudna noticed that Imogen had not made any report through their mental connection, so they went to Professor Sumal's office. When Bells Hells met there, they found out that Imogen and Fearne had had an encounter with Ludinus Da'leth, who had cursed Kadija Sumal and stolen documents from her. Laudna was extremely worried, asking several times if the elf had hurt the other sorcerer (which he had not). After such an encounter, and seeing that Kadija had been left in a very fragile state, they decided to call Ryn, who came and confirmed that she would seek help for the professor and would take care of the still spellbound Tuldus (relieving Pâté of his role, whom Laudna praised for having been so responsible). As promised, the Planerider transported Bells Hells to the Feywild in that very office.
The group appeared in the Harrowcall Fens near the home of Fearne's grandmother. The faun, excited to be back in her childhood plane, began leading her friends around, and when they were kept up by some music-loving flowers (with which Laudna was the first to interact, excited by their strange nature) and an animated tree that tried to bar their way, the sorcerer and her friends managed to keep going by singing and entertaining the plants. When the adventurers reached Ligament Manor, the home of the Fatestitcher, they were welcomed by the strange hag, who hugged her granddaughter and offered them a cocktail. The group stayed at the mansion for the rest of the day, and Fearne caught up with her grandmother, who, despite her sinister appearance, was very welcoming; noticing her appreciation for crafts, Laudna introduced Pâté to the Fatestitcher, which led to a tense moment in which Morri briefly considered keeping the familiar as part of her collection, discarding the idea shortly after because she didn't own him (to Laudna's relief). Before going to bed, since FCG was going to cast Shared Dream on Imogen, Laudna and himself, Laudna tried to help by giving the other sorcerer a scalp massage and holding her hand while falling asleep; in the dream they were able to locate the ruins in Marquet where one of the Malleus Keys was being built, and Imogen was able to briefly interact with her mother before Liliana forced her to end the dream; Laudna was left behind for a bit, and although she was able to force herself back into consciousness, that caused her to wake up more tired than usual.
The next day, on the way to Sun's Shadow the adventurers met a patrol of three nomadic centaurs who tried to capture them to sell them to the Unseelie Court; however Bells Hells managed to knock two of them unconscious and destroy the animated tree they had summoned. The third centaur was killed by a powerful combination of Laudna, Imogen and Fearne's magic. Later the group came across strange towers, and the warlock sent Pâté in bird form to explore, revealing that the structures marked the presence of those who approached them for ten minutes (so the party avoided them). Soon after, while Pâté was flying, Laudna lost her connection with him, as his physical form had been destroyed (presumably by Gloamglut).
Once they managed to access the Shiver Keep (after a brief problem with Ashton and sentient ground) Laudna and Orym, combining Invisibility and Spider Climb, went forward, finding Otohan Thull arguing with Sorrowlord Zathuda by the Malleus Key; the sorcerer, alarmed, checked the tracking orb (that she hadn't been checked recently), confirming that it was working and marking Thull's proximity. As those two left and the rest of Bells Hells reunited with their friends, they set out to sabotage the machine that was summoning Ruidus in the Fey Realm. Laudna, Orym and Fearne (the latter in the form of a slow loris) managed to get into the structure itself, where they inspected its components to see how they could damage the machine, leaving dynamite inside before leaving. One of the eremads finally took notice of the intruders, and a brief confrontation ensued in which the mortals emerged victorious, and during which Laudna contributed to the destruction to the Malleus Key by repeatedly casting Eldritch Blast; however, the sound brought Zathuda back on his draconic mount, Gloamglut, and the adventurers tried to flee, with Laudna managing not to fall unconscious (in part thanks to FCG) and trying to prevent Fearne from taking damage, with little success.
During the escape Laudna was knocked unconscious by Gloamglut's Dark Fire Gaze, being healed by FCG; she used her magic to help her friends move through the difficult terrain of the Sablecast woodland, and when Imogen didn't get an answer to her Sending to Morrigan the warlock checked her orb immediately, fearing that Otohan was still around and potentially hurting Fearne's grandmother (she wasn't). When facing Terrosh, the portal guardian, Laudna offered the fake diary of Vespin Chloras as payment to use the portal, which the strange fey being accepted, sending her through it to Exandria after complimenting her looks.
When Bells Hells discovered that they were in the Taloned Highlands, near Imogen's hometown, Laudna was the first to identify the place. Not long after she used the headless corpse of a squirrel as a material component to cast Find Familiar and bring Pâté back, asking him how it was to be eaten by a fey dragon. When talking about Imogen's past in Gelvaan Laudna explained her own experience in the village, how badly she had been treated, and how Imogen had rescued her. The next day, after Bells Hells' communications with Planerider Ryn were suddenly cut off, they decided to check on her: that night, using Imogen's dream powers, FCG sent himself, Laudna and Chetney with the sorcerer to try and find the Planerider in the Tishtan ruins she was exploring; in that dream space they located the tiefling wizard, petrified near the Malleus Key, but shortly after they were located by Otohan Thull; Laundna and Imogen managed to wake up before the psi warrior could attack them with psychic energy, but either way, the next morning the four friends were somewhat exhausted from the experience. Laudna briefly spoke to Fresh Cut Grass about the constructs they had seen in the dream, but since it was a delicate subject, the warlock force the conversation too much.
When Bells Hells reached Gelvaan Laudna kept worrying about Imogen while trying not to attract attention herself, keeping her hood up and her head down; Despite everything, some people recognized her, but Ashton made sure to be with her friend, intimidating anyone who dared to look at her in a bad way. After the father-daughter reunion between Imogen and Relvin Temult proved relatively productive, the Silver Sun arrived; before leaving, Laudna's friends encouraged her to keep her head up, and she did so, even using her Unsettling Presence to make an old man (who was giving her the stink eye) wet himself, after which the group left Gelvaan in dramatic fashion.
While Bells Hells traveled to the Tishtan excavation site they discussed potential allies and plans to stop the Ruby Vanguard, and Laudna mentioned Justi Pross and the drugs she had given her, but Ashton was reluctant about calling their old friend for the mission; when Imogen decided to contact Ira Wendagoth, the warlock showed her enthusiasm. Later, when Fearne and Orym were going to join Imogen and FCG in a dream mission, Laudna reminded them that if they were in danger they could force themselves awake.
Before going to bed Laudna and Ashton spent a while drinking together; the sorcerer congratulated the barbarian on their speech about the bad intentions of the Vanguard, and inquired about their mysterious past; Ashton talked with her for a bit about their shared background, their extreme loneliness, and expressed interest in the differences (both had been dead, but the second time it happened to Laudna, she had woken up finding her friends still with her, unlike Ashton). The genasi admitted that while he hated everyone in Bells Hells a little bit, he loved them a little bit too; though reluctant, he told her about the few memories he had from his past, how he had witnessed a family member being torn to pieces, and how the only word he remembered from his childhood, "Hishari," had prompted him to join their current group when he learned that Orym was an Ashari. Laudna encouraged her friend to talk to the halfling, and they said they would do so after dealing with the solstice. Laudna helped him go back to bed.
In the following days, during a dust storm Laudna used her Spider Climb to move through the skyship and Mend any damage she found. Ashton tried to apologize for whatever he said to Laudna while drunk, but she brushed it off, praising the vulnerable moment and reiterating that the barbarian should talk to Orym. While in the Calloway Layaway, Laudna and Chetney painted the Silver Sun to look like a Cerberus Assembly ship, and she spent some time interacting flirtatiously around the Nightmare King. When they took off to the skies again the warlock and the blood hunter were still doing some repairs, and later when Bells Hells were dividing up their items (new and old) Ashton showed interest in using Imogen's Feywild shard, but after finding out it could only be used by a sorcerer they handed it over to Laudna (who briefly wondered if Fearne could benefit from the object, but the faun wasn't a sorcerer either).
In the last period of the journey the Silver Sun was chased by an ember roc, and although Laudna slowed it down with her Ray of Frost, the gargantuan bird was still too fast, so Fearne Polymorphed it into a goldfish. The night before their last day traveling to the ruins Laudna and Imogen had an honest conversation, in which they talked about the plans of the Ruby Vanguard and their own relationship. Laudna stated that they had always had free will, regardless of the presence of the gods in the world, and reassured Imogen, expressing her support and her love for her; after joking a bit about how they weren't destined to be "normal" (which was a temptation that Imogen had had about the plans involving Ruidus) the two sorcerers cuddled up for the night.
The next morning, while they strategized, Imogen discovered that with her new Circlet of the Hidden Eye she wasn't overwhelmed by the psychic noise when she used her Open Mind ability, and Laudna was very happy for her, proposing to go partying after finishing their mission. The warlock reminded Bells Hells that they still had gear from Paragon's Call and the Ruby Vanguard, and they ended up deciding that she, Imogen, Orym, Ashton and Chetney would infiltrate enemy territory with those clothes, while Fearne, FCG, Ira and Xandis stayed in the skyship to use it to destroy the Malleus Key; as part of that strategy Laudna put on some foundation to hide her paleness. While they were saying goodbye, Laudna reminded the Nightmare King not to betray them, and took the opportunity to mention one last time that she liked him; the shadow sorcerer was the one who brought together Bells Hells for one last team cheer.
After a short journey (during which Laudna had been checking her orb, that ended up pointing Otohan Thull's presence nearby) the adventurers reached the Tishtan ruins, where thanks to Imogen's confidence they were able to get in smoothly; however, a little further they were stopped since some of them (including Laudna) looked suspicious, which led to a battle. The warlock used her Form of Dread and Bane to weaken their enemies. She also used Pâté as a thrown weapon, harnessing the electricity from one of Imogen's attacks to launch her familiar into an enemy automaton and cast Shocking Grasp through him, defeating the construct. Shortly after they met Beauregard Lionett and Caleb Widogast, two allies of Ryn who also wanted to stop Ludinus; during their conversation Laudna's appearance disturbed her new allies a bit, but they still shared information about each of their investigations, with the monk being suspicious when the warlock mentioned the Nightmare King was working with them. Later, Laudna also tried to help Imogen understand how the Warder automaton they had defeated worked, but without much success. Soon after a dwarf approached and Laudna pretended to be angry because the automaton had stopped working, successfully deceiving her enemy, who walked away.
After Fearne and FCG reunited with the rest of the group and Bells Hells continued descending into the ruins with the Warder the cleric was now controlling. Laudna noticed that Pâté's familiar form wasn't being dispelled by the antimagic waves in the excavation, and after asking him about it she sent him scouting. Later, when Imogen failed to deceive a dragonborn exaltant a brief battle ensued, during which Fearne and Laudna left their hideout inside the Warder to help. After the fight the sorcerer, after being alerted by FCG, confirmed (using her orb) that Otohan was approaching, so the adventurers tried to hide, and the Hollow One Spider Climbed through the ceiling to be out of sight. After Otohan left Laudna helped destroying one of the power sources in the excavation.
Because of the sabotages happening in the excavation, Ludinus decided to rush his plans with the Malleus Key, rallying his forces (and the captured Caleb and Beau) while delivering a speech, during which the Silver Sun crashed against the force field the archmage summoned around his device. Laudna saw that Xandis and Ira had successfully abandoned the skyship before its destruction, and Messaged the latter, informing him of the situation and the need of destroying more power sources, sending Pâté after the fey when he was too far to contact him. She and Ashton went to another power source and attacked it until the genasi decided to toss a stick of dynamite to it, after which they both left, returning to the main chamber.
After the Malleus Key activated, Bells Hells were sent far away, and Laudna, Ashton and Orym appeared on a cliffside, in an area with geysers, from which the beam of red energy hitting Ruidus was visible, although very far away.
Arc 3: Separations and Explorations[]
Laudna, after failing to contact her missing friends via Message, used Pâté to scout the area, confirming they shouldn't go down, due to the geysers, so the three friends started climbing the cliff, led by Orym, who was using the warlock's immovable rod and some rope to assist the group; despite the difficulties, Laudna had Spider Climb and Feather Fall prepared in case they were necessary. They were joined by Deni$e, a dwarven woman who had been sent there as well, but from Tal'Dorei, and the warlock acted welcoming towards her when the rogue showed her kindness. Later, when they found Bor'Dor Dog'Son in the forest and he, scared, tried to attack them, Laudna sent a warning shot with her Eldritch Blast, but the situation did not take long to calm down. When a third person, Prism, joined the group, the Hollow One allowed Bor'Dor to hide behind her, and when she saw that the newly arrived wizard felt insecure about her position as an apprentice in the Cobalt Soul, Laudna encouraged her.
When three plant monsters attacked the party Laudna adopted her Form of Dread, and one of her first attacks revealed that the enemies were surprisingly resistant to fire. Her combat appearance scared Bor'Dor greatly, but she made up for it by giving him words of encouragement about his new magical abilities, and making him the beneficiary of her Silvery Barbs spell; she also cast Wither and Bloom to restore some of Orym's health. After the battle, during their watch, Laudna and Ashton talked for a bit, and he comforted her, noticing that she was trying really hard to keep her composure and not have a mental breakdown from being separated from the other half of Bells Hells; she also sent Pâté to look for Ratchet (Bor'Dor's reindeer, who had fled during the battle), with the intention of cheering the half-elf, but the familiar returned the next morning without having found the animal.
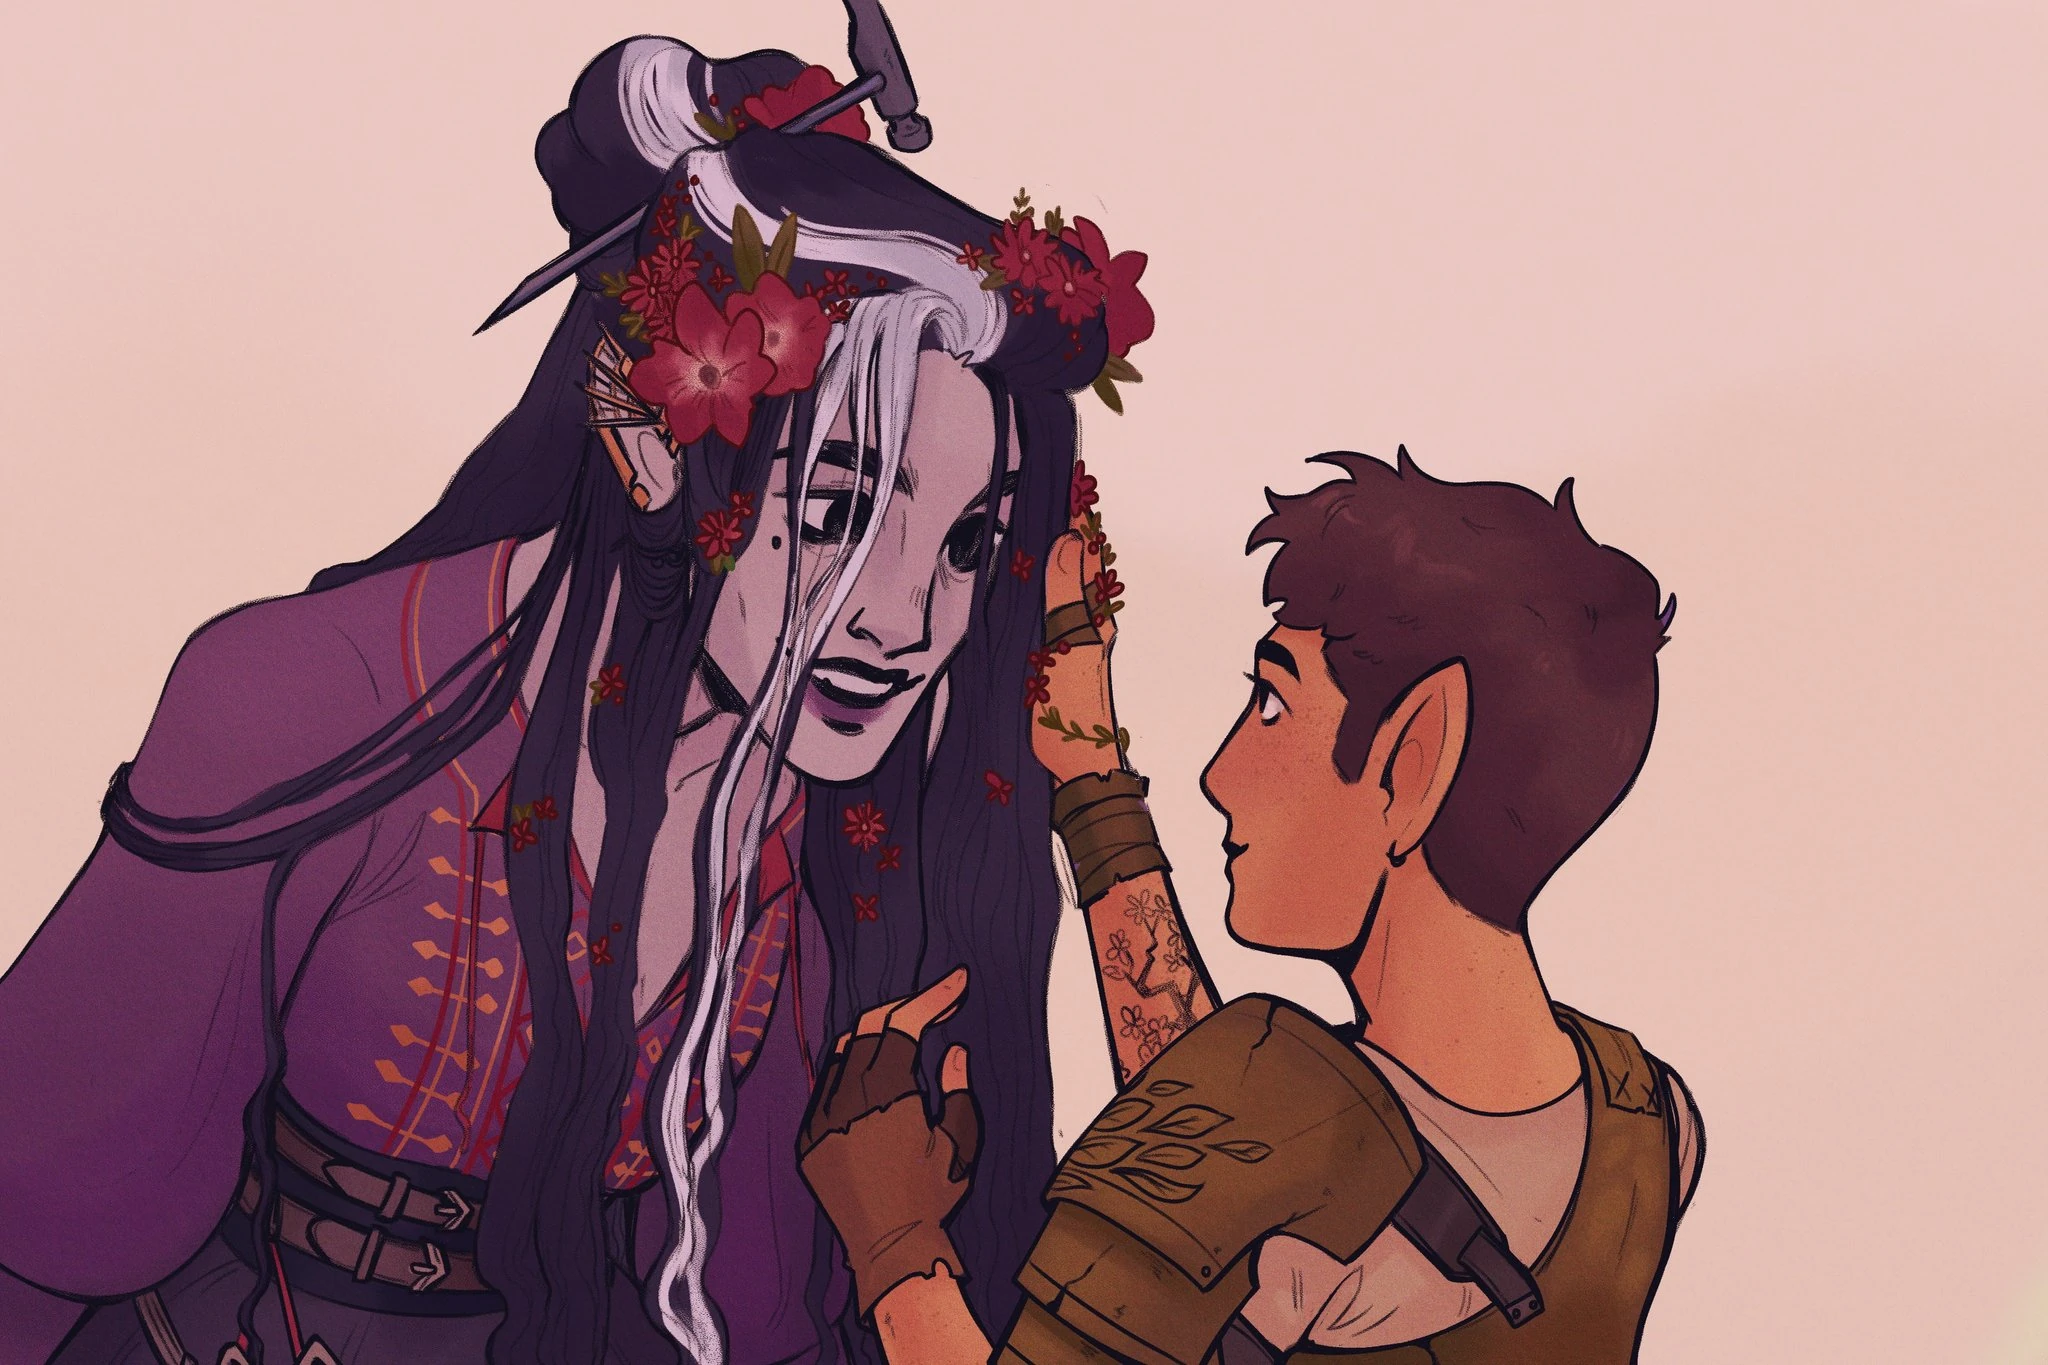

Fan art of Orym giving Laudna flowers, by Maddy Marshall.[art 12]
While following the Outerwalk Road Orym and Laudna found and fixed one of Deni$e's nails respectively. The warlock helped guide the group with Pâté's help, and when they found an abandoned gallows, she sent him to inspect the place; later, the Hollow One was one of the ones noticing the intensity of the magic around them. When Bells Hells arrived to Hearthdell Orym and Deni$e helped Laudna look more alive, using the rogue's makeup while the fighter created some flowers to give some color to the warlock's complexion. Later, after Proleff (the local herbalist) sent them to speak with the elder of the village Laudna took the chance to talk to Bor'Dor, Prism and Deni$e about Ludinus, Predathos and the gods it had devoured (Ethedok and Vordo); she also theorized if the solstice had teleported only people who were near leyline nexuses, since there was one near Hearthdell and eleven people had disappeared there too.
When Bells Hells met Elder Joan Abaddina Laudna was a bit nervous around her, and the goliath soothsayer told her that she wasn't going to hurt her, sensing that nothing she could do to her compared to what the warlock had suffered in the past. That night, following the elder's advice, the group went to a secret meeting in the Fairfroth Brewery, where the villagers were planning how to drive out the followers of the Dawnfather who were occupying Hearthdell. Laudna provided advice about how dangerous the Judicators were, and proposed to focus the townsfolk efforts on the important people of the temple instead of the "lackeys"; before they left everyone drank some beer at her suggestion. It was decided that Orym and Bor'Dor would try to gain the trust of the bastions to send them to Marquet to face Ludinus instead of oppressing the villagers; while that was happening Laudna was very focused on what Orym was saying, and she cast Silent Image to create a shining sun over Catha so the followers of Pelor were more receptive to the halfling's words. Despite those efforts, things turned sour for the two diplomats on the team, and Orym gave the warning, so the rest of Bells Hells and the villagers attacked the Sunrise Sanctuary; the moment Laudna heard Orym she cast Mirror Image as a precaution.
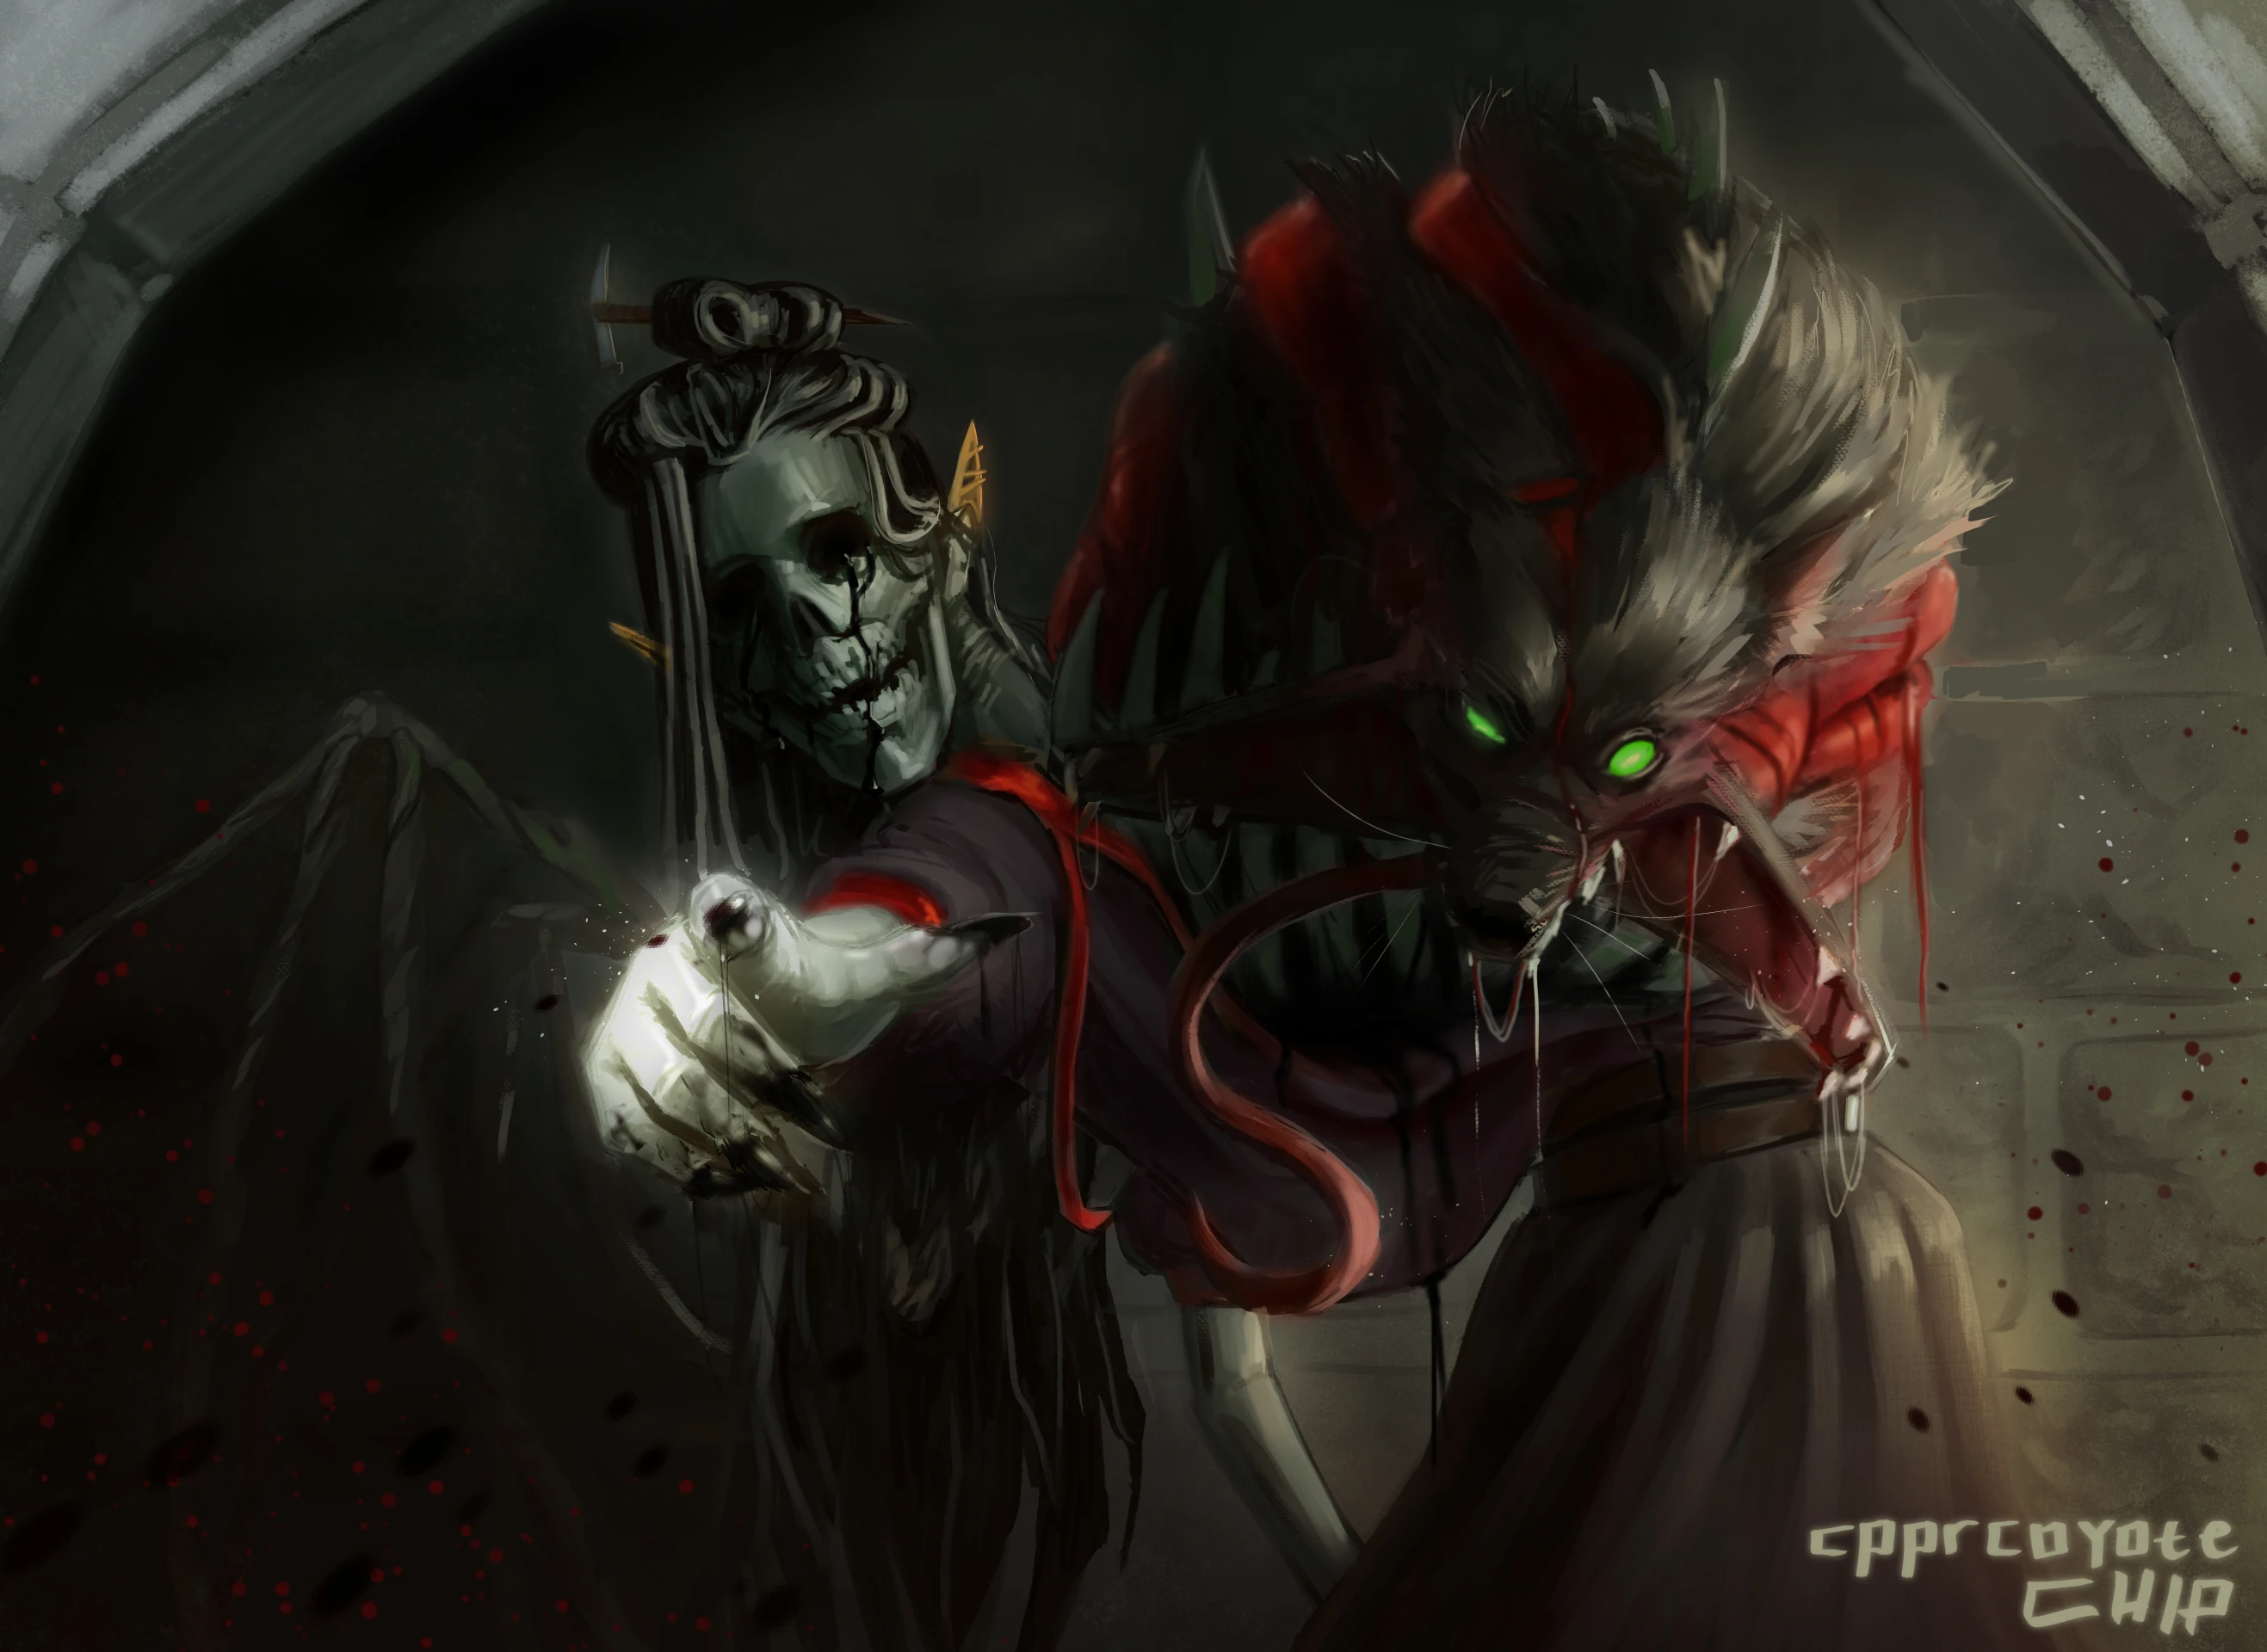

Fan art of Laudna's Hound of Ill Omen, by @cpprcoyote.[art 13]
When the battle started Laudna combined her Form of Dread, her Infestation and her Spider Climb to terrify the bastions while she entered the temple. She saw and attacked the Judicator inside (with little success) and cast Silvery Barbs to prevent Deni$e from being hit very hard by the holy warrior. The stress of the situation made the warlock remember her time in Whitestone, visualizing Delilah and the undead dogs she used; channeling those memories, the shadow sorcerer summoned for the first time her Hound of Ill Omen to attack the Judicator, eventually killing it with the help of Prism's barlgura, after which the shadowy animal disappeared. Laudna then focused her magic on weakening the Dawnborn Angel summoned by Flameguide Kiro's dying prayer, Counterspelling his Fireball.
When the conflict ended, Laudna and Deni$e were upset with Elder Abaddina for not helping more, and although the former supported the soothsayer's speech to the townsfolk by making the lanterns around her brighter, she also advised her not to become like the followers of Pelor whom she had banished from Hearthdell; the warlock, still angry about the situation, shared concerns with a very worried Orym, who, despite this, expressed that he was glad to have met her. When Bells Hells returned with Elder Abaddina to her cottage, they spoke for a bit about religion, spirituality, and how it all connected to Predathos and the elemental eidolons; Laudna talked to Ashton for a bit about what happened in the temple, and later, before going to sleep, she helped Prism check the documents they had taken from the now destroyed Sunrise Sanctuary. The next morning Joan kept her promise and allowed Bells Hells to use her scrying well three times, confirming to Bells Hells that the other half of their team were still alive near Uthodurn; when the warlock saw Imogen through the water she yelled her name, even though her friend couldn't hear her. After the party decided to travel to the Irriam Canyon to ask the Archdruid Hevestro for help in returning to their respective homes, Laudna and her friends left Hearthdell.
As they traveled through the Serratus Wilderness Laudna sent Pâté (accompanied by Mother and Dynios) to find a good place to camp. That night Laudna helped put out the flames caused by Prism's arcane experiment, and she also helped Bor'Dor by Mending his crossbow after it was damaged by the flaming energy of its new runes. The adventurers helped the farmer practice his own magic, building an improvised dummy for which the warlock contributed a spine, stick, red string, and a piece of tooth; the half-elf ended up destroying it all with a Fire Bolt. The following day, when the group found a crater full of flowers and a petrified skeleton, Laudna cast Wither and Bloom to clean the terrain (apologizing to Orym, who liked those flowers) and using her rock chisel to help uncover the remains; that night, after Prism talked a bit about her own past in the Shadowfell the warlock manifested her interest in that plane and talked to the shadar-kai for a bit in Undercommon. Later in the journey, when Bor'Dor showed interest about the missing half of Bells Hells and how powerful they were (since he had concerns about their plans opposing Ludinus and Predathos) Laudna stated how powerful her friends were, particularly Imogen, who was very dear to her.
When Bells Hell's reached the Irriam Canyon Laudna helped most of the team (with the exception of Orym, who got the assistance of a magically Enlarged Mother) by casting Feather Fall so they could safely descend to the bottom (although she wasn't able to land very gracefully herself). They found a strange flowery hill, and Laudna sent Pâté to investigate, confirming the flowers weren't really there (it was, in fact, the camouflage of a large sleeping creature, but they managed to get past it without waking it up); she also localized Primordial inscriptions in an archway, but she wasn't able to copy them down, so Ashton translated them when they approached. When they entered a cave full of prismatic crystals Prism discovered that said material was able to divide arcane spells, so she told Laudna she should try it with her Eldritch Blast.
Bells Hells found a shadowy creature, Evithorir the Taker, near the Emerald Tree, and although they briefly tried to reason with them, a battle ensued. During the fight Laudna used her Form of Dread and her Mirror Image to empower herself, and tried to cloak one of the strange red orbs the Taker was using with her Darkness, although soon she realized her magic didn't affect the function of the orb. She focused instead on attacking and weakening Evithorir (also blocking some of his attacks with her Silvery Barbs and Counterspell) and she managed to defeat them with her Eldritch Blast, absorbing the remnants of necrotic energy that the dark fey left. Once Hevestro (who had been taken from inside the Taker's shadowy body) was recovered the adventurers were able to talk to him and Laudna, casting Silent Image, showed him the recent events in Marquet connected with the apogee solstice and the Malleus Key.
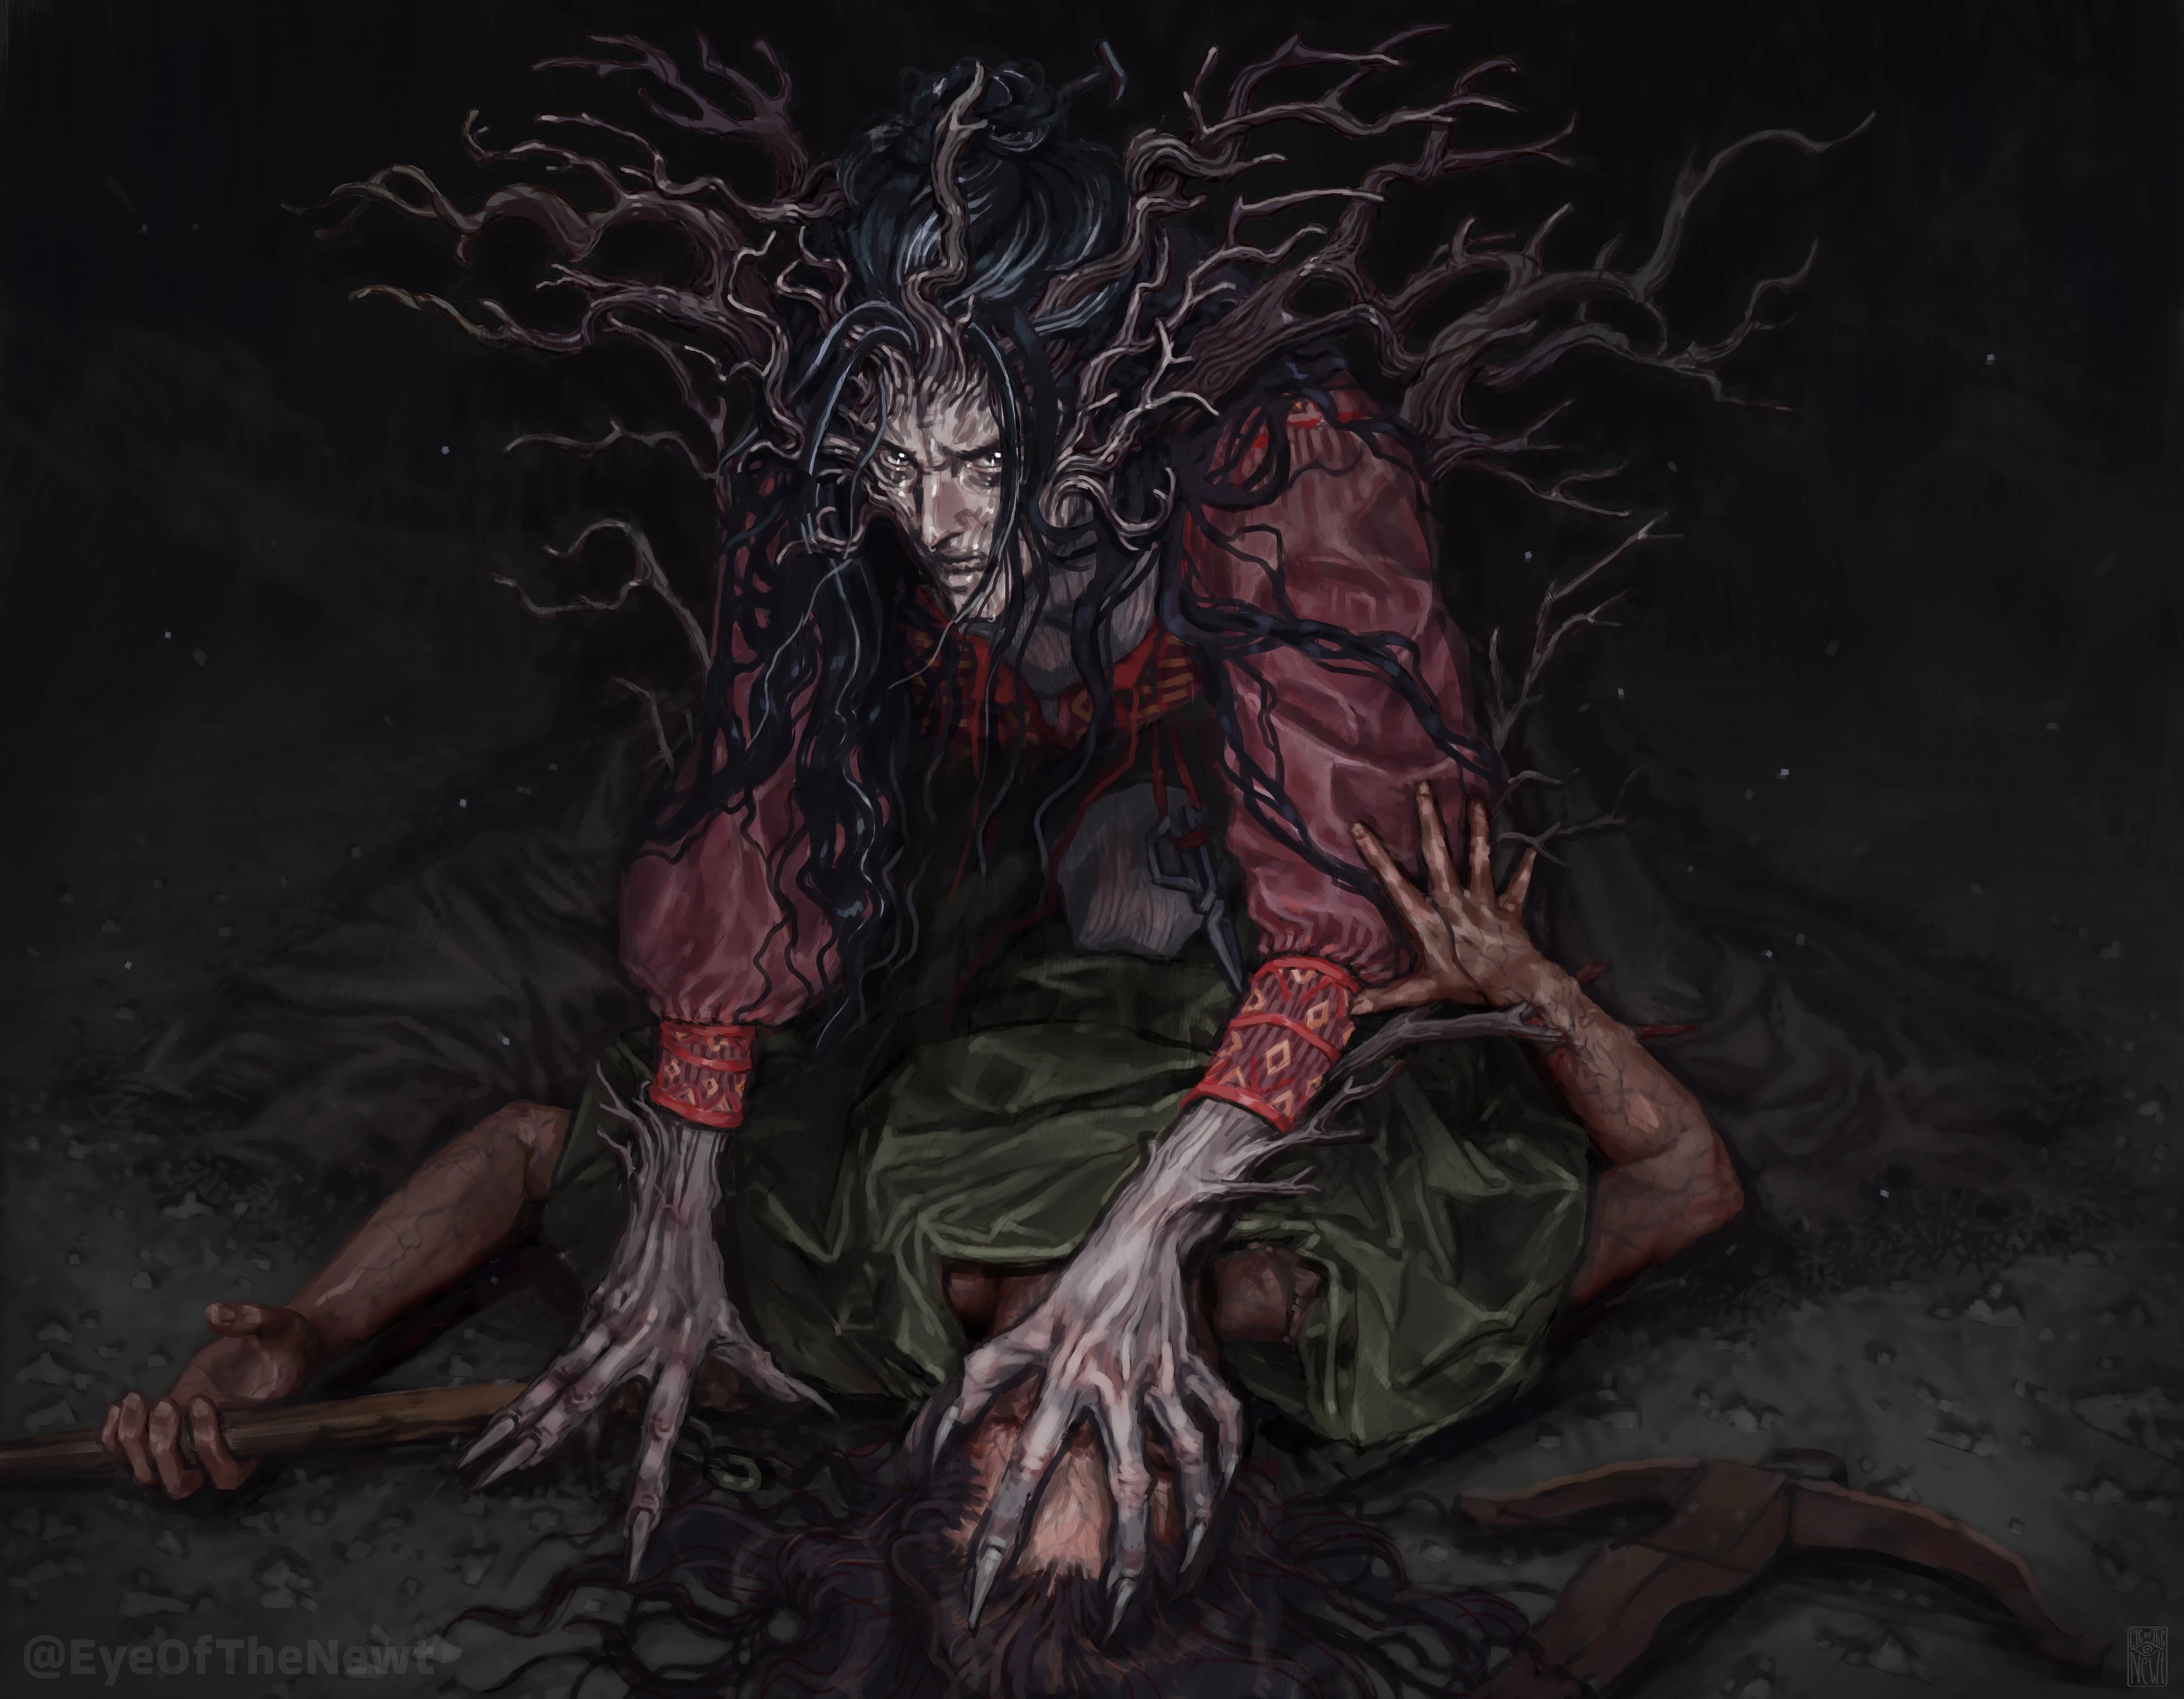

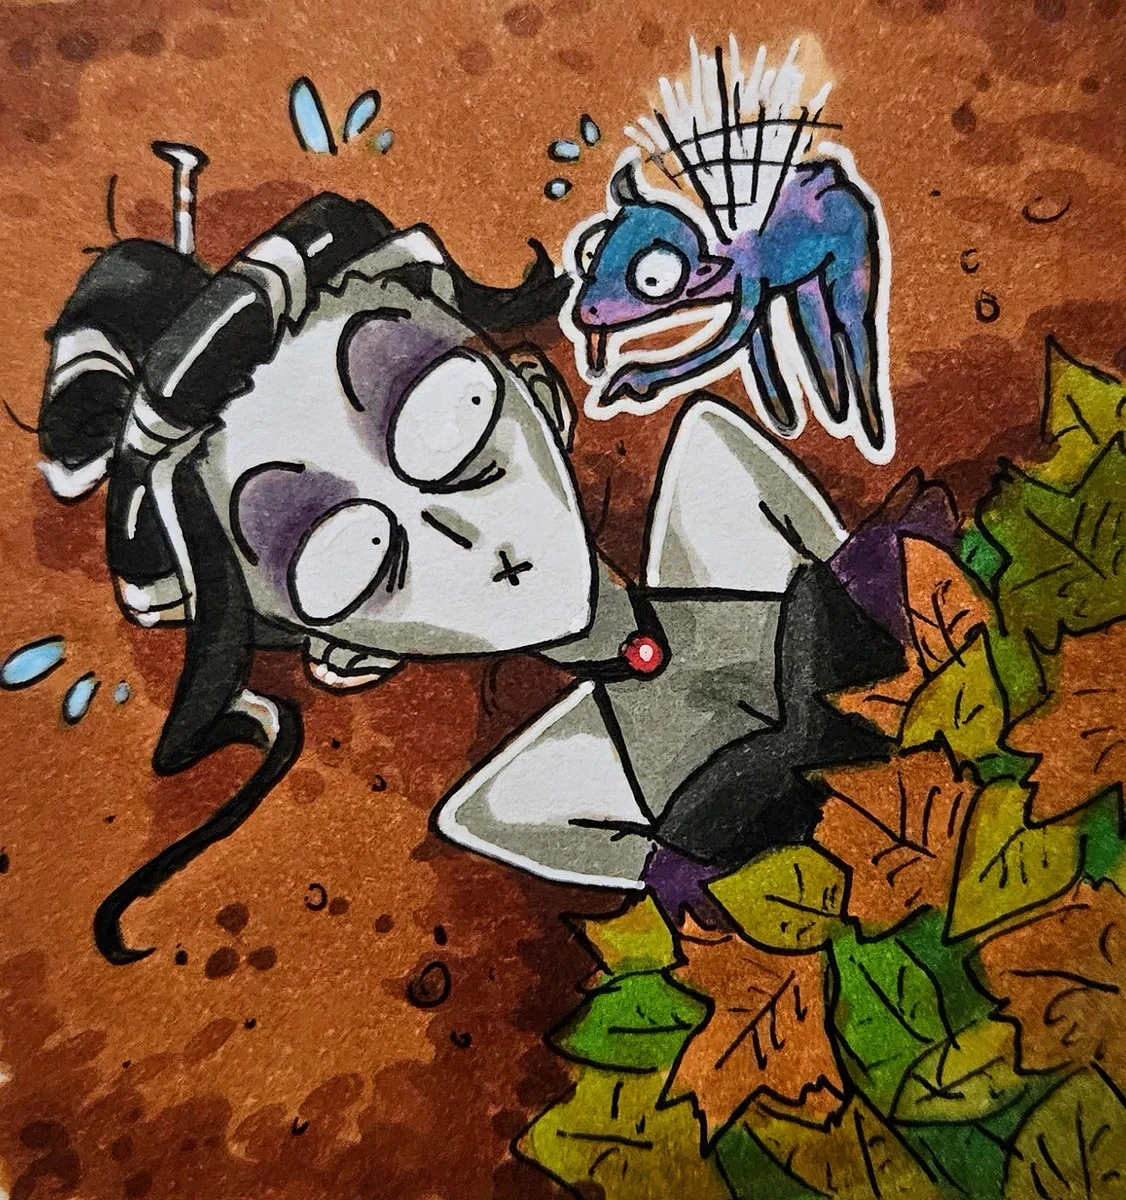
Fan art of Bor'Dor's death, by EyeOfTheNewt.[art 14]
Later, while the archdruid was outside Deni$e started to interrogate Bor'Dor, since he had been acting suspiciously, and Laudna remained calm, making some tea and offering it to whoever wanted to drink it during the conversation. However, after Bor'Dor revealed his real background and connections he attacked the rest of the group, which made Laudna feel extremely betrayed and anxious. She Counterspelled the half-elf's attempt to flee Polymorphed into a hummingbird, approaching right after, wanting to stop him. Laudna cast Hunger of the Shadow, accessing a dormant darkness inside of her as a way of regaining some control over the current situation, severely weakening the traitor in the process, who ended at death's door after Prism (also very hurt) punched him; as Laudna was doing that, some purple energy and a veil manifested in her Form of Dread. After receiving Orym's silent approval the warlock killed Bor'Dor using Wither and Bloom. She then started sobbing, being comforted first by Ashton and later by Prism, to whom Laudna confessed she was ashamed and terrified about the possibility of her former warlock patron coming back (the shadar-kai reassured her, telling her that Laudna would be able to stop Delilah again if necessary); both of them agreed that while they were still angry at Bor'Dor, they were also sad about him.
The following morning Laudna, a little more cheerful, said goodbye to Deni$e affectionately. Later, when Prism offered to Scry on the rest of Bells Hells, Laudna gave her Imogen's ring so she could magically locate her; the wizard also asked her new friends for objects (preferably hair) to use to locate them in the future, and Laudna gave her a clump of hers. After that, the rest of Team Issylra was then transported back to Jrusar.
When they arrived Laudna told Prism about the local Starpoint Conservatory. When the group was traveling in a gondola with a gnome courier they tried asking him about the current situation in the city, and Laudna's visage terrified him, making the conversation difficult; later, when they were arriving to the Spire by Fire Inn Prism mentioned to Laudna that if she ever wanted to visit the Shadowfell, the Night of Ascension was the best moment.

Fan art of FRIDA playing the recording, by Madeline.[art 15]
When they found Team Wildemount Laudna immediately hugged Imogen, and the two groups started speaking and sharing anecdotes; during the conversation the Hollow One described her new summoning power (the Hound of Ill Omen) and expressed her opinions about the gods. When FRIDA played a recording of Imogen praising Laudna, the warlock felt very flattered. She was also very pleased when she discovered that Deanna, like her, had died and been brought back to life.

Fan art of Prism's best friend, by Elaine Tipping.[art 16]
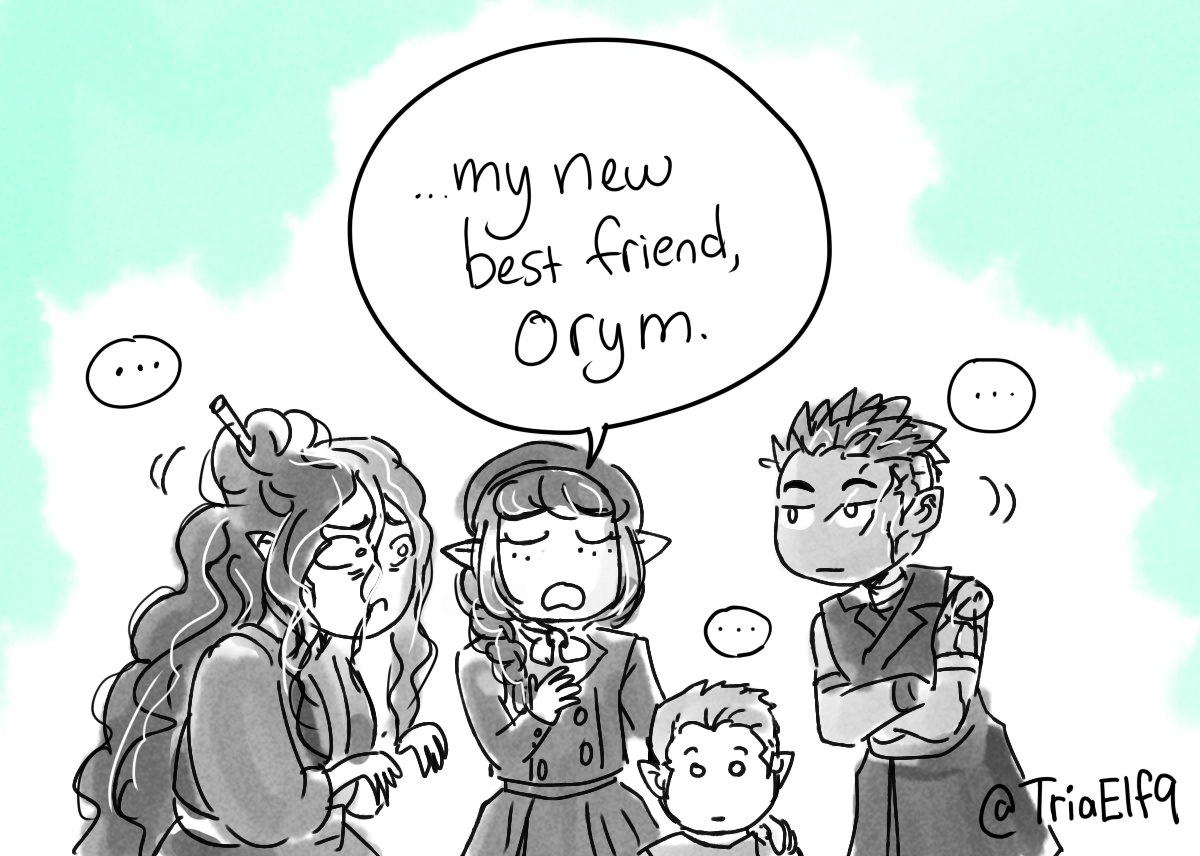
Eventually it was decided that Prism, Deanna, and FRIDA would do a research mission on their own to provide Bells Hells with valuable information, while the main party returned to the Tishtan excavation site. After Laudna made sure that each team had the means to Scry on each other the two groups exchanged farewells, during which Laudna and Prism confirmed their mutual desire to visit the Shadow Realm together one day; even though the wizard had previously stated that she considered Orym her best friend, she still valued her bond with the warlock, and praised her strength overcoming the pain to maintain her trusting nature.
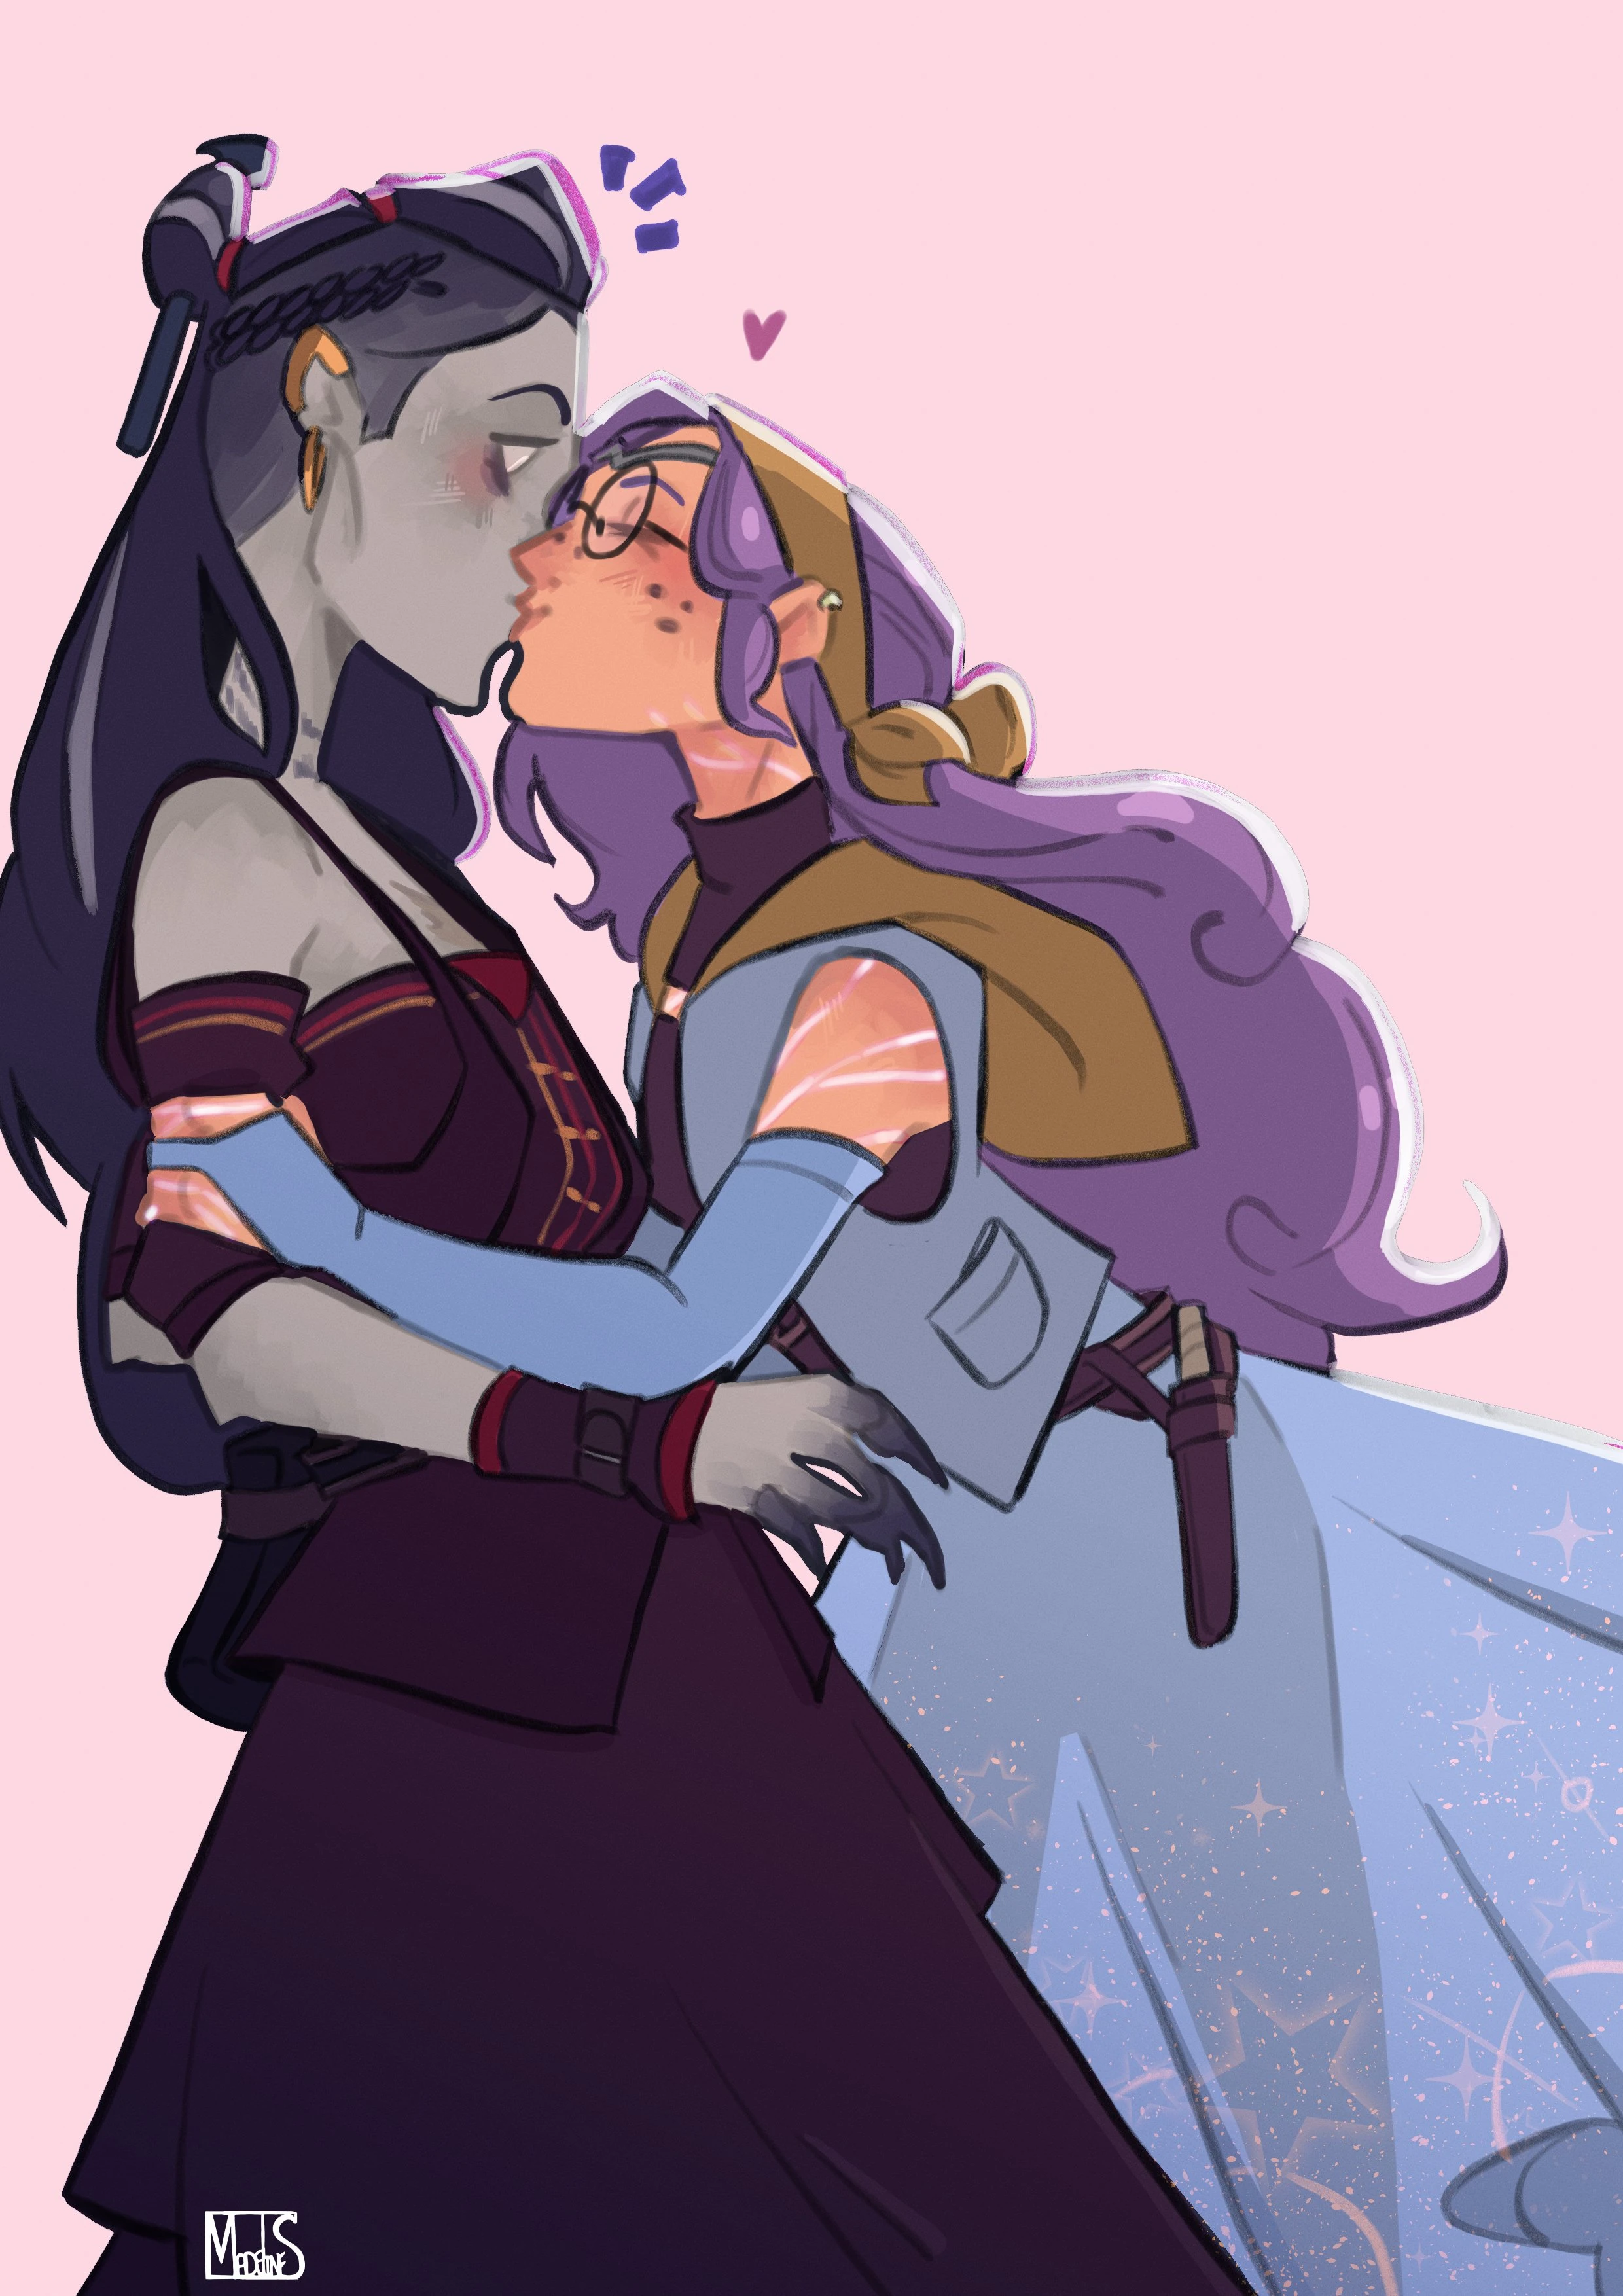

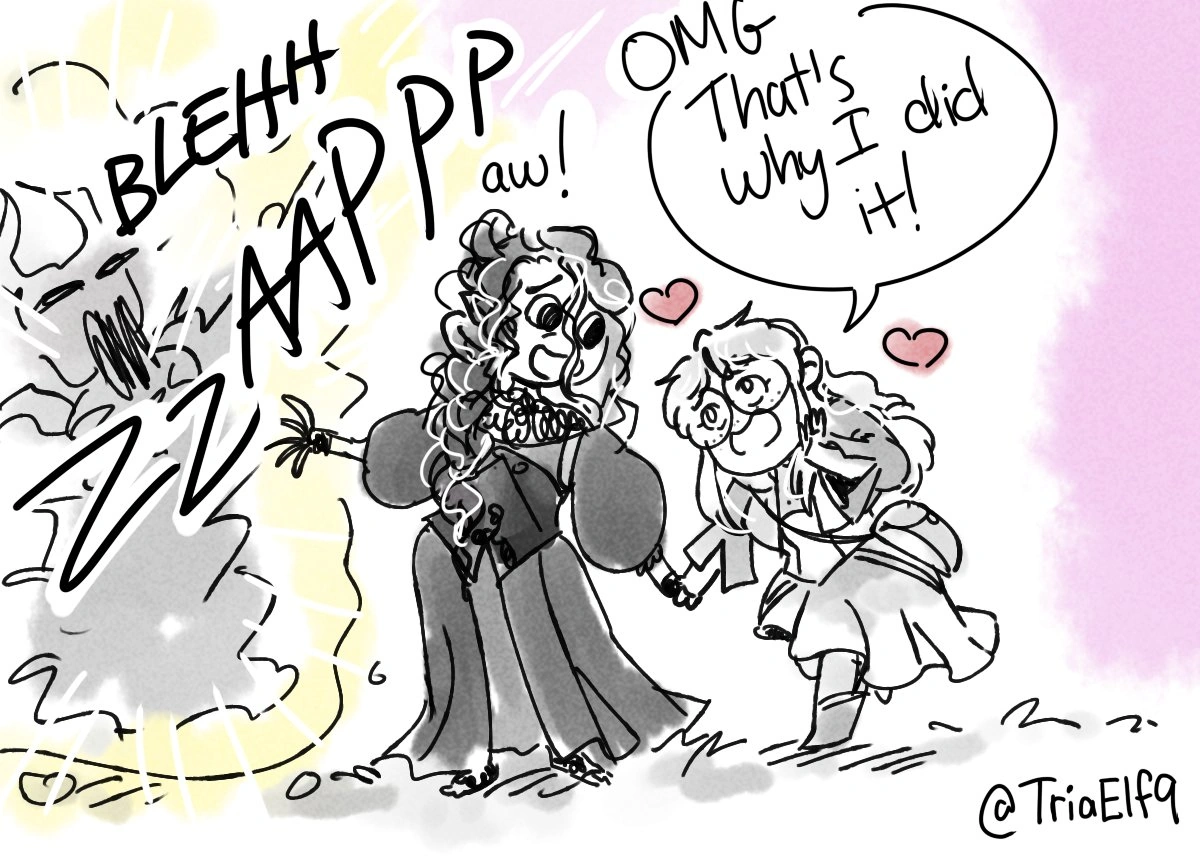
Once the seven original members of Bells Hells were left alone, they continued to share the information and discoveries they had made on their respective trips; however, Laudna was particularly irritated by how apparently enjoyable Team Wildemount's adventure had been, complaining about it, though she later apologized and admitted that deep down she was envious of them; Imogen comforted her, and talked about how the Savalirwood had reminded her about her friend. Seeing that the warlock urgently needed to relax a bit, the party agreed to put off their plans until the next morning and take the rest of the day to rest and make preparations. Imogen and Laudna went on their own to visit Zhudanna, who was very glad to see them; the two sorcerers ended up agreeing to buy food so the old landlady wouldn't have to go out. While they were in the market, Imogen admitted that she wasn't expecting her reunion with Laudna to be like this, commenting that she was now unable to hear the thoughts of the crowd, or Laudna's. When Laudna said that she would always share her thoughts with Imogen if she asked, Imogen asked if she could kiss her, and Laudna agreed. The two then shared a heartfelt conversation confessing their mutual affection, in which Laudna admitted her suspicion that Delilah might have returned; Imogen was supportive, assuring the shadow sorcerer that regardless of what she had done, she was not a bad person; Imogen also gave Laudna her Weavepiercer Gloves, and the two had a livelier conversation about Laudna's proposed upcoming wardrobe change during which she took her belt and combined it with the dollhouse to make a strange backpack. That conversation was interrupted when they noticed that a magical sphere in a nearby fountain was projecting a hologram of Ludinus Da'leth giving a speech (according to the Local wardens it had happened several times in different points of the city), and after the object was destroyed Laudna took some of the pieces.
When Laudna and Imogen returned to their friends, FCG presented Laudna with thematic baked goods connected to the adventures of Team Wildemount so that she would feel included. The shadow sorcerer (after silencing Pâté, who apparently wanted to talk about the kiss) told the rest of Bells Hells about the magical sphere, and they all discussed their recent discoveries and argued about how important faith was in their mission; Laudna was quite skeptical of the gods, stating that she had more faith in humanity, and more specifically in her friends. The following day, the night before leaving Jrusar, the warlock checked the crystal ball that tracked Otohan Thull's location, confirming she wasn't nearby.[101]
When Bells Hells traveled to Zephrah, Orym's sister-in-law Maeve recognized Laudna as the person Orym was supposed to resurrect in Whitestone, and praised her looks. They were brought to a very weakened Keyleth, who asked them for their help healing her wounds by fetching a special flower from the Grey Valley. When they left, they chatted for a bit with another of Orym's sisters-in-law, Leeta, to whom Laudna mentioned that they had tried crashing their skyship to stop Ludinus Da'leth's plans, and the Ashari was impressed by that, confirming it had killed members of the Ruby Vanguard and partially damaged their Malleus Key. When the group visited Orym's mom, Alma, she offered them something to eat, and pointed out that the warlock needed to eat more than anyone else, probably due to her thin build. While some members of the group were running errands, Laudna snuggled up with Imogen and Fearne while holding a string to which Pâté was tied, flying him like a kite.
Fan art of Laudna and Imogen in combat, by Elaine Tipping.[art 18]
When Maeve sent Bells Hells to the Grey Valley with her magic, Imogen held Laudna's hand while she scouted through her familiar's eyes, until they finally found the flowers they were looking for. However, they were attacked by several undead and a devourer-like demon. Laudna, after protecting herself with Mirror Image (and later with her Form of Dread), summoned her Hound of Ill Omen to attack her enemies and used Silvery Barbs to help FCG when he was hit by an attack. Laudna used Imogen's Watery Sphere to attack their enemies with Shocking Grasp, killing two of them with a single cantrip. Later she tried to protect Fearne from an undead minion, but even with Silvery Barbs it managed to knock her unconscious (even though FCG healed her shortly after, also restoring Laudna's health in the process).[102]
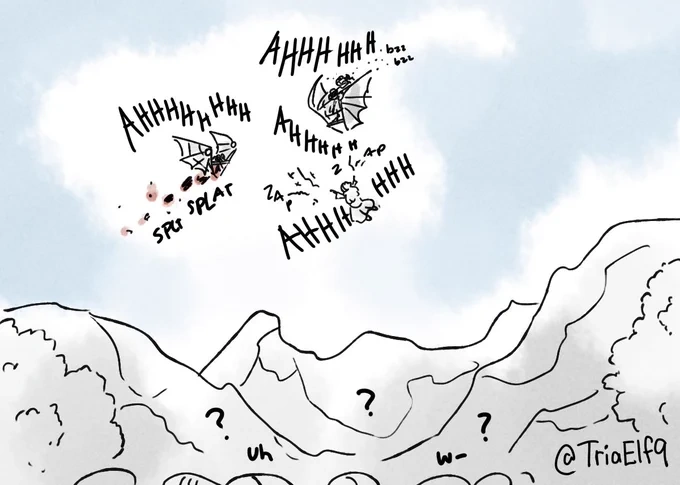
While the group was taking a short rest Laudna admitted she felt way happier than when they arrived to Jrusar, but when FCG asked about the reasons she got nervous and started avoiding the subject; she asked Ashton about his past with the Hishari. Later, while they were moving, Laudna sent Pâté with Chetney, and when vrocks approached them, the warlock defeated one with her Eldritch Blast and congratulated Imogen when she killed the other with her Shocking Grasp. The party reached the Iridon Bastion, which had been taken by demons that had killed some people and captured the rest in cages. The adventurers (who were in two groups, communicating through Laudna and Pâté's connection) decided to fight the fiends, and the Hollow One used her Feather Fall so that herself, Orym, Imogen, and Ashton could approach. Laudna helped opening the cages containing prisoners, even freeing one of them by freezing their chains with Ray of Frost. When the demon leader, Extovass, left Imogen unconscious Laudna became scared and aggressive, with her Form of Dread becoming even more frightening as she shielded her girlfriend, casting Blight against their enemy.
After the battle was finally over Laudna helped opening the other cages with ice magic, and after watching the conversation and pact between Fearne and Teven Klask (an unexpected ally, a champion of Asmodeus), the shadow sorcerer wondered if the druid's fire magic would become stronger because of it. That night, when Chetney revealed he had found a talking sword able to perceive its surroundings, Laudna showed her concern, not liking that it was able to listen to their conversations; she didn't interact with the weapon too much, since she wasn't even able to lift it.
The following day, when they were preparing to Teleport back to Zephrah they listened to Ashton's idea and put some members of Bells Hells inside the portable hole, so Imogen could use her spell with including the rescued Ashari and the survivors from the Iridon Bastion; Laudna was one of the members inside the whole, since she was breathing slower than normal and would not consume too much oxygen. After Keyleth successfully recovered from her wounds she had a private conversation with Bells Hells, during which Laudna shared useful information about their alliance with the Grim Verity and the information they had provided, as well as the discoverings she and her friends had made in Issylra (expressing her concern about Vasselheim); later, while they were theorizing about magical rituals, Vecna was mentioned, and the warlock felt a cold jolt down her spine.

Fan art of Laudna and Imogen, by Pyromeekorai.[art 19]

Fan art of flying skysails, by Elaine Tipping.[art 20]
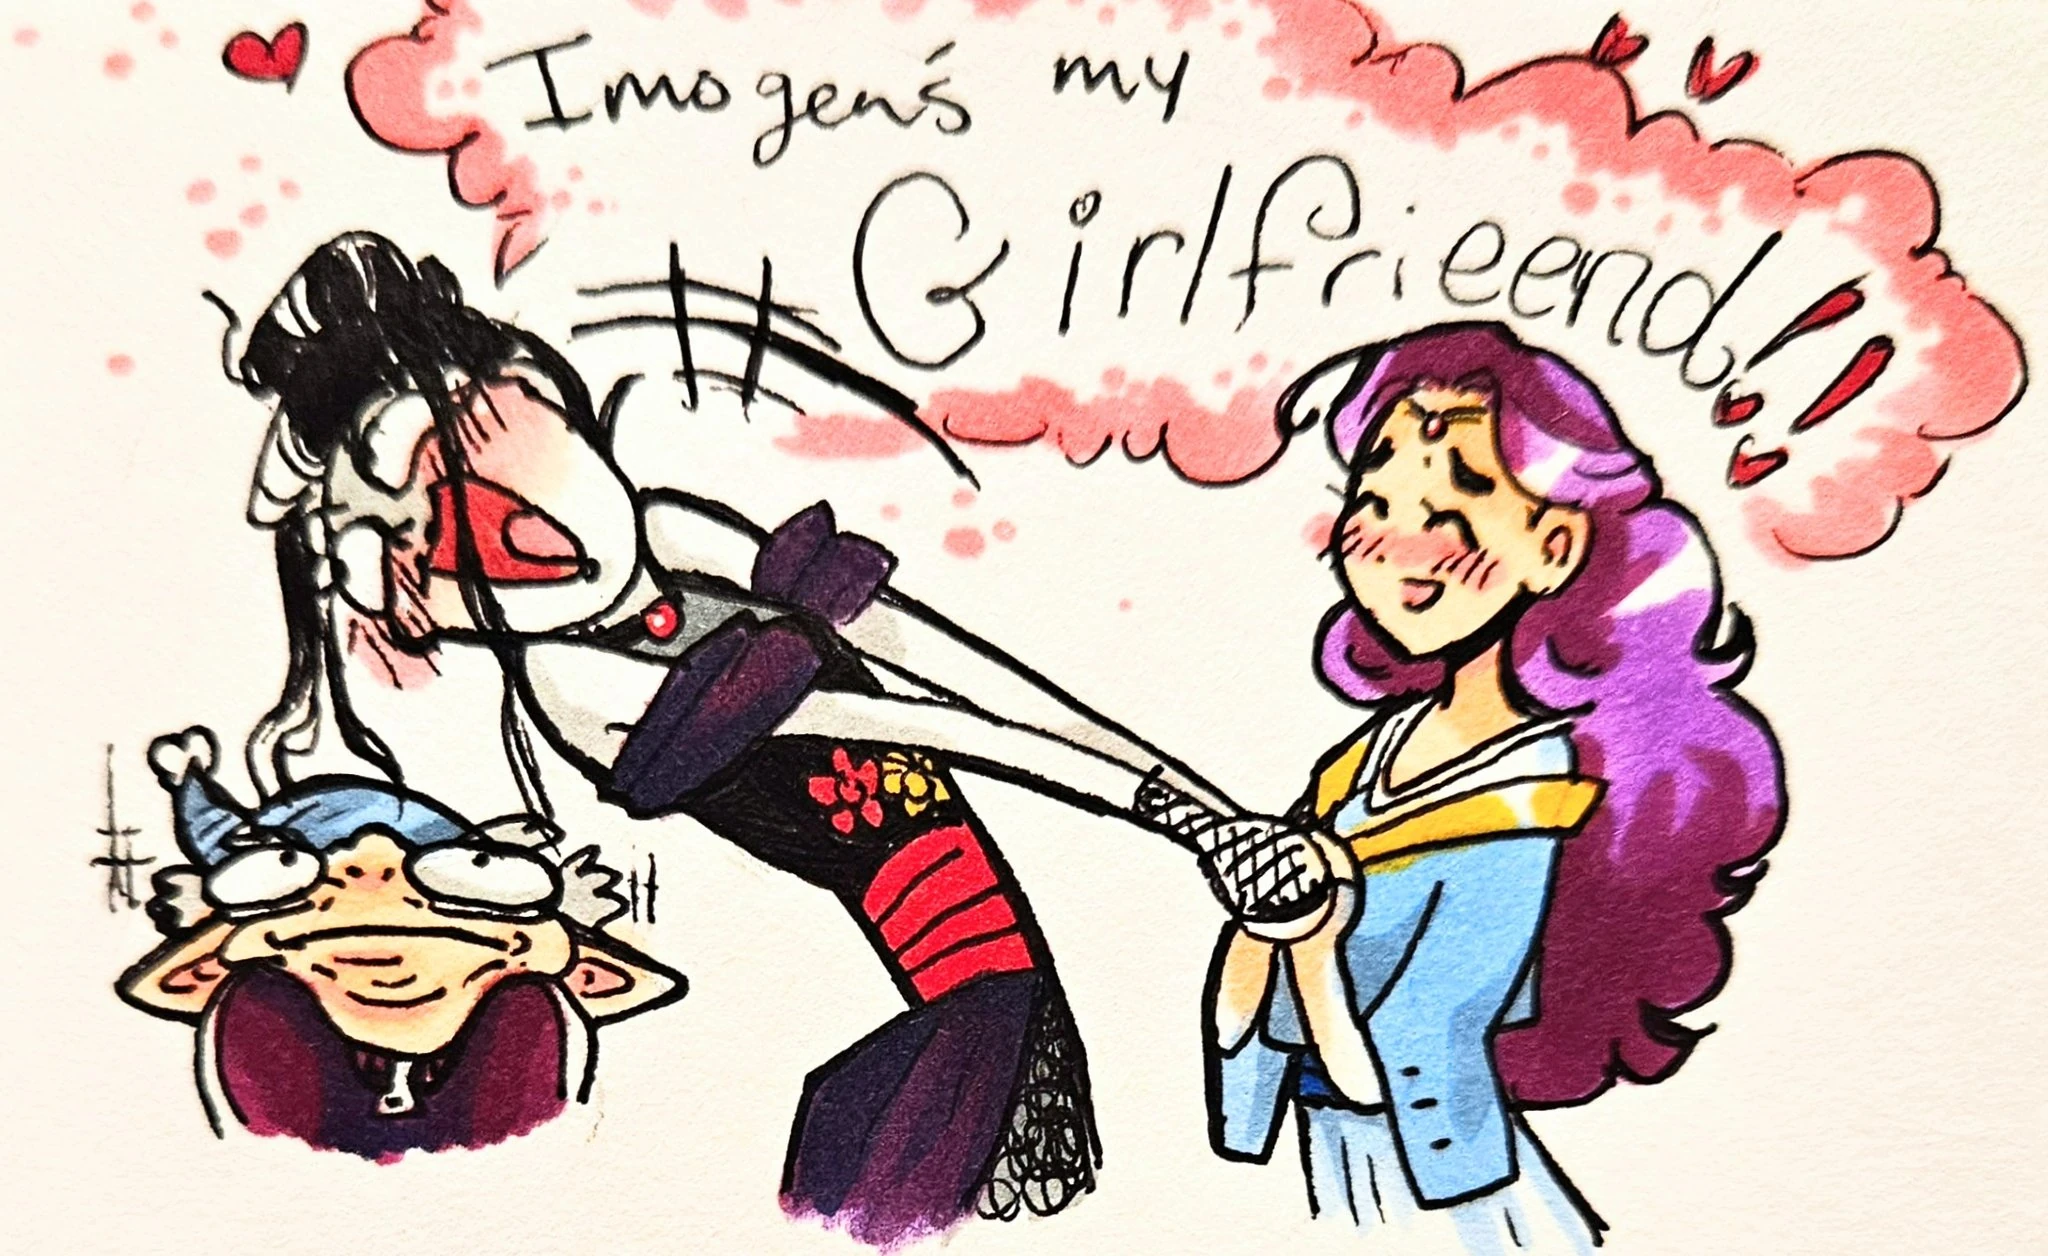
Chetney, Laudna and Imogen left together because the first two wanted to fly skysails. Laudna told Imogen that if something happened to her she should go ahead, and took the opportunity to confess to Chetney that she and the sorcerer were now girlfriends. They managed to convince a local instructor, Ulli, to let them use the flying devices (paying), and after receiving cool nicknames (Arr for Chetney, Snappy Twig for Laudna and Sunray Sally for Imogen) the Ashari and Laudna started flying together on one of the skysails. Surprisingly, she managed to control her skysail very efficiently, but when she saw that Chetney had taken one himself and was flying towards her, both members of Bells Hells started a fight-like game in the air. Imogen joined by casting Flying and helping her girlfriend send harmless sparks toward Chetney, who defended himself by blowing his Horn of Silent Alarm to annoy the Ruidusborn; Ulli, horrified by all this, tried to take control back from Laudna, but she cast Infestation to keep him busy with bees while she enjoyed her time in the air. Although Chetney ended up crash-landing, the warlock reached the ground gracefully; she then felt bad for attacking Ulli, so she cast Wither and Bloom to heal him, leaving immediately afterward at his request and helping Mend the damages caused by Chetney in the surrounding area. Later Bells Hells went to a bar, the Airy Eyrie, to celebrate, and they spoke a bit about the gods, with Laudna saying that she liked Ashton's Primordial connection more than the traditional religion; later, however, she walked away and tried to sense if her connection with Delilah was still there, and when Imogen followed her, the warlock explained how her patron had been the closest thing to a god she had ever had. They wondered if perhaps having a deity to worship would prevent Delilah regaining influence over Laudna, so while they watched the sunset they started yelling and trying to pray to the Moonweaver (the shadow sorcerer suggested that maybe Sehanine would contact them in their dreams); later, after having shared a kiss, they returned to their friends, and Laudna suddenly felt Delilah's presence, whispering that she was still hers, regardless of prayers. She, however, said nothing to her friends, and they continued partying; before going to sleep she checked her orb and confirmed that Otohan Thull wasn't nearby.
The following day, when Laudna knew Keyleth was aware of her and Chetney's performance with the skysails, she suggested the Voice of the Tempest should hire them for the next party. They all Teleported together to Yios in order to find Dancer and were attacked by Shithead. FCG kill the creature with his Destroy Undead ability which also hit Laudna, but she was able to resist its influence.[103]
After the group traveled to Bassuras, Laudna checked her scryball and confirmed Otohan wasn't in the area, after which they went to Imahara Joe's. After the warlock called inside using her creepy Prestidigitation, they discovered Joe and his friend Verna being held by General Ratanish and six members of Paragon's Call. A battle ensued and a rogue shot Laudna, causing her to take her Form of Dread and cast Fireball inside the building; an enemy monk approached Imogen and her in the roof, and the warlock used Shield to defend herself from the hits. The rest of combat she used her Eldritch Blast to attack her enemies and defend her friends; later, when a desert warden druid took the form of a giant eagle to fly away with Joe and Verna, Laudna tried Counterspelling it but discovered that ability wasn't a spell. After rescuing the tinkerers, Bells Hells killed General Ratanish when he returned after being Banished, with Laudna summoning her Hound of Ill Omen to make sure her Blight would be even more effective. After that, the mercenaries' bodies were looted (Laudna and Fearne took some bone trinkets from the druid), and the warlock repaired some of the damage to the shop. When someone outside approached the building, Laudna scared them away with Silent Image, summoning a ghostly girl through the door. Later, while most of the group was discussing the harness and its properties, Ashton left with Imogen to visit old friends, and when Laudna noticed she panicked, believing the barbarian had kidnapped the sorcerer, getting angry at Pâté for saying Ashton was nice, and calming down only when they returned.[104]

Fan art of Laudna and a dolabo, by Pyromeekorai.[art 21]
After Keyleth sent Bells Hells to Slival Laudna used Pâté as a scout, first sending him with the Flying Imogen and Orym, and later while they were in the forest. There, the warlock also used Infestation to summon fireflies to interact with the local dolabos, and that night, during watch, she stayed very still, allowing one of the lizard-like creatures to get closer to her, even if just for a few moments. The following morning, following the petition of the dolabos that FCG had met during his own watch, the adventurers went to a volcanic hill to light a bonfire. Fearne let Laudna handle the bonfire, resuming her role as her fire magic teacher, complimenting her casting of Fireball and assisting her by keeping the flames active. Bells Hells briefly fought Bari Mondolo, attracted by the fire, until it was scared away by Toriz and Jirana; during the conversation with the old galapa the warlock showed interest in the information about Evontra'vir (wondering what the tree would show her about her destiny, since she had already died twice), as well as the ghost Captain Urlu Novos (stating that she would help charm the undead privateer so he would help Bells Hells travel to Kalutha).[105]


Fan art of Laudna and the captain, by Cha Cha Rae.[art 22]
Before the adventurers summoned Captain Novos they used Speak with Dead to obtain information from the corpses of the desert warden druid and General Ratanish, and to make it easier Laudna used illusion magic to disguise Imogen as Liliana. After they were done with that they called the Crimson Abyss, and its crew tried to kill them all; luckily, the captain agreed to speak with Laudna, and she (after being affected by FCG's Turn Undead) approached and tried to appeal to their common undead nature to convince the dwarven privateer to help them, without much success. He ended up tricking her into agreeing to give him his compass and Graz'tchar (which she had described as if it was imbued with the strength of 100 holy men) as soon as they got on board, in exchange for transportation. Laudna reluctantly accepted the situation, although after shaking hands both growled at each other. After that she and her friends spent some time below deck with the crew.[106]
During her time on board Laudna spoke about her concerns about Delilah being back, and how she might be empowering her using other people's life force. She and her friends debated whether they should try to use the warlock patron's power for their own benefit (the same way the pirates seemed to have embraced their undead curse), although Imogen insisted that she wanted her girlfriend as an ally, not Delilah; Kyle, one of the skeletons of the crew, also came forward to share his opinion with the warlock, telling her that he had dealt with addiction when he was alive, and that his relationship with the archmage sounded similar. Bells Hells made two attempts to detect Delilah with magic, but failed both times.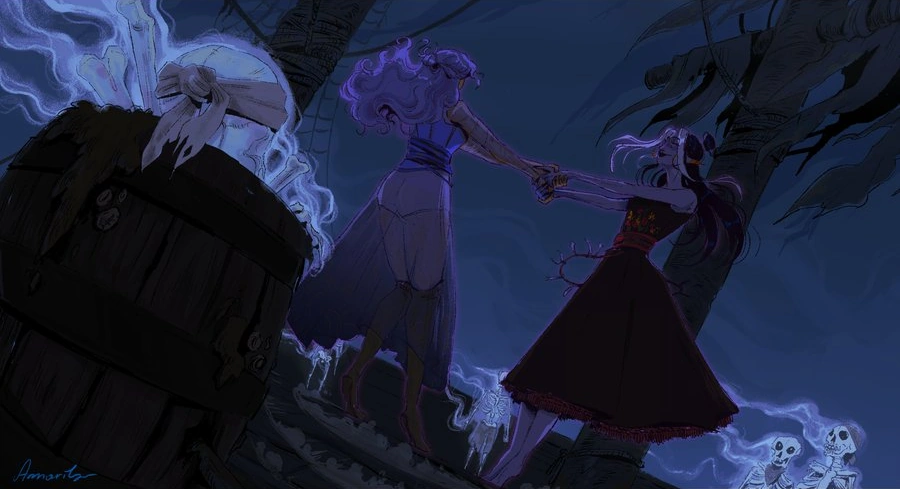
Fan art of Imogen and Laudna dancing, by Nev @ammarilyo.[art 23]
After Cyrillia and Captain Novos spent some private time together (which Bells Hells briefly spied thanks to Pâté) Laudna proposed to organize a dance party for their last day on board, and it was a success, with the warlock doing face paintings for the members of the crew that wanted it, and also dancing with Imogen.
In Kalutha, Laudna sent her familiar to explore a cliff and some caves, and when they had to climb, she cast Spider Climb to make it easier for her. When they were attacked by a basalt caecilian that Pâté hadn't noticed, Laudna used her magic against it, casting Chill Touch to prevent the creature's wounds from healing. Once the monster was killed, the shadow sorcerer explored its lair and gathered bones for her collection.[107] She also used her warlock powers to read the inscriptions inside the raito charm. When the adventurers found a river they (after sending Pâté to scout) used Ashton's hammer and the immovable rod to cross using a rope, but Laudna fell when she was trying to run over it; Ashton jumped to help her, and with some magical help from Imogen and Fearne they were able to get out of the water before a hippo attacked them. During the night, the genasi and Chetney got distracted, allowing shadow creatures to get close and attack Orym and Laudna. Ashton woke up their friends, and after the warlock tried and failed to communicate with them, he held her so FCG could Turn Undead and send those monsters away. The following day Bells Hells found the sinkhole where Evontra'vir was, and Laudna was very intrigued by it, wondering if it was connected to the Shadowfell, and even asking Pâté if he felt anything from it. They ended up jumping (some of them slowed by the shadow sorcerer's Feather Fall), and in that dark space they got the chance to speak with the Great Tree of Atrophy, who told Laudna (after she asked about the titans hurt by the gods) that not all deities were as destructive. Before the group was sent to Igthuldus, the warlock left behind one of Chetney's carvings of himself as an offering.[108]
When they were in Athos Peak Bells Hells found a crack connected to the Chynes Maw, and Laudna cast Spider Climb to access it, then using her rock chisel and her extremely gaunt body to move through that narrow space. After they reached the chamber and Ashton recovered the spark of Rau'shan (with Fearne's help), they debated for a bit about who should use the relic, until Laudna remembered that they should use their harness in order to access the power of the Emperor of Fire. Shortly after, Ludinus and his allies appeared, and the warlock used her magic against them, also summoning her Hound of Ill Omen to weaken the archmage (although the shadow dog was destroyed shortly after); when Ludinus tried to cast an extremely powerful spell, Laudna Counterspelled it, her magic resisting the wizard's own attempt of Counterspelling her, after which he jumped into the pool of magma, revealing he was actually a Simulacrum.[109]
Arc 4[]
After Bells Hells Teleported to Whitestone Laudna was somewhat nervous, although not so much as the last time she visited her hometown. When they were in Percy's workshop, learning about the newly repaired Quintessence Array, Laudna was interested in its potential uses and targets (later Chetney joked about draining some citizens from Whitestone, but she told him that the people there had been through enough). When they were leaving, she left Pâté behind so he would spy the conversation between Lord de Rolo and Allura Vysoren; although the familiar was discovered and sent away by the wizard shortly after, the warlock praised his capacity for improvisation. In the following meeting in the war room, when their allies were asking about Bells Hells and their capacities, Laudna took the chance to praise Imogen's abilities.
Later, Bells Hells talked with Gwendolyn de Rolo, and since she was interested in skeletons and scary stuff, Laudna used her spooky powers to open her skin a bit to expose her sternum; however, the child felt something dark, and suddenly scared, she left; Laudna, Imogen, and Fearne followed her, although they failed to convince her to come out of her room; however, Imogen managed to learn that Gwen had sensed hatred coming from inside the warlock, and when the two girlfriends talked about it, Laudna was even more worried about Delilah. After that, the three witches went for a walk, and in front of the Sun Tree they found a crepe seller called Andrew; Imogen, thinking he might be Whitestone Andy, tried to make him apologize to Laudna who, in turn, was somewhat disappointed at him for the unremarkable life he had now, although the adventurers soon realized that there were several men called "Andy" in town, so maybe Andrew wasn't the warlock's old crush/bully. After reuniting with the rest of the team, Bells Hells returned to the castle to rest, but the three witches rose again for another adventure during the night.[110]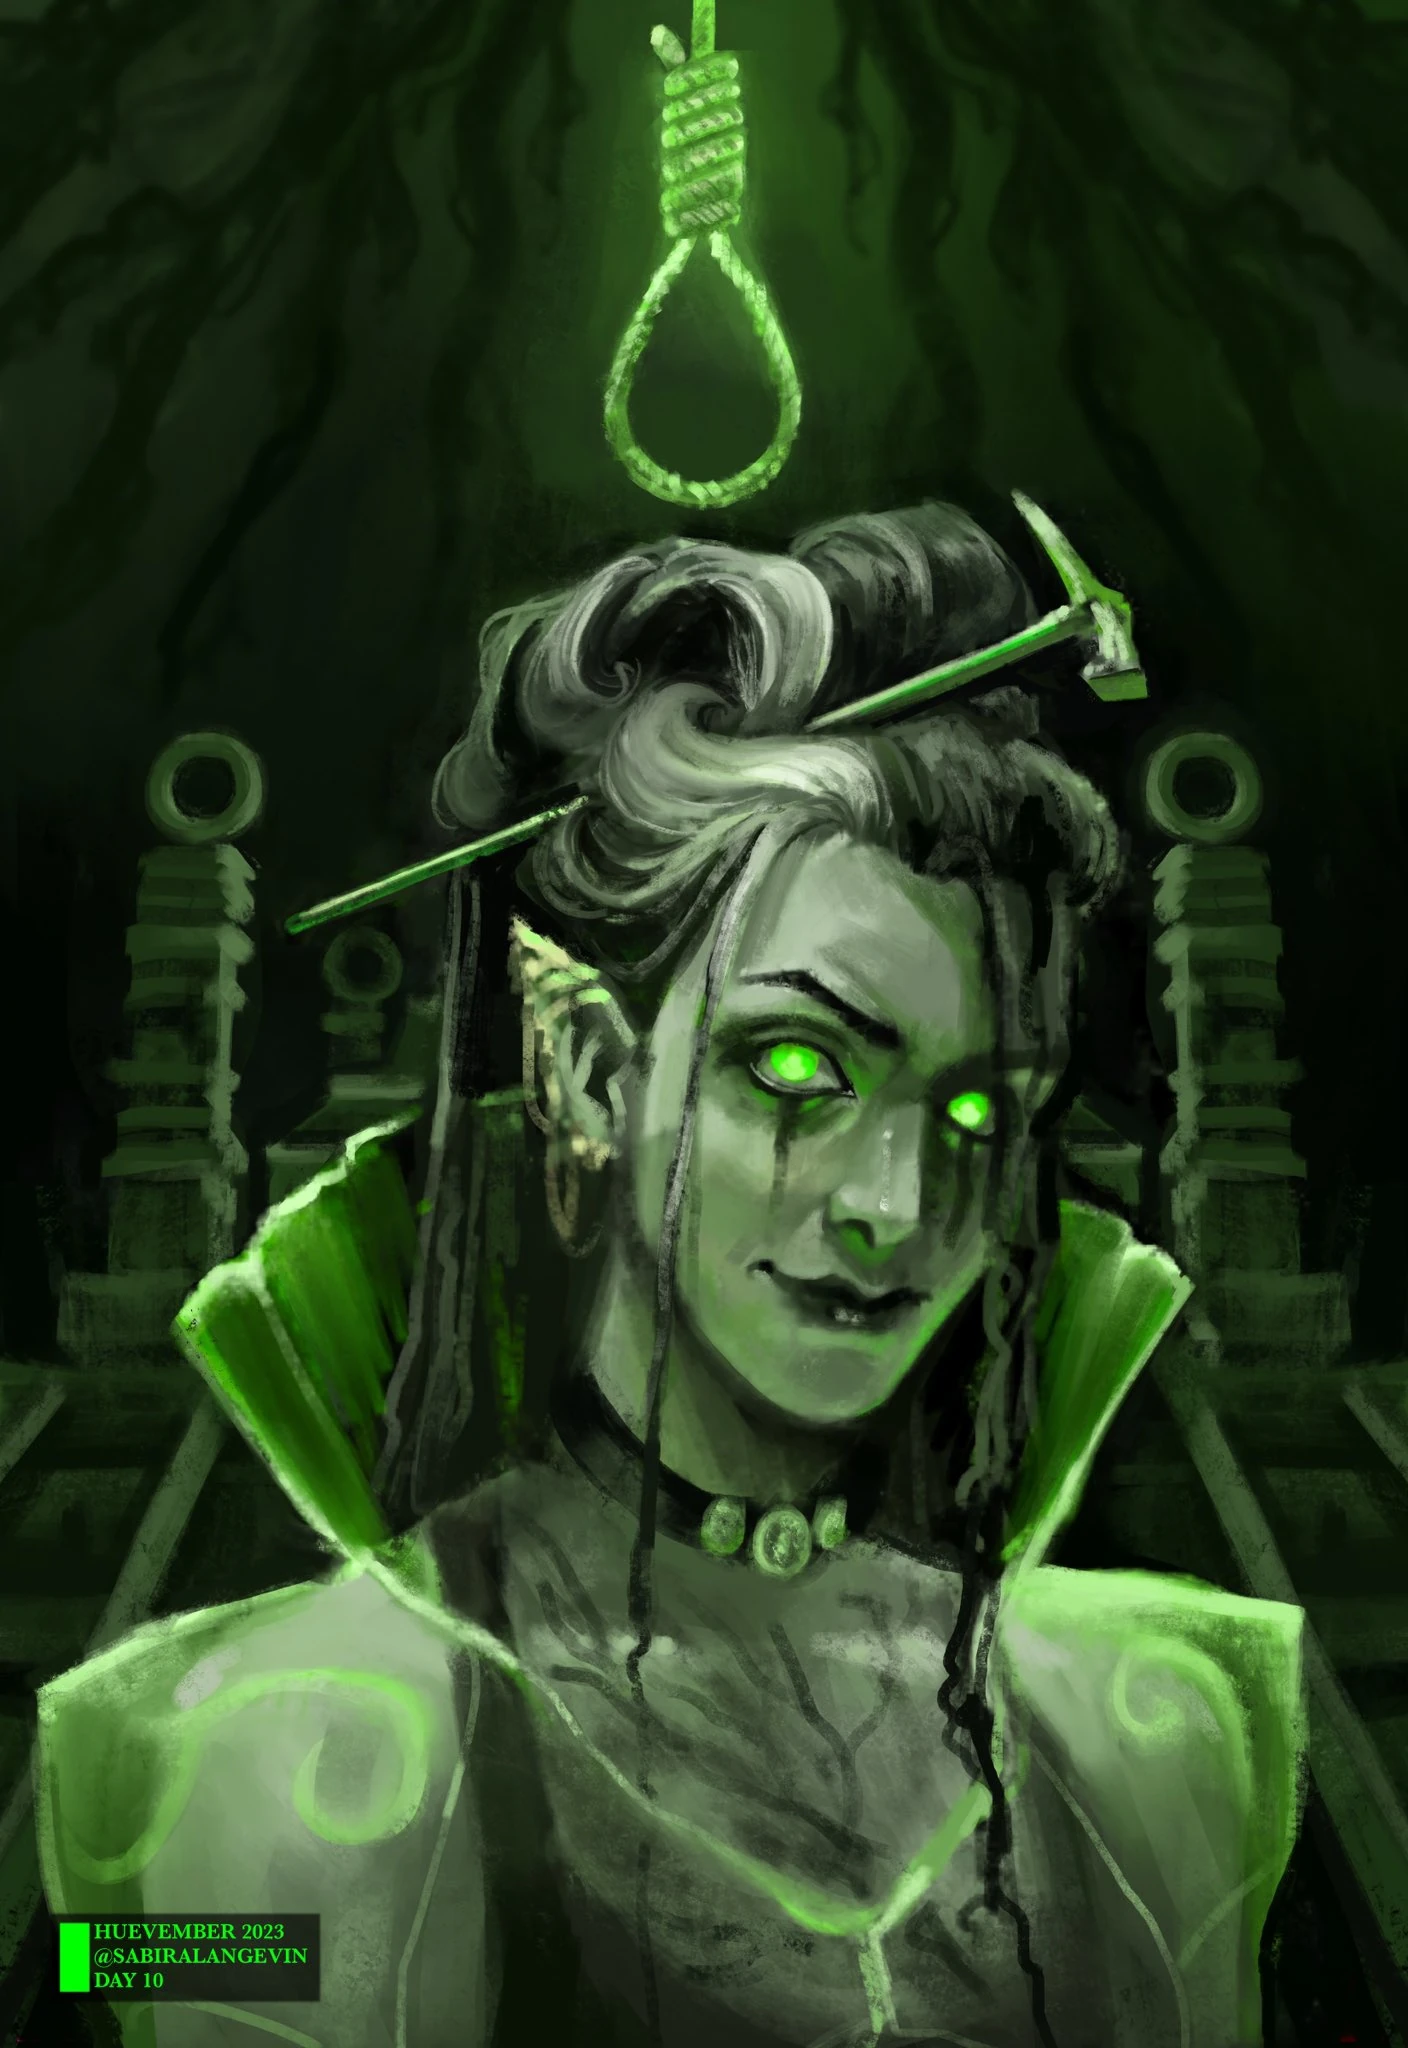
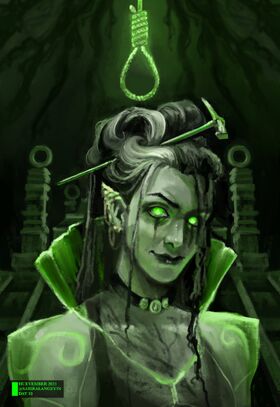
Fan art of Laudna/Delilah, by Sabira Langevin.[art 24]
The three of them went stealthily to explore the castle (stealing a wok on their way), and eventually found a room with a secret door that Laudna remembered from the first time she was there. The three friends descended into an abandoned laboratory where they were attacked by three specters who seemed to recognize Delilah's mark in Laudna. Using that, Laudna adopted a Form of Dread very similar to her patron's outfit, and summoned her Hound of Ill Omen and they were able to quickly defeat the spirits. Shortly after the fight, Delilah's voice became audible to all, naming the specters individually, as she recognized them from her time in the castle. She told Laudna that she was alive only because of her, and that both of them depended on the power of the Whispered One, so it was imperative that Laudna became stronger by feeding Delilah more energy and life, and help stop Predathos, so that Delilah's now-divine master would continue to exist. After Laudna made Imogen promise to help her if Delilah took control again (Fearne acted as a witness, and when she realized the two sorcerers were dating she expressed how happy she was for them), they returned to their rooms, with Laudna answering Delilah's private whisper by agreeing to work with her for the moment.[111]
In the morning Bells Hells spent some time together (after Laudna shared a bit of their nocturnal excursion) and the wok was given to FCG. That same day, after a meeting, Bells Hells went to the ziggurat under the castle to use the harness in a controlled environment, and Laudna felt strange, because through her, Delilah recognized that place. When Ashton wore the Quintessence Array and began absorbing the power of Rau'shan, Laudna recognized their danger and took Imogen and Chetney outside the protective bubble Allura had created, in case the worst happened. However, Ashton survived the process, facing instead the wrath of their scared friends.[112] Laudna felt extremely betrayed by Ashton and his actions, since he had gone behind their backs. Remembering Bor'Dor, she started losing control, and when she realized that Delilah wanted the elemental energy of the shard (a new one, which Ashton had vomited after his body rejected the power), she left the ziggurat, while her friends were still arguing.
She went to the tunnels, eventually finding an exit through a well in the Parchwood Timberlands; speaking with Delilah in her mind, she wandered for a while, eventually finding her old house, with graffiti, marks of burning, and other forms of vandalism. The Hollow One and her patron spoke about what had happened, and about the pains and rewards of love and relationships; while she was there, Laudna made a new doll, using the materials she found in the ruins, eventually falling asleep, surrounded by Delilah's shadows.
The following day the rest of Bells Hells found Laudna in the forest, but she was still nervous and ran away from them for a bit, eventually interacting with them, reuniting with Imogen (who had been very worried), and speaking to Fearne, since she thought that Ashton had manipulated the faun somehow. She also spoke to the genasi later (they had stayed behind following Imogen's advice), and she gave them the doll, that was supposed to represent them; the barbarian said they liked it a lot, which let to a somewhat tense reconciliation. Since Bells Hells needed to reconnect with each other before going on their next mission, they decided to travel (with Allura) to Ligament Manor, so they could recover without wasting time on the Material Plane. When they were there and they spoke about the spark of Rau'shan, Laudna, who didn't want to know where the crystal shard was, stated that she would leave the room if necessary, so the relic wouldn't be a temptation for Delilah.[113]
Laudna learned from Allura about her own past as adventurer. She was with Imogen when the sorcerer decided to remove the Circlet of the Hidden Eye, and although Laudna was concerned about this decision, she supported it, understanding the desire of taking power from a questionable source like she was doing with her warlock patron. Later, when Morri examined the Spark of Rau'shan and the Quintessence Array, Laudna went to a corner and faced the wall in order to avoid temptation. During the team-building exercises organized by Fresh Cut Grass and the Fatestitcher, in the phase about honesty, Laudna admitted Delilah's influence over her and her strong desire for the shard, saying that she was having trouble separating her own desires and opinions from Delilah's; she agreed with Fearne's fear that they weren't going to save the world and confessed that she fantasizes about walking away from the problem; she agreed with Imogen that she was disappointed in Fearne for not taking the shard; she also let her friends ask questions to Pâté about his general feelings (or the lack of them). Later, she and Fearne guided a blinded Imogen very effectively during the phase about communication.[114] In the phase about trust, in which they had to look for ivory branches in a ruin while dealing with the potential presence of doppelgangers, Laudna was very paranoid about who in the group might have been replaced by a shapeshifter, but she focused on finding the branches, managing to reveal the first one after using Wither and Bloom to clear the terrain; she also used Pâté to chase a fey thief with a second branch, and to check if FCG was the real him (he was); at the end, despite the general suspicion (during which Laudna summoned her Hound of Ill Omen) the group trusted each other and successfully completed the exercise.
After the trials Bells Hells spoke for a bit, and Laudna mentioned again how they were probably going to fail their mission, although insisting about how they should accept the small contributions they could make to that cause. Fearne decided she was ready to take the shard and after some preparation in the garden (during which Laudna had to resist Delilah's influence to avoid going after the relic), the Quintessence Array began to absorb the spark of Rau'shan. The faun took a lot of damage, but with her friends' help (which included Laudna casting Wither and Bloom two times to send the surrounding plants' vitality into Fearne) she managed to survive. The warlock showed her support to her friend, and even offered her to teach her how to deal with her new powers (the same way Fearne had taught Laudna how to use fire to cast Fireball for the first time).[115] Laudna collected some charred bones from the garden and spoke with her friends while Ashton and Fearne were gone trying their new powers; eventually, when the whole group was together again, they used FCG's Shared Dream to check Imogen's attempt approaching the red moon, after which Laudna was worried about her girlfriend, since she had been apart from them by the end of the spell's duration.
The following morning Bells Hells and Allura returned to Exandria, appearing near the Red Center the same day they had left. After a meeting with some allies, Keyleth decided to escort them as close to the excavation site as possible, and before they left Laudna had the chance to speak with her, complimenting her and inquiring if she was still worried about the Champion of Ravens. The warlock promised the archdruid that she and her team would do their best gathering information in Ruidus, although she became unsettled when Keyleth apologized for everything that was happening.[116]
When they arrived at the ruins, the adventurers tried to interfere with their enemies' plans on the way to Bloody Bridge, and when they encountered two reilora Laudna sent an invisible Pâté as a scout; however, he was crushed by one of the Ruidian warriors. Imogen and Chetney tried to improvise by pretending she was a member of the Vanguard capturing a gnomish intruder and commanding the rest of her group to find more; however, Laudna wasn't particularly convincing, so one of the reilora attacked and there was a confrontation. They were victorious, and shortly after they fought two more reilora in order to rescue a prisoner, and Laudna managed to kill one of them with her Eldritch Blast. When they were closer to the Malleus Key and its red beam the adventurers saw Otohan giving orders to her people before returning to battle, and when she saw her, Laudna (who had been checking her scrying orb during the mission), confirmed that the leader of Paragon's Call still had the tracking ring with her. Knowing people in the excavation were increasingly alert, Bells Hells used a diversion, and Laudna and Fearne helped detonate two bombs Imogen Catapulted into the air. A brief battle with reilora and members of the Vanguard ensued, during which the members of Bells Hells touched the Bloody Bridge one by one, with Laudna being the second one, accessing it thanks to her Spider Climb spell. Eventually the entire group reached the Moon of Ill Omen.[117]
The adventurers spent some time trying to avoid the enemies in the area, and Laudna helped distracting them, first by casting Phantasmal Force so that one of the juggernauts would "see" Bells Hells running away in the wrong direction, and then casting Darkness to confuse people, which Imogen improved by casting Seething Storm inside the dark globe; while they were doing that Laudna realized that her tracking orb was shining, indicating that Otohan was approaching. Eventually Bells Hells managed to leave and turned into clouds to fly above the surface of the red moon, spending some time moving with a herd of buffalo-like creatures until they found a cave to hide. There Imogen realized that she and Fearne were connected and empowered by an ethereal tether as Ruidusborn, which made them really excited (although they also tried to make Laudna feel included, as their third witch). While they were in the cave Laudna took the chance to Summon Pâté again, and after Imogen tried to connect with the God Eater and woke up very startled, her girlfriend made sure she was ok and expressed her discomfort when she noticed that Orym was pressuring her too much about using the connection with Predathos to their advantage. Later Laudna tried to use her familiar to find the juggernaut they had trapped inside the bag of holding, and althougn Pâté failed, they ended up accessing the corpse of the warrior, which had suffocated inside the bag, and FCG dismembered it to take it out (although they kept the head and the arms).
Bells Hells continued traveling in cloud form until they found a Ruidian village inhabited by some Imperium-aligned Reilora, as well as an entirely different sentient species, the bormodos. The adventurers revealed themselves to one of the latter, Dono, and Imogen (with Laudna's support) managed to convince them not to scream, despite the surprise.[118] After they gained Dono's trust by having a light conversation with him (during which Laudna introduced him to Pâté), he agreed to introduce them to Elder Barthie, so they traveled to his home, and only there did all members of Bell Hells recover their physicial form. After some initial cautiousness about their potential connection with the Ruby Vanguard Barthie agreed to speak with them and exchange information about Ruidus and Exandria; during that conversation Laudna and Chetney used illusion magic to conjure the visages of Ludinus and Otohan, confirming they had been in the area weeks ago. Shortly after a battle ensued when Willmaster Edmuda and her allies appeared. Laudna took the initiative by Hexing the reiloran leader and casting Fireball against her forces; this, however, caused one of them (Petrov Godo, a teenager Ruidusborn) to awaken his power as an Exaltant, casting Telekinesis to hold the warlock that had just attacked them. Laudna tried to protect herself with Mirror Image, but despite her efforts the young Exaltant hit her with Blight. She got free when Orym knocked the teenager unconscious, and then she killed one of the Reiloran Shrikes with Eldritch Blast.[119]

Fan art of Laudna killing Edmuda, by Melissa Hahn.[art 26]
The adventurers took Edmuda, Petrov and Verdo in order to interrogate them, and after the former tried to use her powers against them, they used the Quintessence Array to take them away for a day, granting Orym a temporary boon. During the process of interrogation Laund used her Unsettling Presence and Form of Dread to intimidate the three prisoners, even threatening the third letting him know that Imogen was the daughter of Liliana Temult and that he shouldn't betray or disappoint her. Since Bells Hells had convinced the two young recruits of the Vanguard that the Willmaster was a traitor to leave behind, they were planning on killing her by completing the process with the harness that would grant Orym a permanent boon. However, when they discovered that Otohan was near and they had to leave, Laudna decided that if Edmuda had to be killed quickly it shouldn't go to waste, so she consumed her life force with Hunger of the Shadow, whispering to the reilora that she should have obtained her powers instead of Orym (and gaining Delilah's approval in the process).
Bells Hells traveled as fast as they could in cloud form, eventually hiding from a storm in a deep cleft in the ground. There they explored deeper until they found a stream of underground water that led them to a waterfall and the ruins of an elven building with gardens still flourishing, that Laudna helped access using Spider Climb and her immovable rod. They found the remains of the local inhabitants, probably taken away along with the Exandrian land used to form Ruidus. Laudna decided to keep a porcelain doll that would have belonged to an elven child.[120]

Fan art of Laudna's Animate Objects, by iwilltryalittlearter.[art 27]
After Fearne discovered an aquatic portal connected to Exandria and the witches spoke in favor of taking a risk, the adventurers went through it, appearing in Lake Umamu near the abandoned village of Ria'Doin. They investigated, and Laudna found a clerk's office with several documents describing strange events, including disappearances, people abandoning their homes in a hurry, and individuals suddenly walking into the lake. Despite this, Bells Hells decided to rest in one of the houses, but during the night, people started behaving strangely, feeling the urge to go outside. Suspicious, Laudna sent Pâté to check, but he didn't see anything weird; however, the warlock made him go with Ashton, and they, along with Orym, Chetney and FCG, walked into Lake Umamu (although still protected by Fearne's Water Breathing), where a strange entity grabbed them with its tendrils. Laudna went to the dock and cast Animate Objects, bringing a rope (Ropy) and a boat (Boaty or the Queen de Rolo, which grew muscular arms) to life, using them to go rescue her friends under the surface while assuming a Form of Dread similar to the undead pirates of the Crimson Abyss. Chetney and Fresh Cut Grass got on board, and Laudna tried to intimidate the enemy, although it went so bad the tendrils attacked, being stopped by Boaty. FCG, who had failed trying to Turn the undead entity, made a second attempt, and it worked... Both for the enemy and for Laudna, so while the shadowy entity retreated, the Hollow One commanded her boat to bring them to the surface as fast as possible. As soon as they reached the dock, Animate Objects ended, and both Ropy and the Queen de Rolo sank.
Since the influence of the undead creature of the lake was too dangerous to stay the rest of the night, Bells Hells decided to return to Ruidus through the portal. During her watch, after an existential conversation that lost solemnity when Pâté farted, Laudna sent the familiar away and walked to have some privacy. She then talked to her patron, and she and Delilah had a similar existential conversation, during which the wizard told her that, despite the dangers (and the warlock's own concerns about Delilah growing stronger), it was good that Laudna was getting more powerful, since it meant she could protect the ones she loved, especially Imogen, and she assured that if the warlock was able to give her more power, she would grant more boons in return; during the conversation Laudna also wondered if Delilah was Pâté somehow, but she confirmed that despite the magic keeping them connected, they weren't the same. Before the end of the conversation, the necromancer managed to appear visually in front of the adventurer for a few moments, promising her both of them would endure. The next day the group decided that a Ring of Life Awareness they had stolen could be tracked, so they destroyed it by letting Laudna absorb its power with the harness, which granted her more health and some temporary boons to her attacks and abilities. After that, they traveled to Kreviris.[121]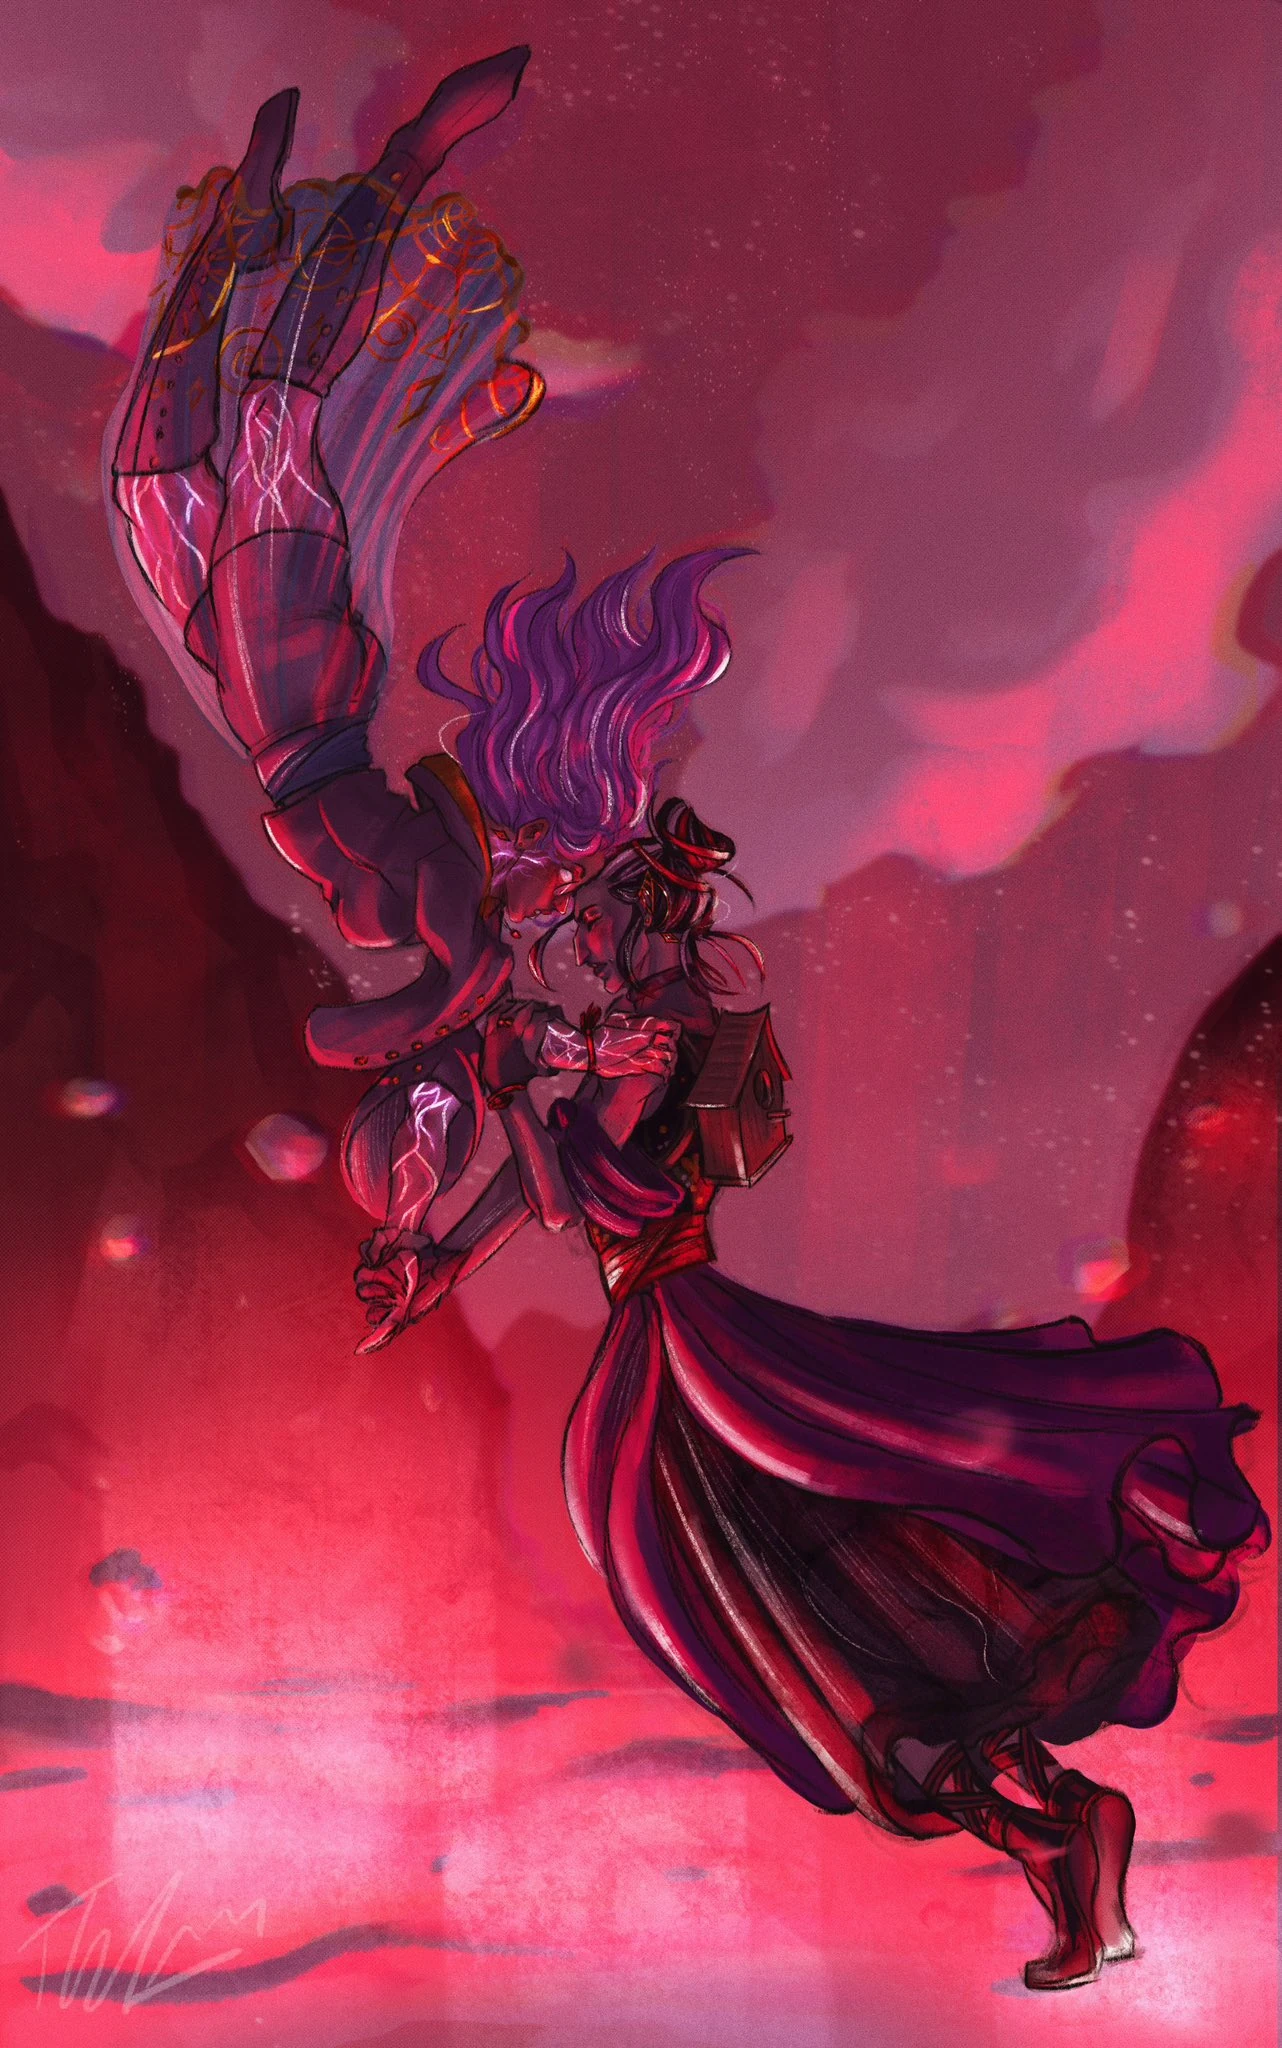

Fan art of the Ruidus flare, by Rachel F. (TheWhaleLord).[art 28]
As they were approaching to the city Ruidus flared once more, and this time, as Imogen started to float, Laudna held her hand to make sure she stayed with them.
Bells Hells stopped in one of the outposts of Kreviris, Tyran A, and while they were there Laudna sent an invisible Pâté to scout the area; after getting some water without raising suspicion Bells Hells continued. After meeting a couple of friendly children in the Clutch, a humble neighborhood, they were stopped and interrogated by a group of reilora riding avadons, but that conversation led to combat. Laudna cast Bane successfully on most of the enemies, and after Ashton killed one with his hammer, he let the warlock cast Blight through it so that she could hit several enemies with a single spell, and it worked; they managed to kill them all and take a box they were carrying with them. After the battle Laudna took a moment to sent Pâté again and intimidate an old reilora that had witnessed what had happened, and then she checked her tracking orb, panicking when she noticed Otohan was relatively near, in the entrance of the valley. The group continued, and in the Jagged Edge they met with Zhesh and her colleage Jidoh; the former agreed to help them meet a person connected to the Volition, and while she was there, Laudna convinced them to give them a glass figurine. The adventurers then hid in the cellar, and while they were planning their next move, Laudna checked the orb again, confirming Otohan was indeed approaching. Not long after, Bells Hells heard how Imperium agents entered the Jagged Edge looking for them, and the shadow sorcerer cast Darkness in the cellar as a precaution;[122] she also tried to lock the door with her immovable rod, but decided against it when she heard how Zhesh was being threatened. Since Laudna was the only one capable of seeing in magical darkness, she telepathically guided her friends as slithers were sent to the cellar to investigate; when one of the monsters began to attack Imogen and Laudna failed to distract it with a severed reiloran finger, she instructed Fearne to replace it with her Wild Shape to buy time, which ended up saving the team, as the patrol left following a false trail indicated by the druid. After that the adventurers stayed in the shop for a while, and Laudna acquired a glass stiletto to arm her doll Sashimi; she also used her powers to read the runes of the Aeorian relic discovered inside the box they had stolen, explaining they were abjurative in nature.
After they left Laudna checked the scry ball to make sure Otohan wasn't approaching, and then the group went to the Overspoke tower to locate the safe house of the Volition; while they were there, the warlock acted as the "bodyguard" of her girlfriend (who was being recognized as Liliana's daughter) to make sure no one got too close to her. When they finally met the rebel group, Laudna helped convincing them they were trustworthy by showing them the corpses of the Imperium soldiers they had defeated.[123] After they were accepted as allies they spoke for a bit with the rebel leader, Rashinna, who wanted them to prove themselves by joining their imminent missions against Kreviris, dismissing Laudna's offering of checking the knowledge of Ruidian history that the adventurers had acquired so far. While they were there the warlock checked her scrying orb, noticing that Otohan was at the heart of Kreviris, although later in the night she returned to the surface.
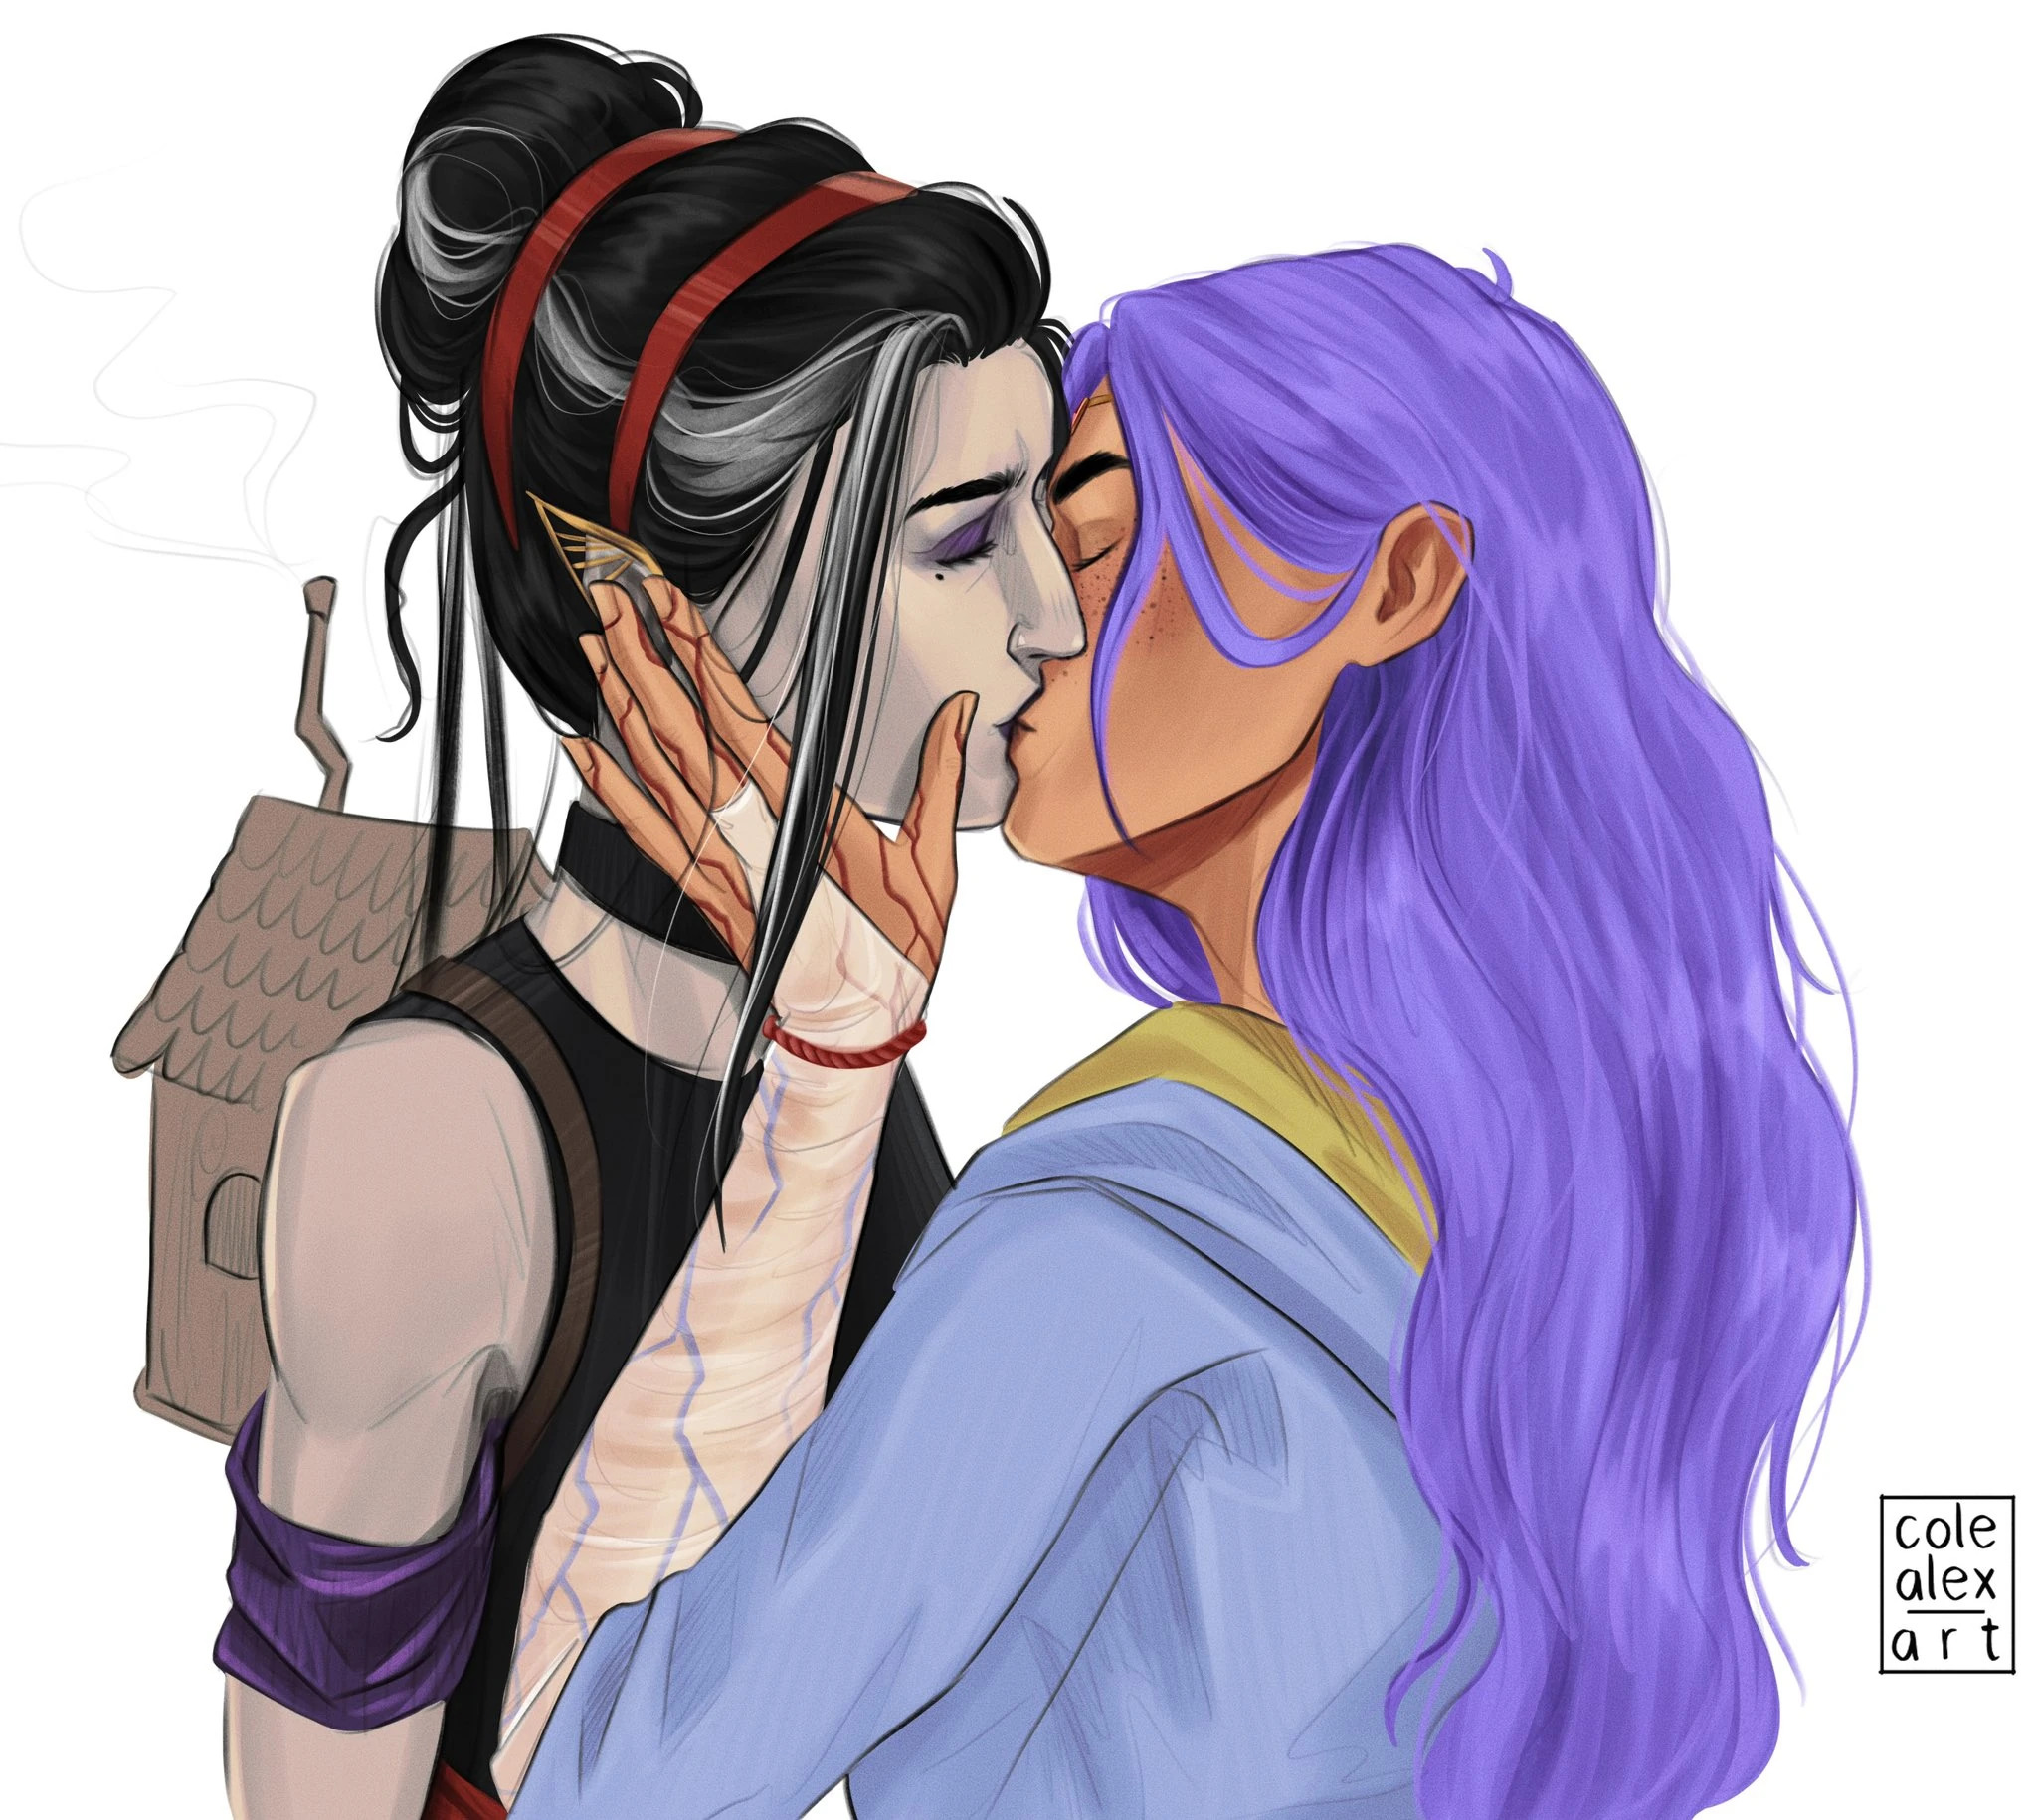

Fan art of Imogen kissing Laudna, by Cole Alexander.[art 29]
The following morning Laudna decided to speak with her girlfriend, since she had had a difficult night after talking to Liliana in her sleep: the two sorcerers agreed that the circumstances had created some distance and tension between them, and that Delilah wasn't helping; Imogen even expressed some resentment because Laudna had somehow "invited" her patron back in her head. The warlock assured her that hadn't been the case, and even claimed that she didn't fully understand her symbiosis with the archmage. Imogen, however, stopped the argument by kissing her, and they reconciled, with Laudna assuring that she believed his girlfriend was very special and could save everyone. Later, while Rashinna was talking about the missions, Laudna made a couple of comments about the plans to deal with Liliana, causing the rebel leader to dismiss her concern and call her "sweet girl", immediately retracting it when the Hollow One used her. Unsettling Presence. Laudna, Imogen, Orym and Chetney decided to investigate the disappearance of Evoroa, a scientist. Although the old gnome refused, the rest of that team accepted the offering of Ivanas (an elderly reilora mystic) and received the benefits of the Invisibility and See Invisibility spells.[124]
The team moved through the streets of Vaterra Kreviris without being seen, noticing there was a lot of activity and even music, and that some of the Ruidians seemed to be preparing to move out of the city; on their way there, Laudna checked her scrying orb, noticing that Otohan was in the center of the Prime Pillar. When they reached the base of the gargantuan glass structure, they decided to access through one of the balconies, and Laudna, with some difficulty, managed to Spider Climb and use her rope and immovable rod to help her friends. Shortly after they discovered that Gona, Evoroa's cytaa, was in one of their satchels, and after the small creature offered to help them, they briefly discussed how to transport her; Laudna briefly offered her doll house, but agreed that staying under Imogen's clothes was better, since Pâté's interaction with Gona could have been weird. They kept moving, avoiding Ruidians and members of the Ruby Vanguard, until they reached an arcane laboratory with several jars with failed experiments (some of which Laudna inspected, reading the labels), as well as Evoroa herself, who was being kept unconscious and floating in liquid inside a glass compartment. After the roar of an explosion (caused by the other half of Bells Hells) caused most reiloran scientist to evacuate the facilities, the adventurers decided to attack the only two that stayed in the room; Laudna (who had previously failed to scare the remaining scientist away with her Unsettling Presence) contributed by casting Blight and Eldritch Blast against a young vidulch one of the reilora had freed. When the battle was over they rescued Evoroa and the warlock used Wither and Bloom to heal her a bit, after which they looted the laboratory (with Laudna taking some lab specimens) and Imogen hid the whole group with Invisibility so that they could leave the building the same way they had entered, just in time to see an angry Liliana Temult flying in the distance; while they were leaving Laudna checked her orb again, noticing Otohan was coming down too.[125]
Laudna and her group continued moving with Evoroa, with the warlock using Pâté as a scout, and constantly checking her orb, noticing Otohan was in the same level of the city than them; they lost their invisibility after the Prime Pillar released an abjurative wave, but recovered it when Imogen recast the spell for everyone but herself. After a brief but harmless encounter with Liliana (who had Scried on Laudna to locate them) they were stopped by the Weave Mind themselves, who, through illusory manifestations, talked to the group, addressing even the invisible ones; they noticed Delilah's presence within Laudna, and tried to tempt her. The mystics disappeared after noticing resistance in the group, and shortly after, the other half of Bells Hells arrived. Together again, the group followed Evoroa's instructions to locate the tunnels that would lead them outside Vaterra Kreviris. Laudna noticed (thanks to her orb) that Otohan was near, casting Mirror Image as a precaution, and despite their efforts, the Legend of the Peaks reached Bells Hells, and a battle ensued.
Laudna summoned her Hound of Ill Omen (who she and FCG decided to name Carpaccio Caviar) and Baned Otohan, but she proved to be incredibly dangerous when she killed Chetney in only a few seconds (although he was Revivified by FCG moments later). The psi warrior resisted the warlock's Blight and attacked her several times, completely destroying her Mirror Images before hitting her real body. Despite this Laudna kept going, and although she failed trying to use Hunger of the Shadow against their enemy, she hit her again with Blight, forcing her to unleash her Exaltant Fury. The leader of Paragon's Call started focusing on the party's healer and knocked FCG unconscious, but Laudna retalliated while healing. Although the warlock's hound was unable to hurt Otohan, she still used its support and attacked the Exaltant with Eldritch Blast; at some point, trying to trick her, she used Phantasmal Force to make her believe that Liliana Temult had arrived to stop her, but the enemy resisted the spell. Laudna then witnessed how a very stressed but determined FCG sacrificed himself by detonating his own core with Guiding Bolt, killing both himself and Otohan in the process. After that, the group, devastated, took Otohan's corpse and Fresh Cut Grass's metal remains and left with Evoroa.
Relationships[]
Imogen Temult[]
- → Main article: Relationship between Imogen and Laudna
Imogen is Laudna's closest ally, whom Laudna met in 841 PD[126][127] while she was in Imogen's town; they "hit it off really well" and decided to start traveling together.[128] They shared a goal: to try to enter one of the conservatories located in the Spires so Imogen can do research.[129] They had been staying together in Jrusar with their landlady, Zhudanna.[130]
Laudna will often wake when Imogen has a nightmare and sometimes observes Imogen without waking her up as it happens. After Imogen awakens, she comforts her and talks about what Imogen saw in the dream.[131][132]
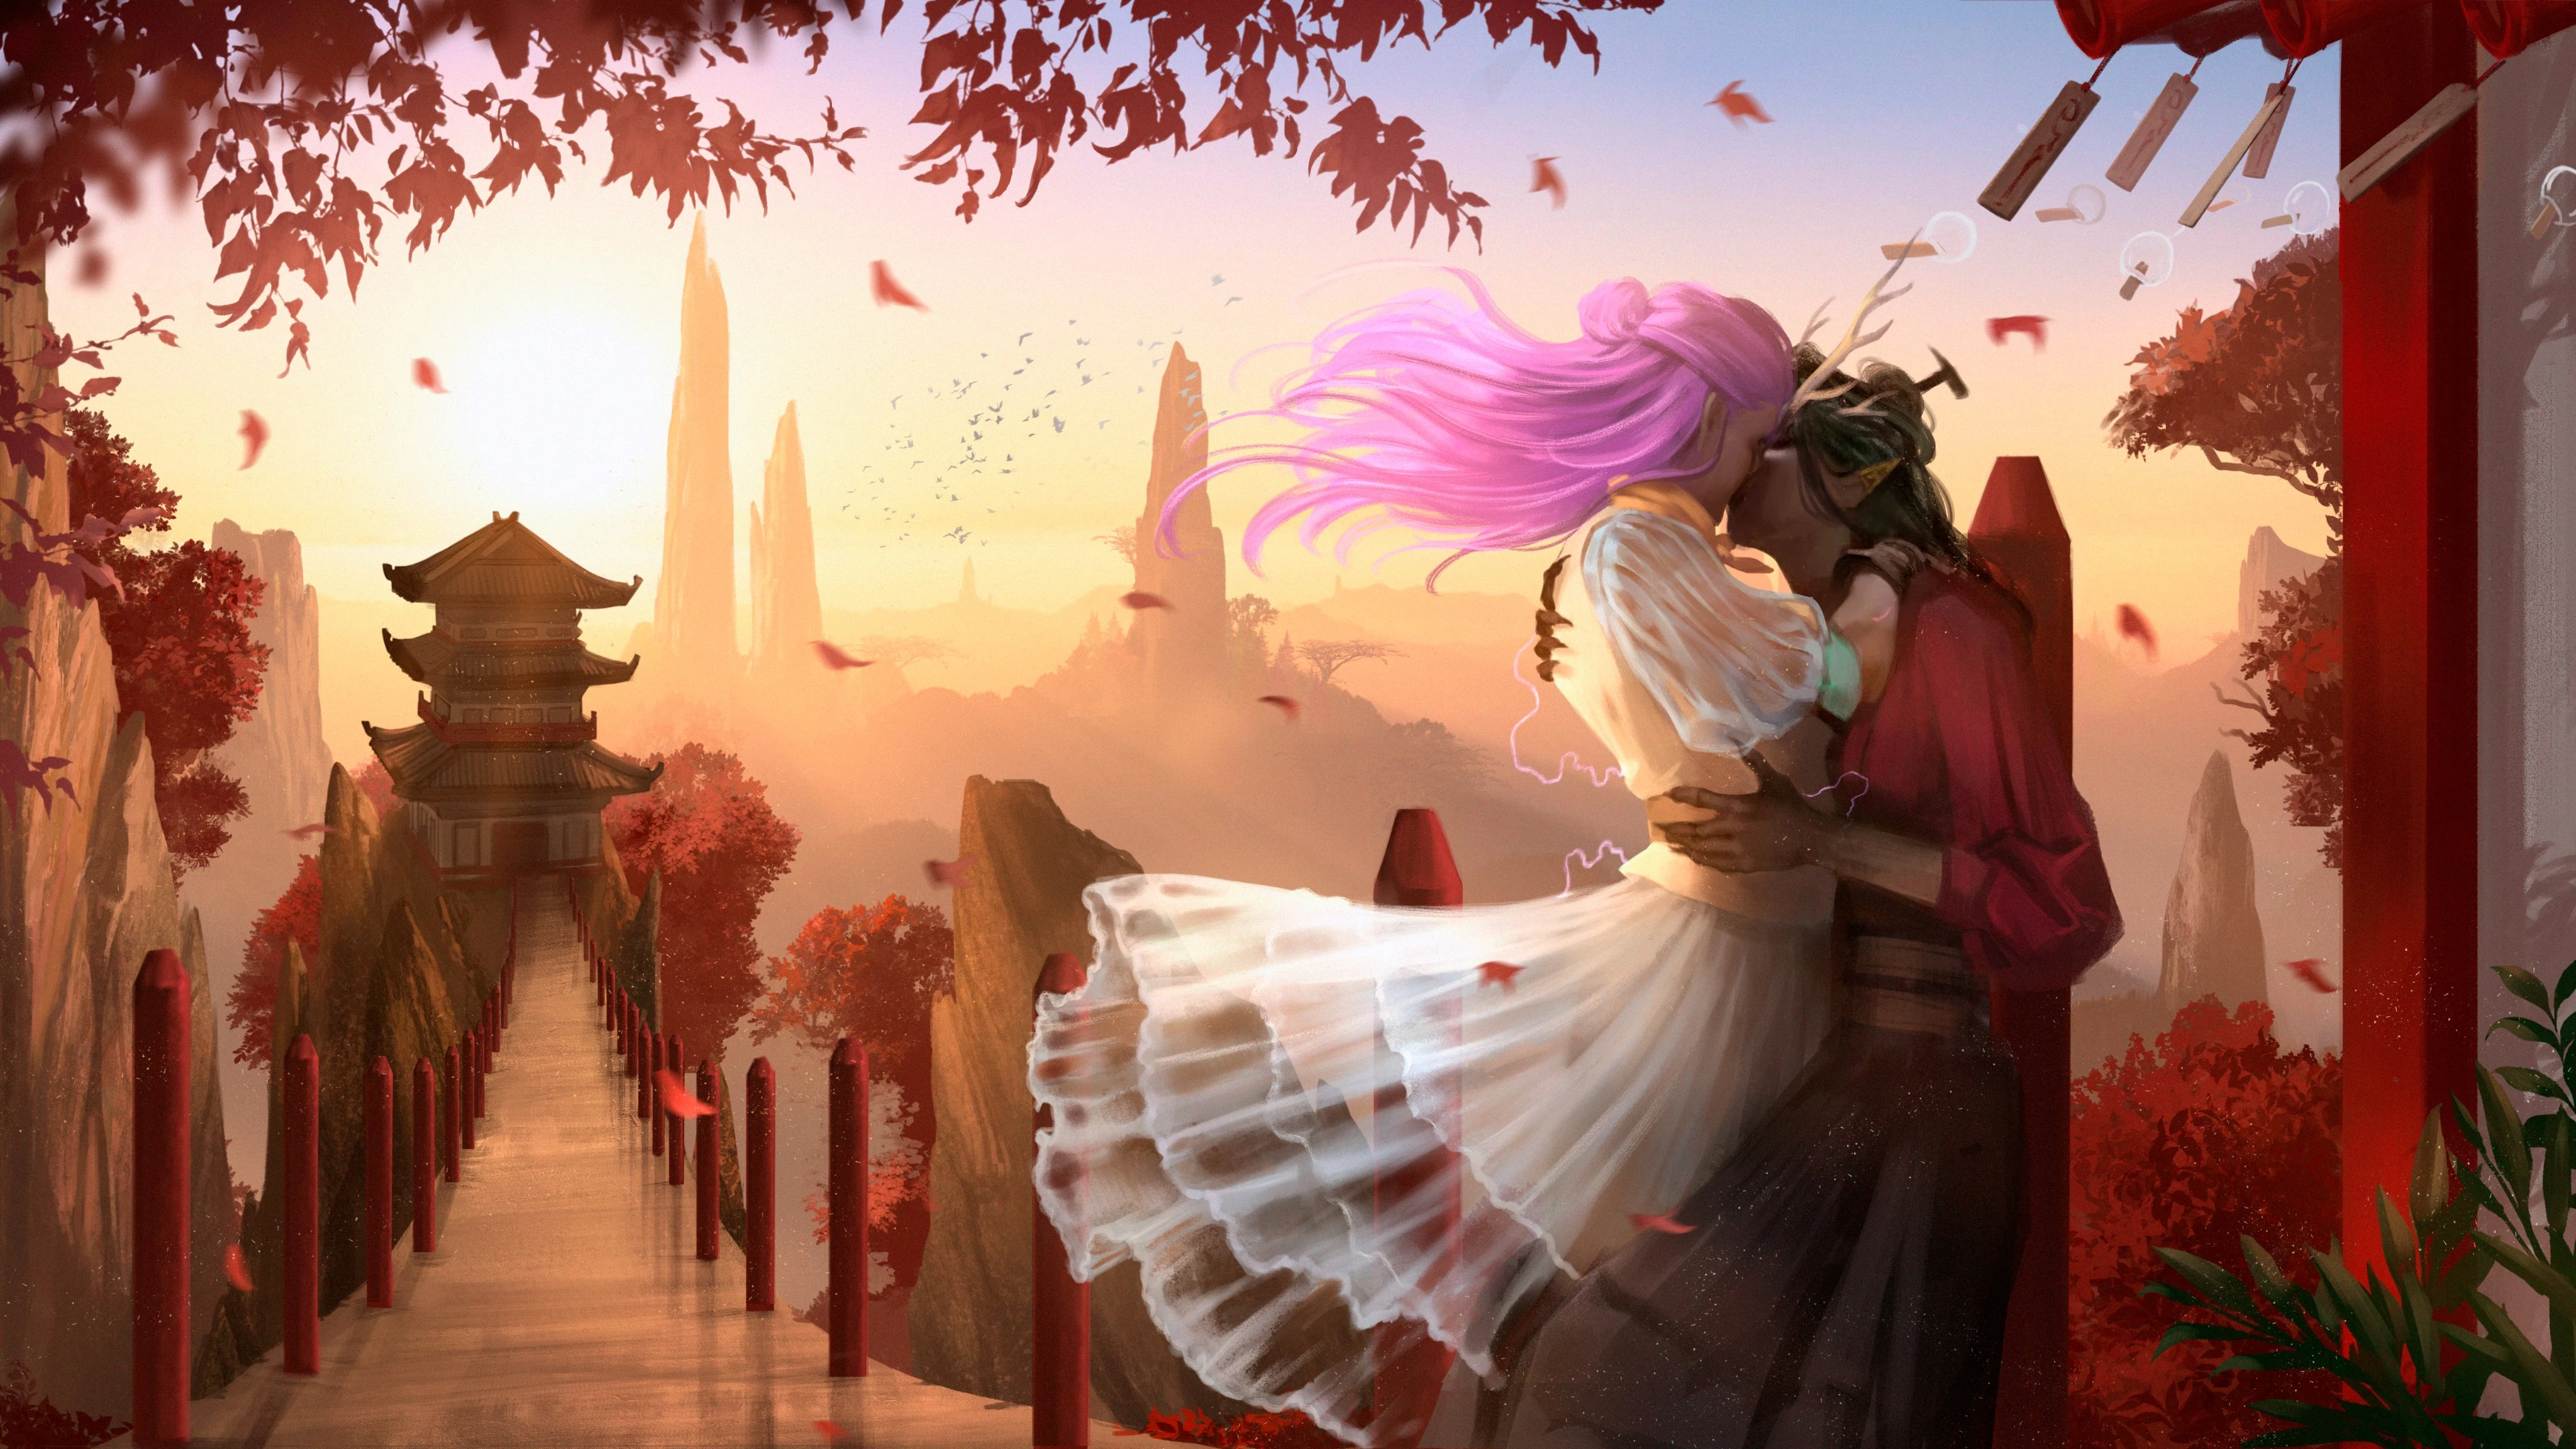

Fan art of Imogen and Laudna's kiss, by BlackSalander.[art 30]
Although they had a brief estrangement when Laudna accidentally destroyed Imogen's Gnarlrock, they soon reconciled and remained close friends, with Imogen being the main advocate of resurrecting Laudna when she was killed, and the one who most aggressively wanted revenge on Delilah for manipulating her. In more recent times both sorcerers have expressed their mutual affection and love, being each other's support, and showing similar concern whenever they were separated. During the separation of the two halves of Bells Hells following the events of the Apogee Solstice, Imogen repeatedly expressed worry and concern about Laudna. Their reunion was at first a bit strained with both showing a bit of jealousy toward the new friendships they had each made, but when they had a chance to talk alone, they each apologized and Imogen asked if she could kiss Laudna, since she could no longer hear her thoughts, and Laudna, taken by surprise, said yes. Later, Laudna kissed Imogen again when she insisted Laudna wasn't a bad person after hearing some of what had happened during their time apart.[133]
Although their relationship has been good so far, the shadow of Delilah has created some tension between them, with Imogen insinuating that perhaps Laudna had "invited" her back somehow, to which the warlock replied by assuring her that she didn't even understand the symbiosis she had with her patron, although it wasn't completely true.[134]
Delilah Briarwood[]
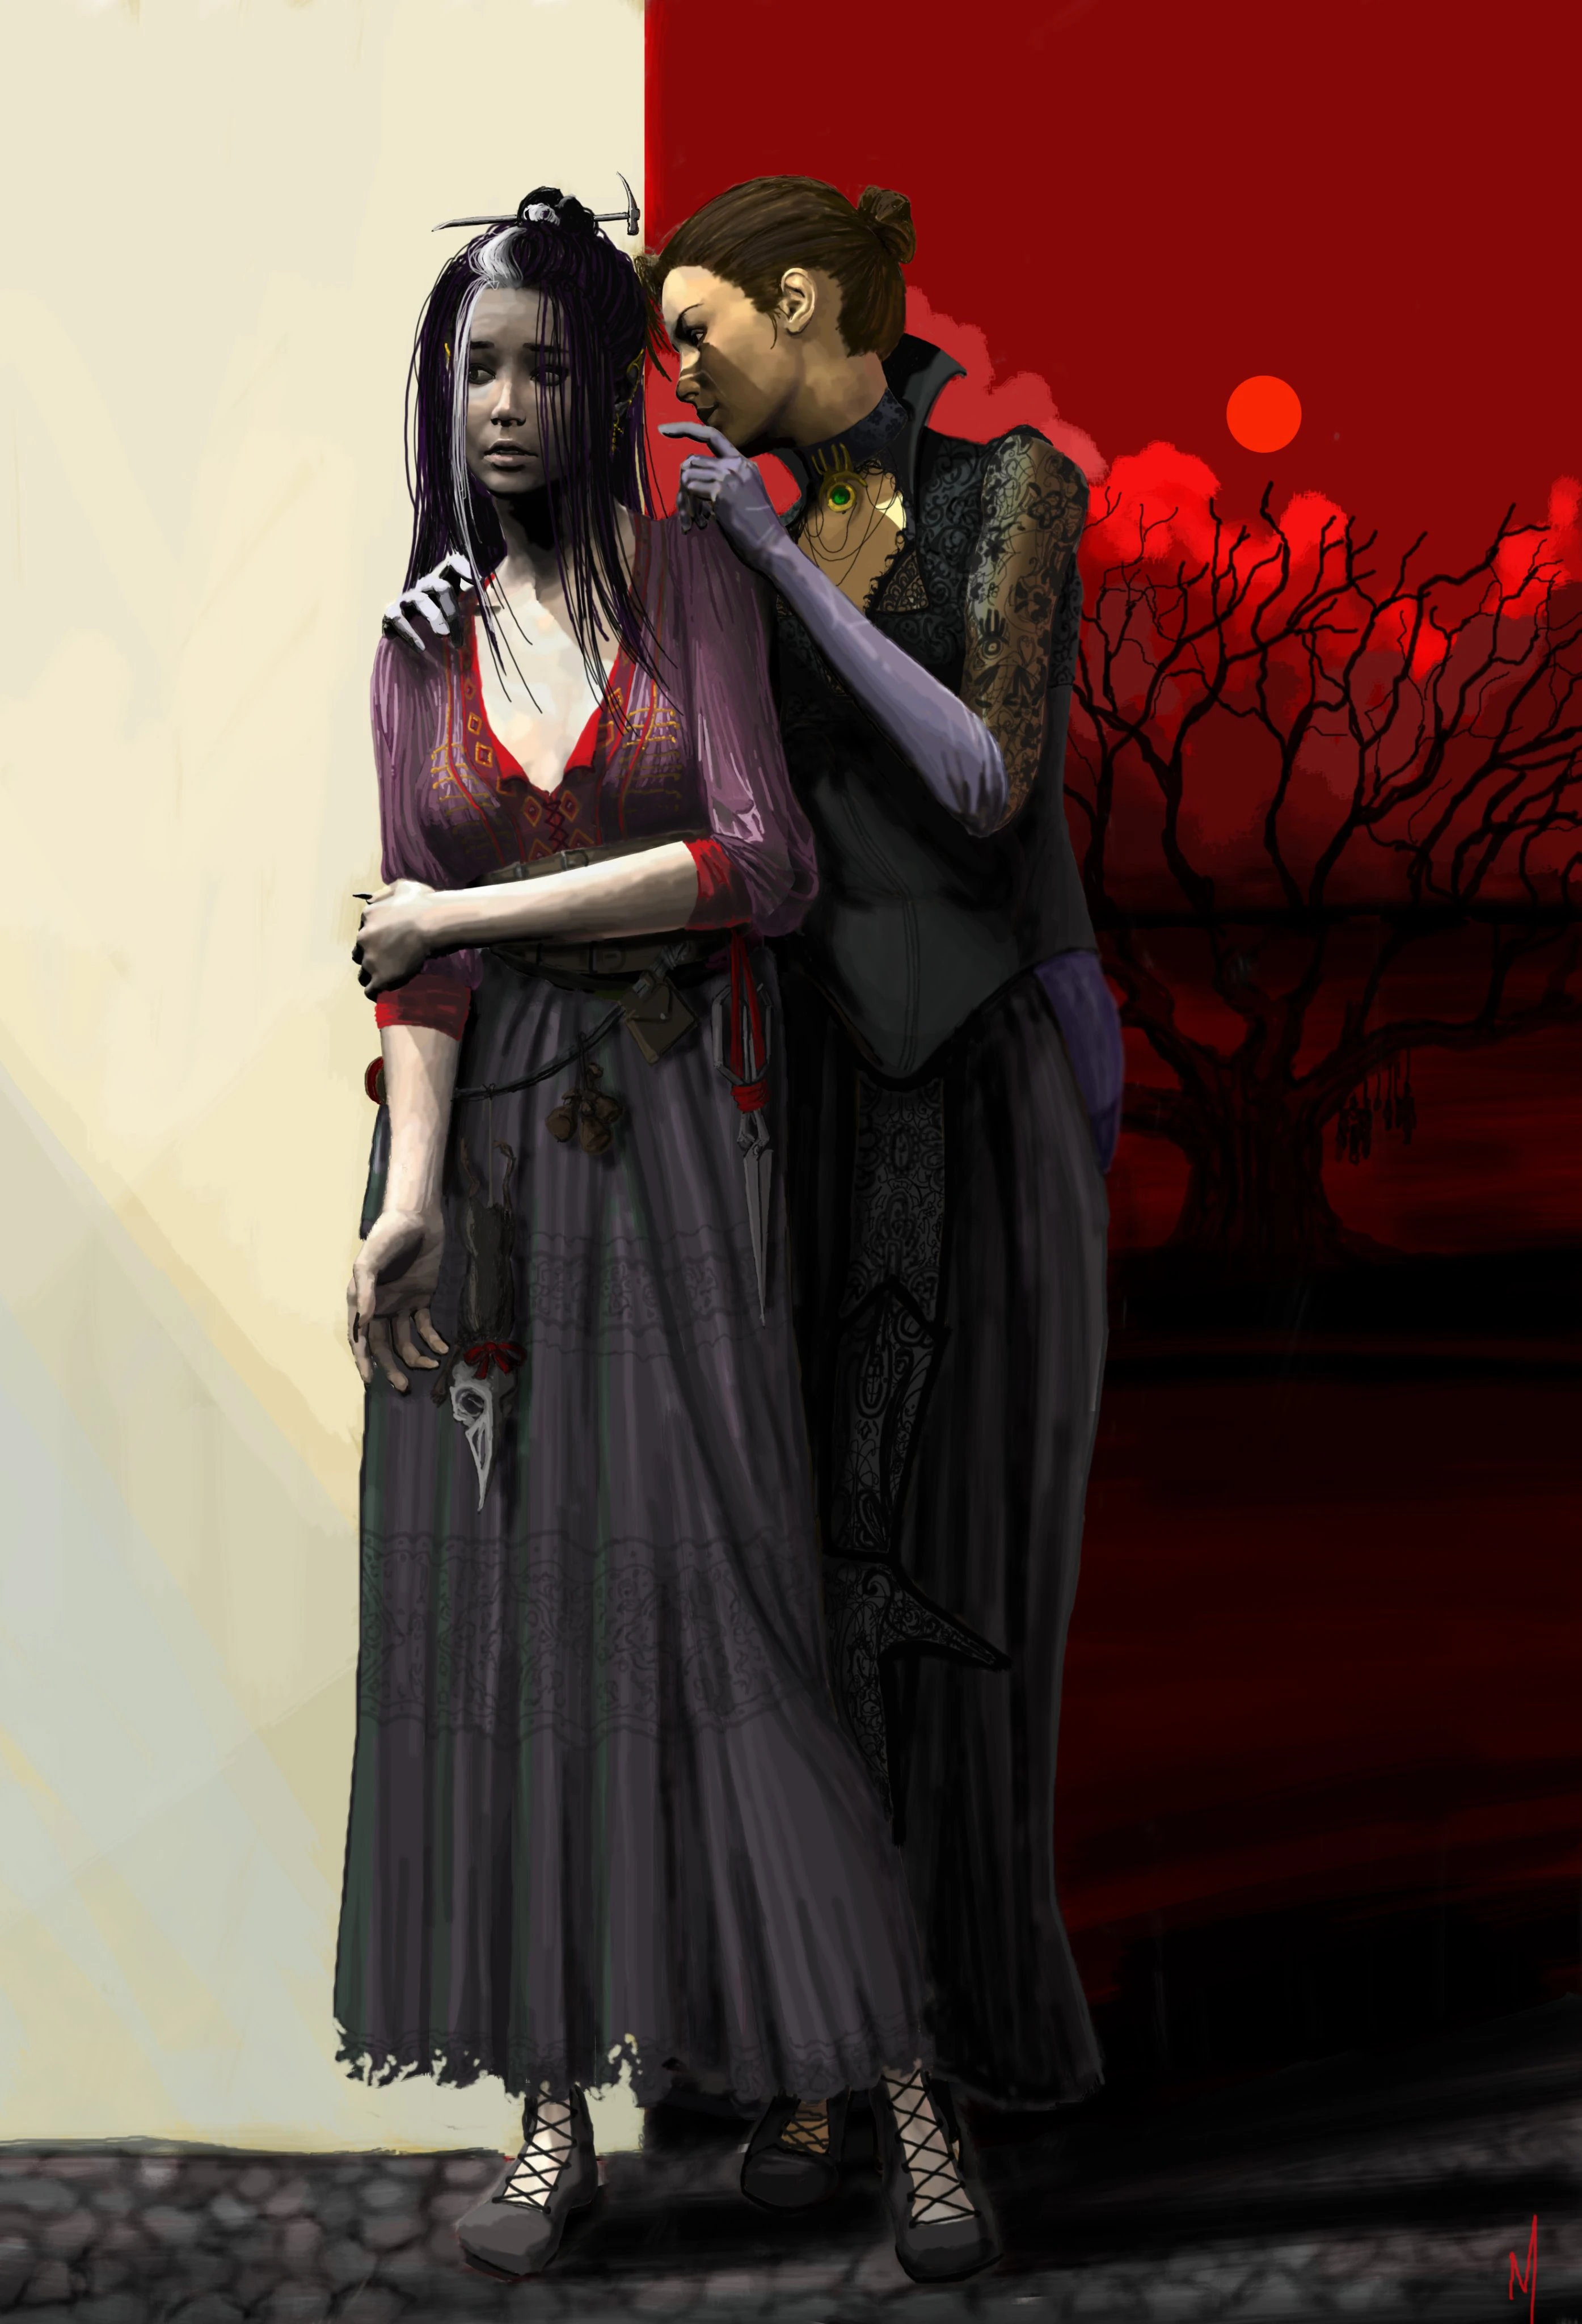

Fan art of Laudna with Delilah, by @caravaggio2000.[art 31]
Laudna occasionally hears the voice of her patron, Delilah, in her head.[135] Delilah appears to be her warlock patron, although it is unclear when after Laudna and Delilah's respective deaths the pact was made. After Laudna told the rest of Bells Hells about her pact, Delilah told Laudna to keep things secret.[136] Laudna has also expressed to Imogen that she is not sure how she feels about Delilah and has floated the possibility of breaking her pact.[137]
While Laudna was inspecting the shard that Imogen got from the Shade Mother's den, Delilah used her power to shatter the shard and transfer the magical essence into Laudna. This upset Imogen, who had asked Laudna not to do anything to the shard. Laudna in turn was quite angry at Delilah and screamed "What did you do?"[138]
Laudna ended up becoming afraid of herself whenever Delilah's power overwhelmed her own, especially if it affected her friends. When Otohan Thull killed her, Laudna found herself trapped in the archmage's strange domain, a dark version of Whitestone in which she relived her past traumas, being held hostage by her warlock patron. After being freed and resurrected she was able to mentally heal herself, and her powers reflected this, establishing a positive association with Whitestone and the Sun Tree in her Form of Dread rather than keeping the dark aesthetic associated with Delilah. Despite all this, Laudna was still terrified of Lady Briarwood, fearing that part of the necromancer was still connected to her, and that if she accessed her power, she could come back, ruining the efforts Laudna's friends had made to get rid of Delilah.
Until "For The Tempest" (3x68) Laudna hadn't heard Vecna's title "the Whispered One", but it sent a cold jolt down her spine,[139] indicating some recognition of Delilah's own patron. Later, Delilah herself would reveal that both of them were bound to the power of the god of secrets, explaining that if he was gone, Delilah would be as well, and consequently, so would Laudna (although the latter didn't believe it). Delilah later told Laudna (in a whisper that only she could hear) that she wanted them to work together, and for Laudna to flourish so that she would as well. "Bound as we are, I do care for you."[140] Following Ashton's apparent betrayal of the party by surreptitiously attempting to absorb the shard of Rau'shan, when Laudna was feeling particularly fragile and alone she sought out Delilah's spirit for advice. Delilah told her that though others would come and go, Delilah was always there. Laudna asked Delilah when love didn't equal pain, and Delilah replied, "That's what love is... and it's worth it. It's worth everything." She urged Laudna to find a way to hurt those who hurt her.[141] Even now she tries to make her obey certain impulses (which is mechanically reflected when the warlock makes Wisdom saving throws to resist her influence).[142]
Pâté de Rolo[]
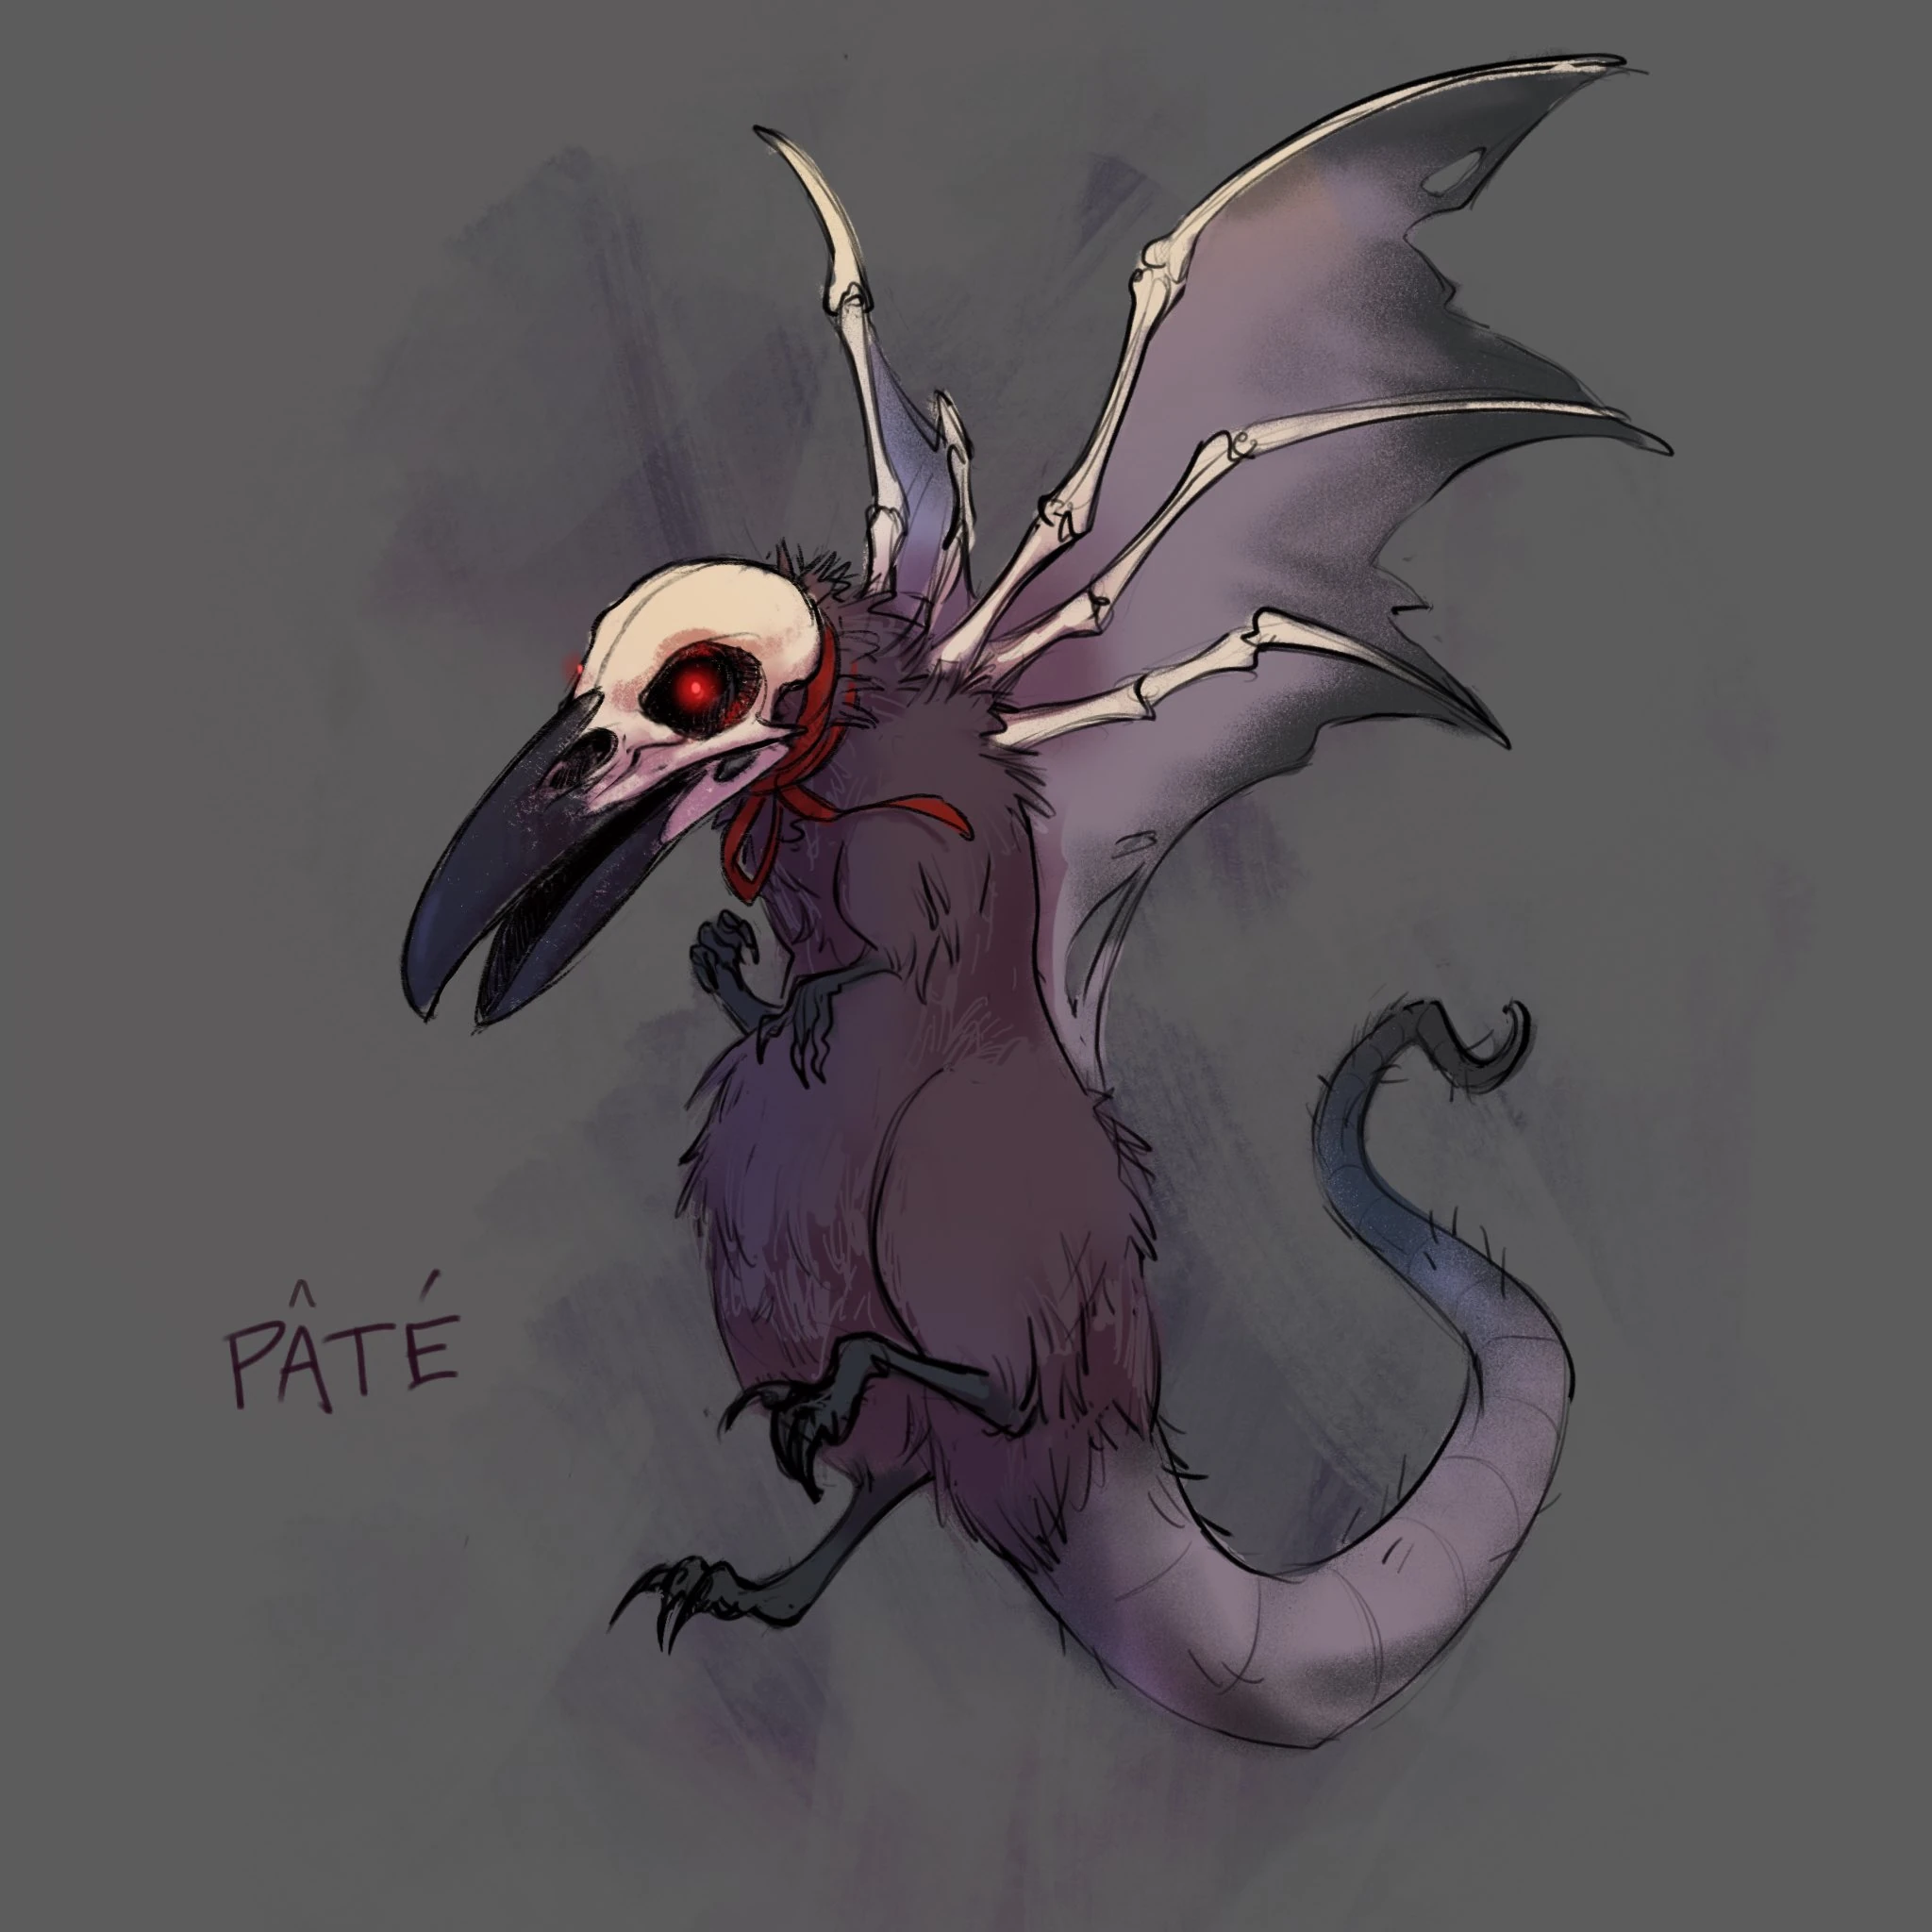

Fan art of Pâté, by Ashley Stoddard.[art 32]
Laudna created Pâté de Rolo from a raven's skull and a dead rat's body to keep her company in her moments of loneliness, and she kept it with her, sometimes using it as a puppet to talk to herself or with other people, and giving it personality. She truly believed that both Pâté and her other dolls, Sashimi and Caviar, were alive, especially after Fearne moved them while Laudna was asleep.[143]
After being resurrected, Laudna, who had been remembering Pâté's creation and now associated him with her friends' positive influence, cast Find Familiar using the rat itself, bringing Pâté to life and giving him strange skeletal wings. His voice was very similar to the deeper, accented voice Laudna had used for him when puppeting him. Laudna was delighted by her familiar, but she asked him to be quiet when she noticed her friends were a bit overwhelmed by his behavior and voice.[144]
Fearne Calloway[]
She and Fearne clicked almost immediately. Fearne loved everything about her and was even fascinated when she saw Laudna perform her 'Form of Dread' for the first time.[145] Laudna, Fearne, and Imogen all have bonded over being spellcasters, and call one another 'Witchy/Witch Bitches'.[146][147][148]
Orym[]
Orym is one of the few members of Bells Hells that knows Laudna's original cause of death. Laudna seems to trust Orym enough to tell him. Orym in return shows his empathy towards her in his repeated apologies about her death. Additionally Orym, due to his relationship with Keyleth, knew about the Whitestone atrocities.
Ashton Greymoore[]
Unlike many people she's encountered, including other party members, who seem off-put by Laudna's creepiness, Ashton seems to love her aesthetic.[149]
In more recent time Ashton has become a protector for Laudna, behaving aggressively towards anyone that even looks at her the wrong way. In a private conversation with her they stated that while both shared similar experiences facing extreme loneliness and death, and the barbarian was actually jealous of Laudna's second demise, since when she was revived her friends were around her, worried, while in Ashton's case most of his previous group had abandoned him. The barbarian and the shadow sorcerer would maintain this cordiality between them, and when they were separated from half of Bells Hells (including FCG and Imogen, their closest friends respectively), Ashton reassured the anxious Laudna that they would bring Bells Hells back together.
After Ashton tried to take the power of Rau'shan for himself, Laudna considered it a betrayal, and struggled dealing with those feelings. However, the following morning the barbarian, worried, spoke to her, and was surprised when she gave him a doll that represented him, stating that he was like a child and needed to find his childish joy again. Despite the previous tensions, Ashton was moved by the gift, and Laudna was very glad they liked the doll.
Ira Wendagoth[]
Laudna seemed to be attracted to Ira, frequently reacting positively to his odd behaviors[150] and bonding over the fact that neither of them considered the gods important in their lives.[151]
Character information[]
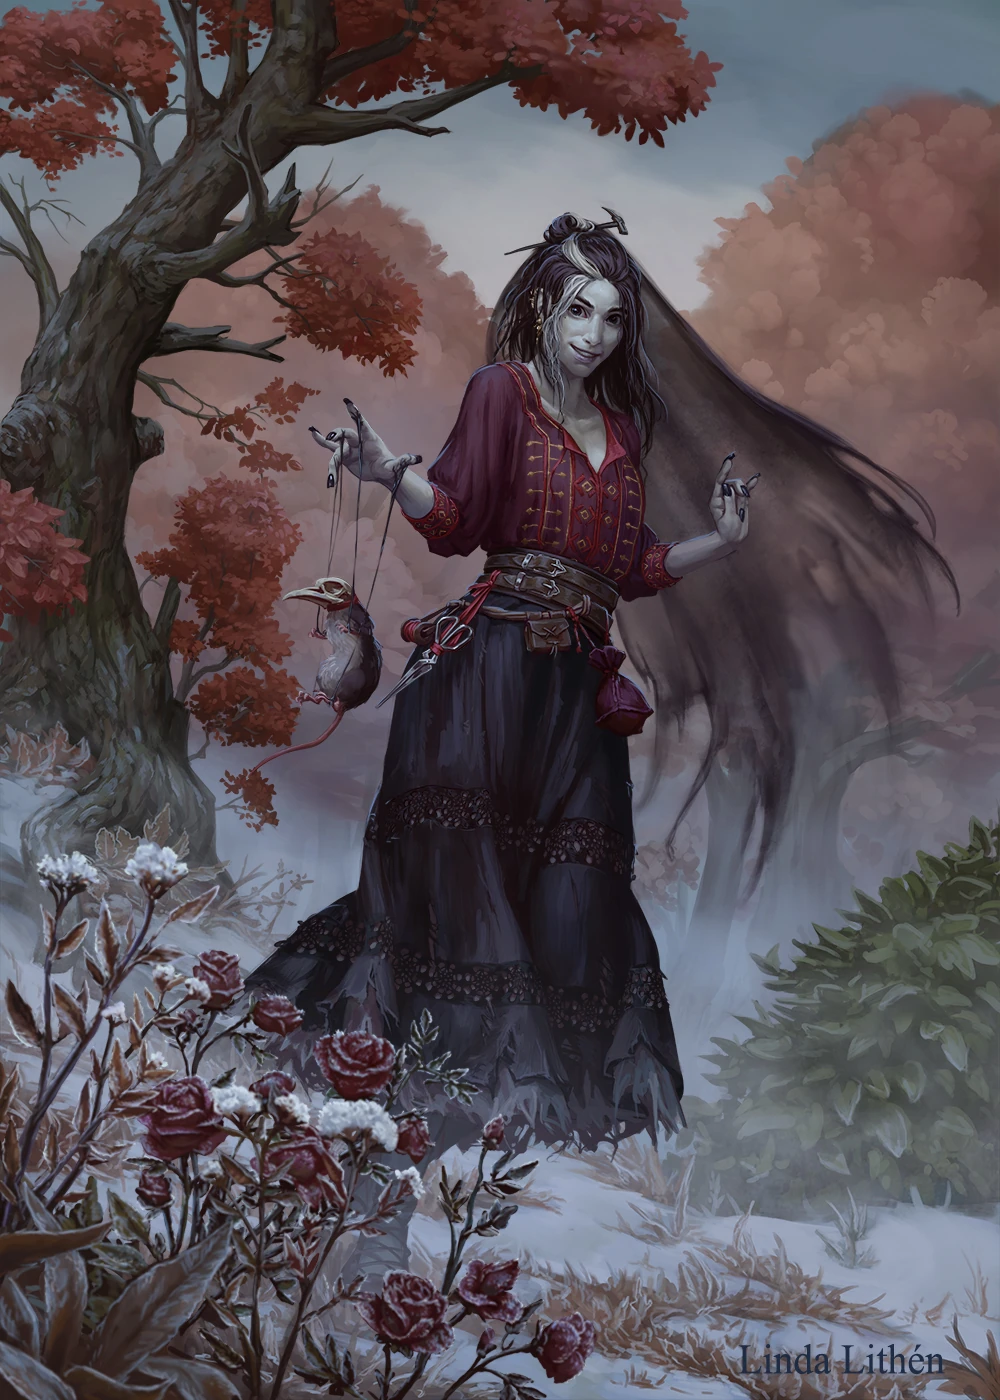

Fan art of Laudna and Pâté, by Linda Lithén.[art 33]
Notable items[]
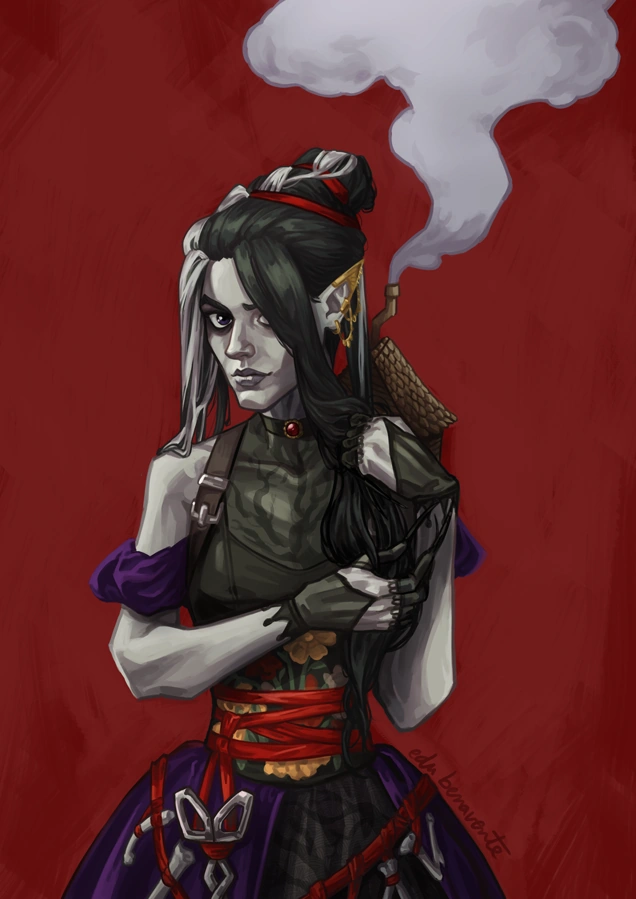

Fan art of Laudna's new outfit, by Edu Benavente.[art 34]
- A good quality belt, the only item of her Vex'ahlia costume that she has kept with her. Currently repurposed as part of a backpack[152]
- Thieves' tools[153]
- Sashimi, a faceless marionette with two sunken eyes given to her by Imogen and Ashton[154]
- Disguise kit[155]
- A little wooden house, made and gifted by Chetney,[156] affixed with a belt and carried on Laudna's back[157]
- A ring of two snakes twining around a ruby, gifted by Imogen[158]
- Pâté de Rolo, a puppet made by Laudna,[159] taken by Imogen after Laudna's death[160] and returned after her resurrection.
- Ring of protection, given to her by Lady Vex'ahlia de Rolo[161]
- Potion of Possibility, held by Imogen for her[162] and given to her once Laudna was resurrected.[163]
- Tracking orb attuned to the ring originally planted on Armand Treshi, taken by Imogen after Laudna's death[164] but returned by her.
- Immovable rod,[165] taken by Ashton after Laudna's death[166] and returned by FCG to her.[167]
- Feywild shard, not attuned, given to her by Imogen[168]
- Amulet of Health[169]
- Ball Bearings[170]
- Rabbit skin[171]
- Slingshot formerly belonging to Bor'Dor Dog'Son[172]
- Weavepiercer Gloves, given to her by Imogen[173]
- A big splinter from Sylas Briarwood's coffin[174]
- Charred bones from the garden in Ligament Manor[175]
- Ancient porcelain doll, delicate and faintly painted, with elven ears, gold hair, and a blouse-dress. Taken from elven ruins under the surface of Ruidus[176]
- Glass sculpture of a Ruidian dancer[177]
- Small glass stiletto[178]
- Specimens from a Ruidian laboratory[179]
Former items[]
- Pearl of Power, taken by FCG after Laudna's death[180] and kept by them with her permission[181]
- Bloodwell Vial +1,[182] taken by Imogen after Laudna's death[183] and kept by her at Laudna's insistence after her resurrection.
- Hender's tooth,[184] used in construction of a training dummy that was destroyed by Bor'Dor[185]
- A small bag of mind altering drugs, given by Justi of All-Minds-Burn.[186] Given to FCG.[187]
Hollow One abilities[]
Laudna differs in some respects from usual Hollow Ones, in that normally they appear the same as in life and appear to be living creatures.[188] Also, Laudna is affected by Turn Undead.[189] She has, however, displayed the following traits:
Feats[]
- Spell Sniper[194]
Proficiencies[]
- Skills: Arcana,[195] Intimidation,[196] Perception,[197] Stealth[198][199]
- Tools: Disguise Kit,[200] Thieves' Tools[201]
Sorcerer abilities[]
- Spellcasting (Charisma-based spellcasting)
- Sorcerous Origin (Shadow Magic)
- Font of Magic
- Sorcery Points: 10
- Flexible Casting
- Metamagic
Warlock abilities[]


Fan art of Laudna's original Form of Dread, by Hailey Collins.[art 35]
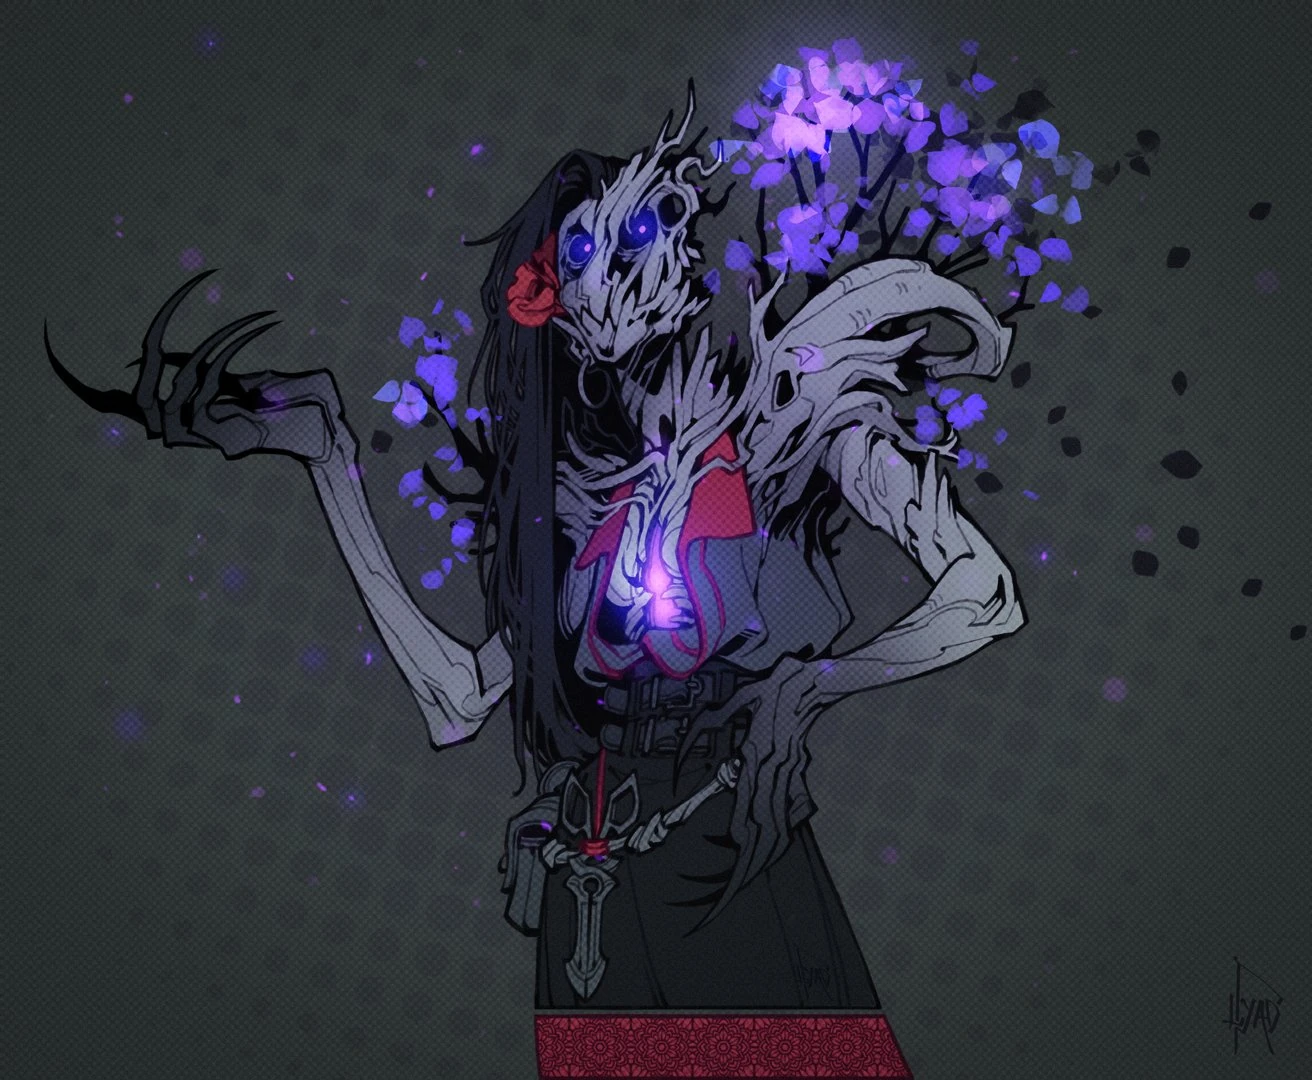

Fan art of Laudna's new Form of Dread, by Lyadrielle.[art 36]
- Otherworldly Patron (The Undead)
- Form of Dread [207]
- Pact Magic (Charisma-based spellcasting)
- Eldritch Invocations - As a Level 3 Warlock, Laudna has 2 active Eldritch Invocations, which she can change when leveling. She has used the following:
- Pact Boon
- Pact of the Chain
- Hunger of the Shadow[212] or Hunger of the Shadow Shard, a melee attack that deals necrotic damage scaling with her Charisma modifier and absorbs (at least part of) the target's soul.[213] It could be a spell of up to 2nd level,[214] but as of "The Promise and the Price" (3x77) it has only been referred to as something Launda will "do", not a spell she "casts".
Spells[]
As a 3rd-level warlock, Laudna should know two cantrips and four leveled spells from the warlock spell list, in addition to Find Familiar as part of the Pact of the Chain feature. As a 10th-level sorcerer, she should know six cantrips and 11 leveled spells from the sorcerer spell list, as well as Darkness as part of the Eyes of the Dark feature. Finally, she should know one additional cantrip with an attack roll as part of the Spell Sniper feat.
| Spell level | Spell | Class |
|---|---|---|
| 0 (cantrip) | Chill Touch[215] | Unknown[fn 3] |
| 0 (cantrip) | Eldritch Blast[216] | Warlock |
| 0 (cantrip) | Infestation[217] | Unknown[fn 4] |
| 0 (cantrip) | Mending[218] | Sorcerer |
| 0 (cantrip) | Message[219] | Sorcerer |
| 0 (cantrip) | Prestidigitation[220] | Unknown[fn 5] |
| 0 (cantrip) | Ray of Frost[221] | Sorcerer |
| 0 (cantrip) | Shocking Grasp[222] | Sorcerer |
| 0 (cantrip) | Thaumaturgy[223] | Unknown[fn 6] |
| 1st | Bane[224] | Warlock - Undead patron[225] |
| 1st | False Life[226] | Unknown[227] |
| 1st | Find Familiar[228] | Warlock - Pact of the Chain |
| 1st | Hellish Rebuke[229] | Warlock |
| 1st | Hex[230] | Warlock |
| 1st | Shield[231] | Sorcerer |
| 1st | Silent Image[232] | Sorcerer |
| 1st | Silvery Barbs[233] | Sorcerer |
| 1st | Feather Fall[234] | Sorcerer |
| 2nd | Blur[235] | Sorcerer |
| 2nd | Darkness[236] | Sorcerer - Shadow Magic[237] |
| 2nd | Mirror Image[238] | Unknown[fn 7] |
| 2nd | Phantasmal Force[239] | Sorcerer |
| 2nd | Spider Climb[240] | Unknown[fn 8] |
| 2nd | Wither and Bloom[241] | Sorcerer |
| 3rd | Counterspell[242] | Sorcerer |
| 3rd | Fireball[243] | Sorcerer |
| 4th | Blight[244] | Sorcerer |
| 5th | Animate Objects[245] | Sorcerer |
Behind the scenes[]
Laudna's creation indirectly stems from a nightmare Marisha had where she encountered the jaw-less flower girl (which Laudna later conjured with Silent Image in "Ghosts, Dates, and Darker Fates" (3x10)). This made her want to play a creepy character for Campaign Three, and she initially wanted to play a little girl who had died and been resurrected, but ultimately believed it could get weird and decided to play an adult instead. Marisha knew from the outset that her character would have died during the Briarwoods' insurrection at Whitestone and been resurrected, and through discussion with Matt, the idea that she was the effigy of Vex'ahlia hung from the Sun Tree came to be. From there, she decided to multiclass as a sorcerer/warlock, and would thus need a patron, for which she suggested Delilah Briarwood.[246]
When Imogen kissed Laudna for the first time, Marisha said that she thought she had made "a dead person who wasn't romanceable."[247]
Appearances and mentions[]
- Campaign Three, all episodes except:
- Absent in "Pyrrhic Return" (3x35), "A Desperate Call" (3x36), and "Far From The Others" (3x52) through "Escape From The Past" (3x58)
- Specials
- "The Mighty Nein Reunion: Echoes of the Solstice" (Sx79), mentioned only (unnamed)
Quotations[]
- Laudna: I'm fun-scary!
Imogen: Laudna, you’re scary-scary.[248] - Laudna: Is it rude to ask about dead people?
Dorian: When you're using their body parts, I think so.
Laudna: Wow. Don't tell Pâté.[249] - Orym: So why are you puppeteering a dead rat?
Laudna: (in Pâté's voice) "Well, you see, Laudna here was quite alone for quite some time, and she kind of needed somebody to keep her company or else she would go insane. Especially because it was just me and that voice in her head." (in her own voice) He's so silly.[250] - Laudna: You know, I don't think I've ever been in love either. I mean, that's not true. I deeply love Imogen.
Ashton: It's a very broad word, isn't it?[251] - Fresh Cut Grass: Are you dead? What the fuck is up with that?
Laudna: I'm not entirely sure. I think so. [...] I think I'm some cross in between life and death. Not totally alive, but not totally dead. I definitely died! I died, and then I woke up. I woke up, and I was surrounded by a lot of other corpses, and all of Whitestone was in a complete panic, run amok, just death and disease and nightmare everywhere, and I didn't know what happened so I ran. I haven't really aged.
Fresh Cut Grass: How long ago was that?
Laudna: Thirty years.[252] - Laudna: (giving the "book jacket version" of her life to Chetney) I was alive, but then I was dead, and now I'm alive again. I'm originally from Whitestone and this is Pâté, my pet rat. (as Pâté) "Hello, Chetney!"[253]
- Laudna: Nightmares are just fun dreams. They're inspiration, right? I've pulled many of my tactics from nightmares that I've had. They keep you on your toes.[254]
- Orym: You know what's interesting about you?
Laudna: Hm? I would hope a great deal of many things.
Orym: Well, there's the obvious, but you're the happiest person in this bunch.
Laudna: Of course! The worst thing that's ever happened to me has already happened.[255] - Imogen: Can you get out of the [spiritworld sun]tree?
Laudna: I think that depends on you, darling.[256] - Laudna: (to Edmuda, killing her with Hunger of the Shadow) Your power should have been mine and not gone to the halfling!
Trivia[]
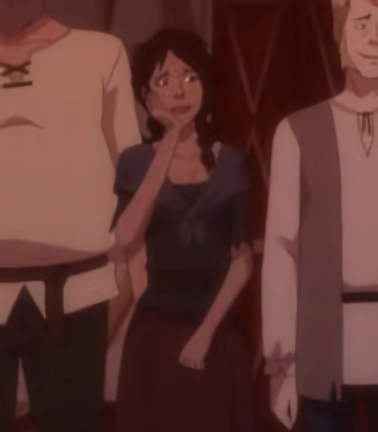

Screenshot of Vex's soon-to-be double in the Amazon show, by Titmouse from "Fate's Journey" (LVM1x05).[art 37]
- In "Fate's Journey" (LVM1x05) in The Legend of Vox Machina, the Briarwoods received in Whitestone Castle the group they were going to disguise as the members of Vox Machina, including a dark-haired woman who would represent Vex'ahlia. Since the show has its own continuity and was in production well before Campaign Three started, it is unknown how much of Marisha's eventual character was being represented in the animation. If that was in fact Laudna, that would make her the first player character to appear in The Legend of Vox Machina who was not a member of Vox Machina.
- The name "Laudna" is derived from laudanum,[257] an opium tincture historically widely used as pain medication or to induce sleep and often featured in 19th century Gothic and horror literature. "Matilda" comes from the combination of the Old High German terms maht (might) and hild (battle). "Bradbury" (Laudna's original surname) comes from the combination of the Old English terms brād (broad) and byriġ, which comes from burg (fortified place).
- Her birth name "Matilda" is an homage to Matilda Scheurer, a teenaged London artificial flower maker in the 1860s who died of arsenic poisoning from the dye Scheele's Green used in manufacturing the flowers.[258] Scheurer's death is one of the explicit inspirations for the pre-generated assignment "Dressed to Kill" included in the Quickstart Guide of Candela Obscura, developed by Darrington Press LLC.
- According to Marisha, Laudna took her new name after spending a long time isolated in the woods, losing touch with who she was and becoming someone new.[259] Laudna explained that she used to sing to Pâté and herself, and the "la la la" she hummed eventually led to "Laudna".[260]
- The animation on her stat card features black smoke and black ooze dripping from the top of the frame.[14]
- Official illustrations of Laudna always show her with her head slightly tilted. In Kamille Areopagita's own notes for the character's art, it was hypothesized that this posture could be due to having been hung.[261] Hannah Friederichs noted that when she drew Laudna she didn't know about her backstory, but she did follow Marisha's notes.[262]
- When using the Message spell, Laudna's voice is accompanied by eerie whispers and otherworldly sound effects created by the rest of the cast. This began as a joke when Laudna tried to spook Orym with a Message and has become a running gag. Prior to this event, her Messages had no echoes.
- Laudna is the second player character to hail from Whitestone, following Percival de Rolo.
- Until Chetney Pock O'Pea's introduction in "Behind the Curtain" (3x07), Laudna was the only member of Bells Hells to have darkvision.
- Laudna's original Form of Dread, similar to a mourning attire, was connected to Delilah's grief after losing her husband.[263] Aspects of this form have begun to reassert themselves since Delilah made her continued presence known to the party.
- During the masquerade ball in Jrusar, Laudna used the alias "Lorelei de Rolo"[264], combining the name of the werewolf family in "Liam's One Shot: The Song of the Lorelei" (Sx36) with the last name of the rulers of Whitestone, her former home. Her stuffed rat Pâté de Rolo also bears the de Rolo name.[265] The word "lorelei" was also mentioned by Laudna as an abusive name hurled at her by mobs when she was driven out of various towns.[266] In this context, it refers to a siren or mermaid who lures men to their doom, particularly one associated with stories surrounding the Lorelei rock in the River Rhine.
- According to Laudna, her mother was one of the strongest women of her life.[267]
- When she was younger she sometimes played with her mother's jewels, one of them being a necklace with three gems that her father gave to her mother for an anniversary, the three gems representing both of them and their daughter.[268]
- The list of strong women includes Delilah Briarwood and, in more recent years, Imogen and Fearne.
- In her youth Laudna had a certain obsession with the nobility and the aesthetic of the lords and ladies.[269]
- So far Laudna has named several of her belongings after food: Pâté (her puppet rat), Escargot (her horse), and Sashimi (her doll). She also named Fearne's new doll "Caviar". A popular theory was that she was giving them the names of the last food she had for dinner before she died. However, Marisha denied it, although she admitted it was a good idea. She named Pâté de Rolo as part of a fun reference to Percival de Rolo and his player, and after that she thought it would be a good idea to keep naming stuff after food with fancy names that were essentially things that are dead.[270]
- "Pyrrhic Return" (3x35) marked only the third main campaign episode that Marisha did not play in over all three Campaigns. Prior to that, she had only missed the two Slayer's Take episodes during which Vox Machina was divided into teams ("Trial of the Take: Part 1" (1x18) and "Trial of the Take: Part 2" (1x19)), and had the highest attendance record of all the main cast with the exception of Matthew Mercer.
- Marisha and Matt both see parallels between dealing with addiction and Laudna's problems resisting the temptation to access Delilah's power.[271]
- Since she was resurrected with the Raise Dead spell,[272] the cut edges of her ears were not regenerated.
- She acquired her knowledge of the Undercommon language through magical means.[273]
- Due to the extremely slow functioning of her organs (given her status as Hollow One) she only needs to use the toilet once a month.[274]
- The night Laudna and Bells Hells played "What the fuck is up with that?" for the first time was one of the most relaxing moments in her life.[275]
- Although her strongest romantic feelings are for Imogen, Laudna has been shown to be attracted to men, particularly Ira the Nightmare King (whose aesthetic and style she admired) and Ariks Eshteross. Marisha also confirmed that Matilda's childhood crush on Whitestone Andy (even though it had started as a joke) had been sincere and she found him really cute,[276] although her feelings were unrequited and the mean boy didn't deserve her affection.[277]
- Having noticed the effects of FCG's Turn Undead (even though it did not harm her) has reaffirmed Laudna's belief that the gods disapprove of her existence.[278]
- Critical Role: Bells Hells - What Doesn't Break, a novelization of Laudna's pre-stream life, has been announced for release on 8 October 2024.
- Marisha has said that she doesn't think the Warlock class has much more to offer Laudna, probably meaning that as of the statement, it's unlikely Laudna would take a fourth level in the class.[279]
Art gallery[]
For more images, see Category:Images of Laudna.
![Fan art of Laudna, by Minttu Hynninen.[art 38]](/wiki/File:Laudna_-_Minttu_Hynninen.jpg "Laudna - Minttu Hynninen.jpg (499 KB)")
![Fan art of Laudna, by BlackSalander.[art 39]](/wiki/File:Laudna_-_BlackSalander.jpg "Laudna - BlackSalander.jpg (847 KB)")
![Fan art of Laudna, by Amarantheia.[art 40]](/wiki/File:Laudna_-_Amarantheia.jpg "Laudna - Amarantheia.jpg (3.62 MB)")
![Fan art of Laudna, by Rachel McEwan.[art 41]](/wiki/File:Laudna_-_Rachel_McEwen.jpg "Laudna - Rachel McEwen.jpg (143 KB)")
![Fan art of Laudna, by shalizeh7.[art 42]](/wiki/File:Laudna_-_Shalizeh7.png "Laudna - Shalizeh7.png (454 KB)")
![Fan art of Laudna, by Cael Lyons.[art 43]](/wiki/File:Laudna_-_Cael_Lyons.jpg "Laudna - Cael Lyons.jpg (506 KB)")
![Fan art of Laudna, by Jenny Tan.[art 44]](/wiki/File:Laudna_-_Jenny_Tan.jpg "Laudna - Jenny Tan.jpg (570 KB)")
.jpg)
.jpg)
External links[]
- Bells Hells Playlist: Laudna (March 25, 2022)
Notes[]
- ↑ Laudna has a feat before reaching level 4 in a class, meaning she is a variant human.
- ↑ With her Amulet of Health attuned, her Con is 19.
- ↑ Chill Touch is both a Sorcerer and Warlock spell.
- ↑ Infestation is both a Sorcerer and Warlock spell.
- ↑ Prestidigitation is both a Sorcerer and Warlock spell.
- ↑ Thaumaturgy is neither a Sorcerer nor Warlock spell.
- ↑ Mirror Image is both a Sorcerer and Warlock spell.
- ↑ Spider Climb is both a Sorcerer and Warlock spell.
References[]
|
Art:
- ↑ Official art of Laudna, 2023 update, by Hannah Friederichs (source). This file is a copyrighted work. Its use in this article is asserted to qualify as fair use of the material under United States copyright law.
- ↑ Official art of Laudna, by Hannah Friederichs (source). This file is a copyrighted work. Its use in this article is asserted to qualify as fair use of the material under United States copyright law.
- ↑ Official art of Laudna, by Hannah Friederichs (source). This file is a copyrighted work. Its use in this article is asserted to qualify as fair use of the material under United States copyright law.
- ↑ Official art of Laudna, 2023 update, by Hannah Friederichs (source). This file is a copyrighted work. Its use in this article is asserted to qualify as fair use of the material under United States copyright law.
- ↑ Fan art of Laudna, by Nathaniel Himawan (ninesicks) (source). Used with permission.
- ↑ Fan art of Laudna in her youth, by @JustHustina (source). Used with permission.
- ↑ Fan art of Laudna being stabbed by Otohan, by Northyme (source). Used with permission.
- ↑ Fan art of the Gentle Repose, by Lap Pun Cheung (source). Used with permission.
- ↑ Fan art of Laudna and Manad, by Danika Kersten (source). Used with permission.
- ↑ Fan art of Fearne teaching Laudna Fireball, by Melissa Hahn (source). Used with permission.
- ↑ Fan art of Laudna, by Veronica Anrathi (Disarmonia) (source). Used with permission.
- ↑ Fan art of Orym giving Laudna flowers, by Maddy Marshall (source). Used with permission.
- ↑ Fan art of Laudna's Hound of Ill Omen, by @cpprcoyote (source). Used with permission.
- ↑ Fan art of Bor'Dor's death, by EyeOfTheNewt (source). Used with permission.
- ↑ Fan art of FRIDA playing the recording, by Madeline (source). Used with permission.
- ↑ Fan art of Prism's best friend, by Elaine Tipping (source). Used with permission.
- ↑ Fan art of Imogen kissing Laudna, by Madeline (source). Used with permission.
- ↑ Fan art of Laudna and Imogen in combat, by Elaine Tipping (source). Used with permission.
- ↑ Fan art of Laudna and Imogen, by Pyromeekorai (source). Used with permission.
- ↑ Fan art of flying skysails, by Elaine Tipping (source). Used with permission.
- ↑ Fan art of Laudna and a dolabo, by Pyromeekorai (source). Used with permission.
- ↑ Fan art of Laudna and the captain, by Cha Cha Rae (source). Used with permission.
- ↑ Fan art of Imogen and Laudna dancing, by Nev @ammarilyo (source). Used with permission.
- ↑ Fan art of Laudna/Delilah, by Sabira Langevin (source). Used with permission.
- ↑ Fan art of Laudna sleeping, by Mintywolf (source). Used with permission.
- ↑ Fan art of Laudna killing Edmuda, by Melissa Hahn (source). Used with permission.
- ↑ Fan art of Laudna's Animate Objects, by iwilltryalittlearter (source). Used with permission.
- ↑ Fan art of the Ruidus flare, by Rachel F. (TheWhaleLord) (source). Used with permission.
- ↑ Fan art of Imogen kissing Laudna, by Cole Alexander (source). Used with permission.
- ↑ Fan art of Imogen and Laudna's kiss, by BlackSalander (source). Used with permission.
- ↑ Fan art of Laudna with Delilah, by @caravaggio2000 (source). Used with permission.
- ↑ Fan art of Pâté, by Ashley Stoddard (source). Used with permission.
- ↑ Fan art of Laudna and Pâté, by Linda Lithén (source). Used with permission.
- ↑ Fan art of Laudna's new outfit, by Edu Benavente (source). Used with permission.
- ↑ Fan art of Laudna's original Form of Dread, by Hailey Collins (source). Used with permission.
- ↑ Fan art of Laudna's new Form of Dread, by Lyadrielle (source). Used with permission.
- ↑ Screenshot of Vex's soon-to-be double in the Amazon show, by Titmouse from "Fate's Journey" (LVM1x05). This file is a copyrighted work. Its use in this article is asserted to qualify as fair use of the material under United States copyright law.
- ↑ Fan art of Laudna, by Minttu Hynninen (source). Used with permission.
- ↑ Fan art of Laudna, by BlackSalander (source). Used with permission.
- ↑ Fan art of Laudna, by Amarantheia (source). Used with permission.
- ↑ Fan art of Laudna, by Rachel McEwan (source). Used with permission.
- ↑ Fan art of Laudna, by shalizeh7 (source). Used with permission.
- ↑ Fan art of Laudna, by Cael Lyons (source). Used with permission.
- ↑ Fan art of Laudna, by Jenny Tan (source). Used with permission.
| |||||||||||||